Craving creamy, cozy dishes but sticking to low carbs? This guide to keto comfort food shows you how to get the same warm, nostalgic flavors — without the starch. Read this section for a fast, actionable summary of the exact skills, recipes, and pantry swaps you’ll walk away with.
In short: the outcomes
- Recreate classics, low-carb style. Learn how to turn pot pie, mac & cheese, shepherd’s pie, chili, and casseroles into satisfying keto-friendly versions that deliver the same textures and tastes.
- Master the swap rules. Simple “replace and adjust” rules for converting starches into keto-friendly carriers (cauliflower, konjac, spaghetti squash, almond/coconut flours). Know the exact ratios and tricks so your dishes aren’t gummy, watery, or bland.
- Pantry & gear that matter. A compact shopping list of must-haves (almond flour, pork rinds, xanthan gum, full-fat dairy, collagen/gelatin) plus small tools that speed results (food processor, immersion blender, digital thermometer).
- Four full, weeknight-ready recipes. Cook tonight: a Cauliflower Mac & Cheese, Keto Chicken Pot Pie, Shepherd’s Pie with cheesy cauliflower mash, and a one-pot Chili & Cheese Skillet — each with step-by-step methods and quick-fix tips.
- Troubleshooting cheatsheets. Fix common problems fast: watery cauliflower, split cheese sauces, crumbly low-carb crusts, and bland fillings — with one-line fixes you’ll remember.
- Make-ahead + freezer strategy. Batch-cook plans and storage hacks so comfort food becomes quick, healthy convenience — perfect for busy weeks or holiday cooking.
- Dietary swaps & safety notes. Dairy-free, nut-free, and vegetarian alternatives plus food-safety reminders (reheating temps, freezing guidance).
Who this is for
Busy home cooks who miss classic comfort food but want stable blood sugar, people new to keto, and experienced low-carb cooks looking for better texture and flavor strategies.
How to use this guide
Start with the pantry checklist, pick 1–2 flagship recipes to try this week, and use the troubleshooting cheat sheet if something goes sideways. Want quick wins? Roast cauliflower for the mac & cheese tonight and simmer the chili tomorrow — two comfort meals with minimal fuss.
Ready to eat cozy again — keto-style? Let’s dig in.
Why Keto Comfort Food Works
Comfort food isn’t just about calories — it’s a multisensory shortcut to feeling safe, cozy, and satisfied. Keto comfort food succeeds because it preserves the things people actually crave from comfort meals (creaminess, warmth, crunchy contrast, and deep savory notes) while swapping the high-carb parts that can cause energy crashes. Below, I’ll break down what “comfort food” really means, how keto swaps recreate its textures and flavors, and why high-fat, moderate-protein comfort meals can leave you feeling full and steady for hours.
What we mean by “comfort food.”
“Comfort food” is a mix of psychology and science: it’s food tied to memory, safety, and reward. People reach for it when they want to feel better, nostalgic, or socially connected — think grandma’s pot roast, mac & cheese, or a bubbling casserole. These dishes tend to be rich in fats, salt, and complex textures, which activate the brain’s reward circuits and create emotional relief. In short, comfort food soothes mood as much as hunger. (1, 2)
How keto adaptations recreate texture/flavor
Good keto comfort food focuses on sensory preservation, not literal substitution. Instead of starches, cooks use vegetable bases and fat-forward techniques to mimic texture:
- Cauliflower becomes a silky mash or “mac” substitute when roasted and pureed with cream, butter, or cream cheese — it captures that spoonable, velvety mouthfeel many people miss. Culinary techniques like roasting (to remove water and add caramelized flavor), straining, and finishing with high-fat ingredients make the swap convincing. (3, 4)
- Fat + browning = umami. Browning meat, reducing sauces, and adding aged cheeses or butter concentrate savory compounds so a lower-carb dish still tastes indulgent. Small technical tools — a food processor for smoothing, a hot oven for crisping, and controlled use of thickeners (xanthan gum, a little arrowroot if you’re not strict) — keep textures true without relying on flour or potatoes.
- Contrast matters. A soft, creamy base paired with a crunchy pork-rind or parmesan topping recreates that classic “comfort” contrast (think creamy filling + crispy crust), which your brain reads as satisfying even when carbs are down.
Nutrition & satiety: why high-fat + protein comfort food can keep you full
From a physiological angle, keto comfort works because fat and protein are more satiating per calorie than refined carbs for many people. Protein has a strong appetite-suppressing effect and a higher thermic effect of food, and fat slows gastric emptying, so meals feel filling for longer. Clinical and review evidence suggests ketogenic-style diets can reduce hunger and help with appetite control for some people, which explains why a rich, low-carb casserole or cheesy cauliflower mash can leave you satisfied without frequent snacking. (5, 6)
That said, quality matters: choose whole-food fats (olive oil, avocado, fatty fish) and non-starchy vegetables alongside moderate protein. Overdoing highly processed fatty foods can still lead to excess calories. For most people, a comfort-focused keto plate that emphasizes real ingredients — roasted cauliflower, slow-braised meat, properly seasoned cream sauces — hits both the emotional and physiological targets that make comfort food “work.” (7, 8)
Keto Cooking Principles & Pantry Staples
Keto comfort food succeeds when you respect two things: sensory priorities (creaminess, crunch, umami) and ingredient behavior (how low-carb flours, thickeners, and vegetables act in heat). Below, I give a tight, practical pantry checklist, clear swap rules with safe ratios, and precise tips for thickening, binding, and crisping — all written so you can actually cook better tonight.
Pantry checklist: fats, low-carb flours, thickeners, cheese & dairy
Stock these once, and you’ll be able to turn almost any classic comfort dish into a keto winner.
Fats & oils
- Butter (unsalted and salted) — for browning, sauces, and mouthfeel.
- Olive oil & avocado oil — for sautéing and dressings.
- Rendered animal fats (duck fat, bacon fat) — quick umami booster for roasting or pan-roasting.
Low-carb “flours” & binding starches
- Almond flour — versatile for batters and crusts (use in purpose-built recipes; don’t always swap 1:1 for wheat). (9)
- Coconut flour — extremely absorbent (use sparingly, usually with extra eggs).
- Psyllium husk (whole or powder) — magic for breadlike crumb and elasticity in keto loaves. (10)
Thickeners & stabilizers
- Xanthan gum — an extremely small pinch thickens sauces or stabilizes dressings without starch. Use sparingly. (11, 12)
- Gelatin/collagen powders — great for mouthfeel in gravies and slow braises (also adds protein).
- Tapioca or arrowroot — not strictly keto, but useful in small amounts if you’re flexible with carbs.
Crunch & breadcrumb substitutes
- Pork rinds (pulverized) — the most reliable panko-like topping or coating in keto cooking. (13, 14)
- Crushed nuts/parmesan — work well for gratins and crumbles.
Cheese & dairy
- Full-fat cream, cream cheese, and mascarpone — the backbone for creamy sauces.
- Hard aged cheeses (Parmesan, aged cheddar) — for umami and crisp topping.
- Grated fresh cheeses (mozzarella, fontina) — melt well in bakes.
Veggie & pantry staples
- Cauliflower (fresh or frozen) — your #1 starchy swap (mash, “rice”, mac base). (15, 16)
- Konjac/shirataki noodles or spaghetti squash — quick pasta alternatives.
- Low-sodium broths — for deglazing and comforting sauces.
- Herbs, Dijon, mustard, tamari/Worcestershire — small extras that add depth.
Low-carb swap rules: replacement ratios & texture tricks
Swapping ingredients is 60% ingredient knowledge + 40% technique. Below are practical, kitchen-tested rules you can apply to most comfort recipes.
1. Potato → cauliflower (mash/mac base)
- Ratio guideline: Use 1.5–2 cups cooked cauliflower for every 1 cup of mashed potato you’re replacing. Roast or steam until very soft, drain well, and finish with butter/cream/cream cheese for silkiness. Roasting concentrates flavor and reduces water. (17)
2. Pasta → roasted cauliflower/konjac
- For mac-style dishes, roast cauliflower florets (425°F/220°C) to get a slightly chewy edge before saucing — that caramelization helps mimic the bite of pasta. Konjac noodles work as direct pasta swaps for a lower-texture alternative. (18)
3. Breadcrumbs → pork rinds/nuts/cheese
- Pulverized pork rinds are the quickest panko/panko-style substitute. For a drier crumb, mix pork rind crumbs with grated Parmesan. For veggie crusts, use a nut/parmesan combo. (19)
4. Wheat flour → almond/coconut blends
- Baking rule of thumb: almond flour is not a drop-in 1:1 replacement for wheat in many recipes — follow almond-flour recipes or replace 25–50% and experiment. For yeasted or breadlike structures, add psyllium or eggs to mimic gluten’s function. Refer to King Arthur’s almond-flour guidance for baking specifics.
5. Thickening sauces (flour → gums/gelatin)
- Small amounts of xanthan gum (start with ⅛–¼ tsp per cup of liquid) will thicken without cloudiness; whisk it into a little cold liquid first to avoid clumping. Gelatin or collagen can add mouthfeel to meaty gravies when dissolved properly. Arrowroot/tapioca can be used sparingly if you have wiggle room for carbs.
Texture tricks (quick checklist)
- Roast instead of steam to remove moisture & add Maillard flavor.
- Squeeze or drain cooked cauliflower in a towel or fine sieve to prevent watery mash.
- Layer textures (creamy base + crunchy topping) to trick the palate into thinking the dish is more “carby” than it is.
Thickening, binding, and crisping without flour
When you remove wheat flour, you lose structure and thickening power — here’s how to replace it without sacrificing texture.
Thickeners — choose by application
- For glossy pan sauces & gravies: use xanthan gum — very efficient, non-starchy thickener; whisk a tiny amount into cold liquid before adding to the hot sauce to avoid clumps. (Start with ⅛ tsp and increase slowly.)
- For stews & braises: reduce liquids slowly to concentrate, then finish with a spoonful of gelatin or collagen dissolved in warm water for body and mouthfeel.
- For “creamy” soups & purees: use cream cheese + heavy cream and blend very smooth; also consider a small splash of olive oil for satiety and sheen.
Binders (for breads, dumplings, meatloaf)
- Eggs — universal binder. Use 1 egg per cup of nut flour in many savory batters.
- Psyllium husk — creates a rubbery, gluten-like network when hydrated; excellent in keto breads (a small % by weight — recipes vary).
- Ground flax + water (flax “egg”) — ok for some binds in savory bakes, but adds an earthy flavor.
Crisping & crusts
- Pork rind panko: Blitz pork rinds in a food processor for crispy breading. Works for topping casseroles or breading cutlets.
- Cheese crisp (frico): sprinkle grated hard cheese in a thin layer on a baking sheet; bake until melted and golden, then set — perfect crunchy garnish.
- High heat & dry surfaces: remove excess moisture (especially from cauliflower) before roasting or pan-searing — dryness = crispness.
Quick kitchen cheats (actionable)
- Dry your cauliflower: after cooking, return to the hot pan and stir over medium heat for 1–2 minutes to evaporate water before mashing.
- Xanthan safety: a little goes a long way — use tiny amounts and whisk into cold liquid first to avoid clumping and sliminess.
- Pork rind panko prep: pulse 1–2 cups pork rinds for 5–8 short pulses in a food processor — don’t overprocess into powder if you want texture.
Top 10 Keto Comfort Food Classics (Overview & Recipe Blueprints)
Below are ten beloved comfort dishes reimagined for keto. Each entry includes a short intro, the core keto-swap strategy, a compact ingredient blueprint you can drop into a recipe card, high-level method highlights, practical nutrition notes, and quick variations + make-ahead/freezer tips. Use these blueprints to write full recipes and test in your kitchen.
Keto Chicken Pot Pie
- Intro & why it’s a comfort classic: Warm, creamy chicken filling with tender veggies and a golden top — pot pie is nostalgia in a dish. Keto versions keep the cozy filling and replace the carb-heavy crust with cauliflower-based crusts or almond-biscuit tops.
- Keto swap strategy: Replace wheat pastry with a cauliflower “puff” crust or almond-flour biscuits; swap starchy peas/carrots for lower-carb veg (turnip, green beans, mushrooms) or smaller amounts of peas. Thicken with cream + xanthan or gelatin instead of flour.
- Ingredient blueprint: shredded cooked chicken; butter; onion; celery; low-carb “carrot” (diced turnip or carrot sparingly); chicken broth; heavy cream + cream cheese; xanthan gum (tiny amount) or gelatin; cauliflower + eggs + almond flour + cheese (for crust) OR almond flour + egg + butter (for biscuits); thyme, salt, pepper.
- Method highlights: sauté aromatics → build sauce with broth + cream → thicken gently → fold in chicken → par-bake cauliflower crust → assemble → bake until bubbling and golden.
- Nutrition notes: Rich in fat and moderate protein; low in net carbs when starchy veg are minimized. Very satisfying due to creamy fat content.
- Variations & make-ahead/freezer tips: Dairy-free option: use coconut cream and tapioca (if flexible). Assemble and freeze unbaked — bake from frozen, adding time; reheat to 165°F (74°C).
Cauliflower Mac & “Cheese”
- Intro & why it’s a comfort classic: All the melty, cheesy goodness of classic mac & cheese — with cauliflower florets standing in for pasta. Roasting the cauliflower adds caramelized edges that mimic pasta chew.
- Keto swap strategy: Replace pasta with roasted cauliflower. Build a full-fat cheese sauce (cream, cream cheese, aged cheddar) and top with a crunchy pork-rind/parmesan crumb for that panko finish.
- Ingredient blueprint: cauliflower florets; butter; heavy cream; cream cheese; sharp cheddar + Parmesan; Dijon mustard; garlic; pork rinds (pulverized) or almond-parm crumb for topping; salt, pepper, smoked paprika.
- Method highlights: roast florets for browning → make silky cheese sauce off heat → fold sauce into cauliflower → finish under broiler with crunchy topping for contrast.
- Nutrition notes: High in fat and cheese-based protein, low in net carbs (cauliflower is the starchy sub). Very satiating and kid-friendly.
- Variations & make-ahead/freezer tips: Add cooked bacon or shredded chicken. Freeze before baking in a covered dish; thaw overnight for best texture, or bake from frozen with longer cook time.
Keto Shepherd’s Pie
- Intro & why it’s a comfort classic: A savory meat base topped with fluffy “mashed potatoes” — shepherd’s pie is quintessential comfort. Swap potatoes for ultra-smooth cauliflower mash and keep the slow-simmered meat intense and saucy.
- Keto swap strategy: Use cauliflower mash (roasted then puréed) as the topping. Build the meat layer with extra umami (mushrooms, tomato paste, reduced broth) so the dish still tastes deeply savory despite fewer carbs.
- Ingredient blueprint: ground lamb or beef; onion; garlic; mushrooms; tomato paste; beef broth; Worcestershire or tamari; herbs; cauliflower (for mash); butter; cream cheese or heavy cream; shredded cheddar (optional).
- Method highlights: brown meat for good fond → add aromatics and reduce with stock to concentrate → roast/steam cauliflower until very soft → drain/press and purée with cream & butter → top meat and bake until golden.
- Nutrition notes: High-protein, high-fat main course with low net carbs thanks to the cauliflower topping. Great for leftovers and meal prep.
- Variations & make-ahead/freezer tips: Swap lamb for beef or use a vegetarian mince for a meatless version. Assemble and freeze; bake from frozen with longer covered initial bake.
Low-Carb Meatloaf with Cheesy Mash
- Intro & why it’s a comfort classic: Meatloaf is simple, cozy, and full of home-cooked vibes. The keto version keeps the moist meat base and pairs it with a cheesy cauliflower mash.
- Keto swap strategy: Replace breadcrumbs with ground pork rinds, almond flour, or flax; use eggs and a touch of psyllium to bind if needed. Top with a sugar-free tomato glaze or creamy gravy.
- Ingredient blueprint: ground beef (or mix beef/pork); egg(s); ground pork rinds or almond flour; onion; garlic; herbs; Worcestershire; salt & pepper; cauliflower mash (butter, cream, cream cheese); optional sugar-free ketchup for glaze.
- Method highlights: combine meat and binder → shape or press into loaf pan → bake until internal temp reached → rest and top with mash or glaze; broil briefly for crust.
- Nutrition notes: High in fat and protein, low in carbs when binders are keto-friendly. Very filling — suitable for dinner + next-day slices.
- Variations & make-ahead/freezer tips: Make mini-loaves or muffin-tin meatloaves for portion control. Freeze cooked slices individually for quick meals.
Keto Chicken & Dumplings
- Intro & why it’s a comfort classic: The pillowy dumplings surround a savory chicken stew — pure cozy. Keto dumplings use almond-flour or cheese-based dumplings that puff and hold shape in the stew.
- Keto swap strategy: Make dumplings from almond flour + egg + baking powder + cheese, or use ricotta/cream-cheese dumplings for a softer pillowy texture; thicken stew with cream/gelatin or small xanthan.
- Ingredient blueprint: shredded chicken; low-sodium chicken broth; onion; celery; carrot substitute (turnip or extra mushroom); butter; heavy cream; cream cheese; dumpling mix (almond flour, egg, baking powder, herbs OR ricotta + egg + parmesan).
- Method highlights: simmer broth and veggies → fold in chicken and cream to make stew base → drop dumpling dough spoonfuls onto simmering stew, cover and cook until set.
- Nutrition notes: Comforting, higher-fat stew with moderate protein; dumplings add calories but minimal net carbs if nut-based.
- Variations & make-ahead/freezer tips: Freeze stew separately from dumplings; add freshly made dumplings when reheating for best texture.
Cheesy Bacon Cauliflower “Risotto” / Cauli-Risotto
- Intro & why it’s a comfort classic: Risotto’s soft, buttery graininess is replaced by riced cauliflower that gets creamed with cheese and bacon for depth and texture. It’s spoonable, rich, and decadent.
- Keto swap strategy: Use riced (or finely chopped) cauliflower sautéed slowly to reduce moisture, then finish with butter, Parmesan, cream, and rendered bacon to achieve a risotto-like creaminess without rice.
- Ingredient blueprint: riced cauliflower; bacon or pancetta; shallot; butter; white wine or splash of broth; heavy cream; Parmesan; lemon zest; parsley.
- Method highlights: render bacon → sauté shallot → toast riced cauliflower briefly → deglaze → add warm broth gradually to keep it spoonable → finish with cream & cheese off heat for silkiness.
- Nutrition notes: Low-carb side or main, rich in fat; bacon and cheese contribute umami and satiety.
- Variations & make-ahead/freezer tips: Add shrimp or shredded chicken to make it a meal. Cauliflower risotto is best fresh, but can be chilled and gently re-warmed with extra broth.
Keto Pot Roast / Braised Beef with Root-Veg Swaps
- Intro & why it’s a comfort classic: Slow-braised beef yields falling-apart meat and a gravy that spoon-clings — quintessential Sunday comfort. Swap high-starch roots with turnips, rutabaga, and low-carb roasted vegetables.
- Keto swap strategy: Use low-carb root vegetables (turnip, rutabaga, daikon) instead of potatoes; thicken braising liquid with reduction and optional gelatin instead of flour. Add umami boosters (mushrooms, tomato paste) for depth.
- Ingredient blueprint: chuck roast or brisket; onion; garlic; mushrooms; tomato paste; beef broth; red wine (optional, small amount); herbs; turnips/rutabaga; butter; gelatin (optional).
- Method highlights: sear meat well → brown aromatics and tomato paste → deglaze with wine/broth → braise low & slow until fork-tender → add roasted low-carb roots near the end. Finish with reduced pan sauce or gelatin for the body.
- Nutrition notes: High in fat and protein; low net carbs when starchy roots are swapped. Very filling and ideal for batch meals.
- Variations & make-ahead/freezer tips: Shred and freeze in portions with sauce. Reheat slowly and add a pat of butter for shine.
Keto Pizza Casserole / Fathead Pizza Bake
- Intro & why it’s a comfort classic: Pizza flavor in casserole form — melty cheese, savory sauce, pepperoni, and herbs. Fathead-style crusts (mozzarella + cream cheese + almond flour) make a pizza-like base that’s low-carb and satisfying.
- Keto swap strategy: Replace dough with fathead crust or use a layered casserole (meat + sauce + cheese + toppings) that delivers the same pizza notes without wheat. Use sugar-free tomato sauce.
- Ingredient blueprint: mozzarella + cream cheese + almond flour (fathead crust) OR ground sausage/beef base; sugar-free pizza sauce; mozzarella; pepperoni; oregano; parmesan.
- Method highlights: prepare fathead dough and press into pan → par-bake → layer sauce + cheese + toppings → bake until edges are golden and cheese bubbly. Or make a meat-sauce base, top with cheeses, and broil for a melty finish.
- Nutrition notes: Very high-fat, moderate-protein comfort meal with minimal carbs; tailor portions for calorie goals.
- Variations & make-ahead/freezer tips: Make individual skillet pizzas or freeze unbaked fathead crusts; assemble and bake from frozen with extra time.
Low-Carb Mac ’n’ Cheese Bake (Cauli or Konjac)
- Intro & why it’s a comfort classic: Another mac & cheese variant that leans on either roasted cauliflower or konjac noodles for very low-carb “pasta.” The focus is on creating a creamy, cheesy matrix and a golden topping.
- Keto swap strategy: Use roasted cauliflower florets for a close texture or prepped konjac shirataki noodles for a noodle-like bite. Thicken with cream cheese and cheddar, and crisp with pork-rind or almond-parm crumbs.
- Ingredient blueprint: cauliflower or konjac noodles; heavy cream; cream cheese; cheddar; Gruyère or fontina (optional); Dijon; pork rind crumbs or almond + parm; salt & pepper.
- Method highlights: roast/dry the base → make cheese sauce gently → combine and bake to meld flavors and brown the top. For konjac, rinse & dry noodles thoroughly to reduce odor and improve texture.
- Nutrition notes: Low net carbs, high fat. Konjac is virtually zero-carb but has a different mouthfeel—cauliflower is more familiar to many eaters.
- Variations & make-ahead/freezer tips: Add lobster or crab for luxe versions. Freeze before baking; thaw overnight and bake until bubbly.
Comforty Keto Chili & Cheese Skillet
- Intro & why it’s a comfort classic: Chili is hearty, spicy, and perfect for bowls, nacho-style plates, or skillet dinners. Make it keto by skipping beans and bulking with extra meat, mushrooms, and peppers — finish with a melty cheese crown.
- Keto swap strategy: Omit beans; add diced mushrooms, riced konjac, or extra meat for body. Use tomato in moderation and reduce to concentrate flavor; thicken via reduction or a touch of xanthan/gelatin.
- Ingredient blueprint: ground beef or mixed beef/pork; onion; bell pepper; garlic; chili powder, cumin, smoked paprika; crushed tomatoes (small can or diluted); beef broth; mushrooms (optional); cheddar; scallions, avocado for garnish.
- Method highlights: brown meat for flavor → add spices and toast briefly → add tomatoes & broth and simmer uncovered to intensify → finish with cheese melted on top or mixed in for silky texture.
- Nutrition notes: High-protein, fat-friendly dish. Very low net carbs compared to traditional bean chili. Extremely meal-prep friendly.
- Variations & make-ahead/freezer tips: Serve over cauliflower rice or with keto cornbread. Freeze in portions; reheat on the stovetop, adding a splash of broth.
Full Recipes (4 flagship recipes written in full)
Keto Chicken Pot Pie (Full Recipe — Serves 4)
Why you’ll love it: Creamy, savory chicken filling with a golden low-carb topping — all the nostalgia of pot pie without the starch spike.
Prep + Cook time: 20 min prep → 35–40 min cook (total ~1 hr including par-bake)
Ingredients
- 2 cups cooked shredded chicken (about 10–12 oz / 280–340 g)
- 2 tbsp butter
- 1 small onion, finely diced (about ½ cup / 75 g)
- 1 cup diced celery (about 100 g)
- 1 cup low-carb “carrot” alternatives (diced turnip or ¾ cup diced mushrooms)
- 2 cloves garlic, minced
- 1½ cups low-sodium chicken broth (360 ml)
- ½ cup heavy cream (120 ml)
- 2 oz (55 g) cream cheese, softened
- 1 tsp dried thyme
- ½ tsp dried rosemary, crushed
- Salt & black pepper to taste
- ¼–½ tsp xanthan gum (start with ¼ tsp) or 1 tbsp gelatin dissolved in 2 tbsp warm water
- Cauliflower crust: 4 cups roasted cauliflower florets (about one medium head), squeezed dry; 2 large eggs; ¼ cup almond flour (28 g); ½ cup shredded cheddar (55 g); pinch salt & pepper
- OR Almond-flour biscuit topping: 1 cup almond flour (112 g); 1 egg; 2 tbsp melted butter; 1 tsp baking powder; pinch salt
Method
- Prep crust (if using cauliflower crust): Roast cauliflower florets at 425°F (220°C) for 18–20 min until browned. Pulse in a food processor until rice-like. Place in cheesecloth and squeeze out as much moisture as possible (very important). Mix cauliflower with eggs, almond flour, cheddar, salt & pepper. Press into a 9-inch pie dish. Par-bake at 400°F (200°C) for 8–10 min.
- Make filling: In a large skillet, melt butter over medium heat. Sauté onion and celery until translucent (4–5 min). Add garlic and cook 30 sec. Stir in “carrot” substitute and cook 2–3 min.
- Build sauce: Pour in chicken broth and bring to a simmer. Whisk heavy cream and softened cream cheese until smooth, then temper into the simmering broth. Sprinkle xanthan gum evenly while whisking (or stir in dissolved gelatin). Simmer 2–3 min until slightly thickened.
- Finish filling: Fold in shredded chicken, thyme, rosemary, salt & pepper. Taste and adjust seasonings. Remove from heat.
- Assemble & bake: Pour filling into par-baked crust (or into a prepared baking dish). Top with the remaining cauliflower mix or drop biscuit dough by spoonfuls over the filling. Bake at 375°F (190°C) for 15–20 min until topping is golden and filling is bubbling. Let rest 10 minutes before serving.
Tips & troubleshooting
- If filling seems too thin, simmer to reduce or add another ⅛ tsp xanthan whisked into cold water.
- Removing moisture from cauliflower is essential — otherwise the crust will be soggy.
Variations
- Dairy-free: Substitute coconut cream + 2 tbsp tapioca (if you allow small carbs) or use a chia slurry to thicken.
- Vegetarian: Swap shredded chicken for shredded, firm tofu and vegetable broth; increase mushrooms for umami.
Make-ahead & storage
- Assemble unbaked and freeze. Bake from frozen at 375°F (190°C), adding 20–30 min; ensure internal temp 165°F (74°C). Refrigerate leftovers 3–4 days; reheat covered to retain moisture.
Cauliflower Mac & Cheese — Stovetop + Bake (Serves 4)
Why you’ll love it: Creamy, melty, and cheesy with roasted cauliflower replacing the pasta — the perfect weeknight comfort fix.
Prep + Cook time: 15 min prep → 35 min total
Ingredients
- 1 large head of cauliflower (about 1.5–2 lb / 700–900 g), cut into small florets (or 16 oz / 450 g frozen)
- 2 tbsp butter
- 2 cloves garlic, minced
- 1 cup heavy cream (240 ml)
- 4 oz (115 g) cream cheese, room temp
- 1½ cups shredded sharp cheddar (150 g)
- ½ cup grated Parmesan (50 g)
- 1 tsp Dijon mustard
- Salt, black pepper, and a pinch of smoked paprika
- Crunchy topping: ½ cup crushed pork rinds (50 g) + 2 tbsp grated Parmesan
Method (stovetop + bake finish)
- Preheat & roast cauliflower: Preheat oven to 425°F (220°C). Toss florets with 1 tbsp oil, salt, and roast 18–22 min until edges brown (roasting reduces moisture and adds flavor).
- Make cheese sauce: In a saucepan over low heat, melt butter. Add garlic briefly (don’t brown). Stir in heavy cream and warm. Whisk in cream cheese until smooth. Add cheddar in batches, stirring until fully melted. Stir in Dijon, salt, pepper, and half the Parmesan. Remove from heat.
- Combine & bake: Fold roasted cauliflower into the sauce, transfer to a small baking dish. Mix pork rind crumbs + remaining Parmesan and sprinkle over top. Bake at 375°F (190°C) for 10–12 min until bubbly and golden. Optional 1–2 min under the broiler for extra browning.
- Serve: Rest 5 min to thicken and serve garnished with chives.
Stovetop-only option: Skip the bake — fold cauliflower into the sauce and serve immediately. Top with pork rind crumbs for crunch.
Tips & troubleshooting
- If the sauce breaks/separates, remove from heat and whisk in a tablespoon of cream cheese or a splash of cold cream; finish gently over very low heat.
- For firmer texture, roast cauliflower longer to remove water.
Variations
- Add cooked bacon, shredded rotisserie chicken, or a spoonful of Dijon + smoked paprika for depth.
- For lower-dairy, replace some cream with unsweetened almond milk and thicken slightly with ½ tsp arrowroot (if carbs permit).
Make-ahead & storage
- Freeze unbaked casserole; thaw overnight and bake until bubbly. Refrigerate leftovers 3–4 days; reheat gently with a splash of cream or broth.
Keto Shepherd’s Pie (Full Recipe — Lamb or Beef Options) — Serves 6
Why you’ll love it: A rich, savory meat base topped with buttery cauliflower mash — all the tradition, reworked for low net carbs.
Prep + Cook time: 20 min prep → 55–65 min cook
Ingredients — Meat base
- 1½ lb (680 g) ground lamb (traditional) or ground beef (substitute)
- 1 medium onion, diced
- 2 cloves garlic, minced
- 1 cup mushrooms, finely diced (adds body & umami)
- 2 tbsp tomato paste
- 1 cup beef or chicken broth (240 ml)
- 1 tsp Worcestershire sauce or tamari
- 1 tsp dried thyme
- Salt & pepper
Ingredients — Cauliflower mash
- 2 large heads of cauliflower (about 1.6–2 lb / 750–900 g)
- 4 tbsp butter
- ¼–½ cup heavy cream (60–120 ml) or 4 oz cream cheese
- ½ cup shredded cheddar (optional)
- Salt & white pepper to taste
Method
- Preheat: Oven to 400°F (200°C).
- Cook cauliflower for mash: Break cauliflower into florets and steam or boil until very tender (12–15 min), or roast at 425°F for 20 min for a drier mash. Drain well and pat dry. Purée in a blender/food processor with butter and cream (or cream cheese) until silky. Fold in cheddar if desired; season.
- Make meat base: In a large skillet, brown ground meat over medium-high heat, breaking into crumbles. Drain excess fat, leaving ~1 tbsp. Add onion and mushrooms; sauté 4–5 min until softened. Stir in garlic and tomato paste; cook 1–2 min. Add broth, Worcestershire, thyme; simmer uncovered until thick and reduced (~8–10 min). Taste and adjust seasoning.
- Assemble: Spread meat mixture in a 9×13 pan (or casserole). Spoon cauliflower mash over, smoothing with a spatula. Score lines with a fork for texture and browning. Sprinkle extra cheddar if using.
- Bake: Bake 15–20 min at 400°F until edges bubble and top begins to brown. For extra brown, broil 1–2 min, watching carefully. Rest 10 min before serving.
Tips & troubleshooting
- Too watery mash? Squeeze cooked cauliflower in a towel before blending, or roast instead of boiling.
- Flavor depth: add a splash of red wine while deglazing (optional) or a teaspoon of soy/tamari for more umami.
Variations
- Lamb option: Use ground lamb + rosemary instead of thyme for a classic shepherd’s flavor.
- Vegetarian: Use a lentil substitute or crumbled tempeh + extra mushrooms and vegetable broth.
Make-ahead & storage
- Assemble and refrigerate for up to 24 hours before baking. Freeze the whole casserole; thaw overnight and bake until warmed through. Leftovers refrigerate 3–4 days.
Keto Chili & Cheese Skillet (One-Pot Comfort) — Serves 6
Why you’ll love it: Hearty, spicy, and melty — a bowlful of cozy that’s perfect for weeknight dinners, game day, or meal prep.
Prep + Cook time: 15 min prep → 40–50 min simmer
Ingredients
- 2 lb (900 g) ground beef (80/20) or mixed beef/pork
- 1 medium onion, diced
- 1 bell pepper, diced (optional)
- 3 cloves garlic, minced
- 2 tbsp chili powder
- 1 tbsp ground cumin
- 1 tsp smoked paprika
- 1 tsp dried oregano
- 1 (14 oz / 400 g) can crushed tomatoes, use 1 small can or dilute for lower carbs
- 1½ cups beef broth (360 ml)
- 2 tbsp tomato paste
- 1 cup mushrooms, diced (optional to add bulk)
- Salt & pepper to taste
- 1–2 cups shredded cheddar (for topping)
- Toppings: sour cream, sliced scallions, diced avocado, cilantro
Method
- Brown meat: In a large heavy skillet or Dutch oven, brown the ground meat over medium-high heat until deep golden bits form. Drain excess fat if too much.
- Sauté aromatics: Add onion and bell pepper; cook until softened (4–5 min). Add garlic and spices; toast 1 min until fragrant.
- Add tomatoes & simmer: Stir in tomato paste, crushed tomatoes, and beef broth. Add mushrooms if using. Bring to a simmer and cook uncovered for 25–35 minutes until thickened and concentrated. Stir occasionally and adjust consistency with broth or simmer longer for thicker chili.
- Finish & serve: Season to taste. Sprinkle shredded cheddar over the skillet, cover or tent with foil for 2–3 minutes to melt. Serve with sour cream, scallions, and avocado.
Tips & troubleshooting
- Beans are omitted to keep carbs low — add diced zucchini or more mushrooms to stretch the chili without adding carbs.
- If too acidic, balance with a pinch of baking soda (tiny), a splash of heavy cream, or a small square of dark chocolate for depth.
Variations
- Spicy version: Add chopped chipotle or a few dashes of hot sauce.
- White chili style: Use shredded chicken + green chiles + chicken broth + cream for a lighter version.
Make-ahead & storage
- Chili flavors often improve after a day in the fridge. Freeze in portions for easy reheating. Reheat gently on the stovetop; add a splash of broth if it tightens up.
Sides, Toppings & Comforting Sauces
Every great comfort dish needs the right side, a crunchy finish, and a sauce that ties everything together. Below you’ll find practical, kitchen-tested options for cauliflower mash variations, keto-friendly gravies and cream sauces that won’t kick you out of ketosis, and crispy topping swaps that deliver the crunch and nostalgia of breadcrumbs — without the carbs. Use these as ready-made add-ons or adaptable building blocks for the recipes above.
Cauliflower mash variations (buttery, cheesy, herb)
Cauliflower mash is the go-to potato swap because it mashes silky, takes flavors well, and reheats cleanly. Key technique: drain and dry — excess water is the enemy. Roast whenever possible for the best flavor.
Simple base method (makes ~4 servings)
- Break 1.5–2 lb (700–900 g) cauliflower into florets.
- Roast at 425°F (220°C) with a drizzle of oil for 20–25 minutes (browning reduces water and adds flavor). OR steam/boil 12–15 min and then transfer to a pan over medium heat for 1–2 min to evaporate moisture.
- Purée in a food processor with 4 tbsp butter and ¼–½ cup heavy cream (start with ¼ cup). Season with salt and white pepper. Taste and adjust.
Variation A — Buttery Classic
- Add: 2 tbsp extra butter and 1 tsp chicken or veggie bouillon powder (for savory boost).
- Finish: stir in 1 egg yolk off heat for extra silk and body (optional).
- Texture tip: blend just until smooth — over-blending can make cauliflower gluey.
Variation B — Cheesy Cauli-Mash
- Add: 3–4 oz cream cheese or ¼ cup mascarpone, plus ½–1 cup shredded aged cheddar.
- Method: fold cheese into warm mash off heat to avoid separation. Sprinkle extra cheddar and broil 1–2 minutes for a golden top.
- Use: perfect for topping shepherd’s pie or serving next to pot roast.
Variation C — Herb & Garlic
- Add: 2 cloves roasted garlic (mash into purée), 2 tbsp chopped chives, 1 tbsp chopped parsley, 1 tsp lemon zest.
- Serve: with a pat of herb butter on top for brightness — especially good with braised beef or lamb.
Troubleshooting quick fixes
- Watery mash? Return to the pan and cook over medium, stirring until excess moisture evaporates, or add 1–2 tbsp almond flour or 1 oz cream cheese to bind.
- Bland mash? Hit with acid (1 tsp lemon juice) and salt — acid wakes up fat-forward foods.
Keto gravies & cream sauces that don’t break ketosis
The secret to a luscious, low-carb gravy is concentration + fat + minimal thickener. Reduce your braising liquid, add butter or cream, and use gelatin or xanthan gum in micro-amounts for body. Below are three reliable sauce blueprints.
Blueprint A — Brown Pan Gravy (meaty, low-carb)
- Use: after searing roast, meatloaf, or pork chops.
- Ingredients: pan drippings (2–4 tbsp), 1 cup beef or chicken broth, 1 tbsp tomato paste (optional), 1 tsp Worcestershire or tamari, 1 tbsp butter, ¼ tsp powdered gelatin dissolved in 1 tbsp warm water or 1/8–1/4 tsp xanthan gum whisked into 1 tbsp cold water.
- Method: deglaze the pan with broth, stir in tomato paste and Worcestershire, and simmer to reduce by ~25%. Off heat, stir in butter and dissolved gelatin (or whisk in the xanthan slurry briefly while simmering) until glossy and slightly thick. Season.
- Tip: gelatin gives a silky mouthfeel and reheats well; xanthan needs tiny amounts — too much makes the sauce slimy.
Blueprint B — Creamy Mushroom & Thyme Sauce
- Use: over chicken pot pie, meatloaf, shepherd’s pie.
- Ingredients: 2 tbsp butter, 1 cup sliced mushrooms, ½ cup chicken broth, ½ cup heavy cream, 2 tbsp cream cheese, 1 tsp fresh thyme, salt & pepper.
- Method: sauté mushrooms in butter until golden, deglaze with broth, reduce slightly, whisk in cream and cream cheese off heat. Finish with thyme.
- Keto note: this is naturally low-carb and rich; adjust cream volume to keep calories in check.
Blueprint C — Cheesy White Sauce (Alfredo-style, keto-safe)
- Use: for mac & cheese, cauliflower gratin, or white shepherd’s pie variants.
- Ingredients: 1 cup heavy cream, 2 oz cream cheese, 1–1½ cups shredded Parmesan + fontina or mozzarella, pinch nutmeg, salt & pepper.
- Method: warm cream gently, whisk in cream cheese until smooth, remove from heat, and fold in cheeses until melted and silky. Avoid high heat to prevent graininess.
- Stabilizer option: for longer hold, dissolve ¼ tsp xanthan in 1 tbsp cold water and whisk in while the sauce is warm.
General sauce tips
- Always temper cold dairy into hot liquid slowly to prevent curdling.
- Reduce liquids over medium heat — concentrated flavors make smaller volumes feel indulgent.
- For gravy-like thickness without carbs, prefer reduction + gelatin over large amounts of starch substitutes.
Crispy topping alternatives (Parmesan, pork rind crumbs, almond crumble)
Crunch is a comfort-food essential. These low-carb toppings give you that satisfying contrast — use them on casseroles, mac & cheese, pot pies, and gratins.
Option 1 — Pork Rind Panko (fast & kid-friendly)
- Prep: pulse 1–2 cups pork rinds in food processor for 5–8 short pulses until coarse crumb (don’t overprocess into powder unless you want a finer texture).
- Mix: combine with 2–3 tbsp grated Parmesan, 1 tsp Italian seasoning, and a drizzle of melted butter.
- Use: sprinkle over casseroles and bake 8–12 minutes until golden. Great for chicken casseroles and keto mac.
Option 2 — Parmesan Frico (cheese crisp topping)
- Prep: place ¼–½ cup finely grated Parmesan in thin rounds on parchment-lined sheet, bake at 400°F (200°C) for 4–6 minutes until edges brown; cool and break into shards.
- Use: scatter over soups, mashed cauliflower, or casseroles for an ultra-crisp salty bite.
Option 3 — Almond-Parmesan Crumble (nutty & toasty)
- Mix: ½ cup almond flour, 2 tbsp grated Parmesan, 1 tbsp melted butter, pinch salt, 1 tsp lemon zest (optional).
- Texture: almond flour gives a crumbly, biscuity finish — toasting before topping improves crunch.
- Use: sprinkle on gratins or over mac & cheese for a sophisticated crunch.
Option 4 — Herbed Pork Crumb + Seeds (extra texture)
- Mix: crushed pork rinds + 1 tbsp toasted sesame seeds + 1 tbsp pumpkin seeds + chopped parsley.
- Benefits: adds nutty flavors and visual interest — great for chili bowls.
How to choose
- For maximum nostalgia (panko-like crunch): pork rind panko is the closest match.
- For the cleanest keto option with no pork: almond-parmesan crumble or Parmesan frico works perfectly.
- For dairy-free crunch: use toasted seeds + crushed roasted sunflower seeds bound with a little olive oil.
Crisp-up tips
- Add topping in the last 8–12 minutes of baking to avoid burning.
- If broiling to finish, watch closely — crumbs brown fast.
Quick serving ideas & combos
- Shepherd’s pie: top with cheesy cauliflower mash + Parmesan frico for contrast.
- Mac & cheese: finish with pork rind panko + a quick broil for golden crunch.
- Pot roast: Spoon brown pan gravy over slices and serve with buttery cauliflower mash.
- Chili: crown with shredded cheddar + herbed pork crumbs and a dollop of sour cream.
Meal Planning: Comfort Food Week
Here’s a practical, keto-friendly 7-day comfort-food meal plan built around the flagship recipes you already love (Chicken Pot Pie, Cauliflower Mac & Cheese, Shepherd’s Pie, Chili & Cheese Skillet), designed for easy leftovers, smart freezer strategy, and minimal daily cooking. Includes a compact batch-cook schedule, you can turn two hours on Sunday into cozy dinners all week.
7-Day Sample Plan (serves 4 each night — adjust portions as needed)
Notes: Meals are ordered for efficient reuse of ingredients. Leftover ideas are listed, so nothing goes to waste.
Monday — Cauliflower Mac & Cheese
- Dinner: Cauli Mac & Cheese (served with a simple green salad).
- Leftovers: Lunch Tuesday; freeze one portion if you want (casserole freezes well).
Tuesday — Keto Chicken Pot Pie
- Dinner: Individual or family pot pies.
- Leftovers: Lunch Wednesday; extra filling freezes well for later assembly.
Wednesday — Shepherd’s Pie (lamb or beef)
- Dinner: Shepherd’s Pie with cheesy cauliflower mash.
- Leftovers: Portion out two lunches or freeze one portion.
Thursday — Chili & Cheese Skillet
- Dinner: One-pot chili topped with cheddar and avocado.
- Leftovers: Great for bowls, nacho-style with pork-rind crumbs; freezes in portions.
Friday — Meatloaf Night + Cauliflower Mash
- Dinner: Low-carb meatloaf, served with buttery cauliflower mash and steamed green beans.
- Leftovers: Meatloaf slices for sandwiches (lettuce wrap) or frozen.
Saturday — Pot Roast / Braised Beef
- Dinner: Slow-braised pot roast with roasted low-carb root veg (turnips, rutabaga).
- Leftovers: Shred for chili bowls, shepherd’s pie remix, or freezer portions.
Sunday — Leftovers / Flex Night
- Use up remaining portions: mac & cheese, chili, pot pie filling, or meatloaf. Reheat or toss into a quick casserole. Make a fresh cauliflower rice or steamed veg to round out.
Leftovers & Freezer Strategy (easy rules)
- Portion before freezing. Use single-meal portions (1–2 cups) in rigid, freezer-safe containers or zipper bags for the fastest reheating.
- Label clearly. Format: Meal — Date made — Reheat: 165°F. Example: Keto Chili — 2025-11-25 — Reheat to 165°F.
- Storage times:
- Refrigerator: cooked meals 3–4 days.
- Freezer: casseroles, bakes, braises — up to 3 months for best quality; meatloaf 2–3 months.
- Thawing & reheating: Thaw overnight in the fridge when possible. Reheat in oven (covered) at 325–350°F until internal temp 165°F, or microwave in 1–2 min bursts, stirring between. For skillet meals, rewarm over low heat and add a splash of broth or cream if dry.
- Avoid sogginess: Freeze crunchy toppings (pork-rind crumbs, frico shards) separately in small bags and add after reheating.
Shopping List (organized by section) — Week for 4 people
Produce
- Cauliflower — 6–8 heads (for mac, mash, riced sides)
- Yellow onion — 6 medium
- Garlic — 2 heads
- Celery — 1 bunch
- Bell pepper — 2
- Mushrooms — 2 lb (for base soups, shepherd’s pie, risotto)
- Turnips/rutabaga — 3–4 medium (pot roast, low-carb “carrots”)
- Green beans or broccoli — 2 lb (sides)
- Avocados — 3–4 (topping for chili)
- Fresh herbs: parsley, thyme, chives (small bunches)
- Salad greens — 1–2 bags
Meat & Protein
- Whole chicken or rotisserie (for shredding) OR 2–3 lb cooked shredded chicken
- Ground beef — 4–5 lb (for chili, shepherd’s pie, meatloaf)
- Ground lamb (optional) — 1–1.5 lb (for shepherd’s pie option)
- Chuck roast or brisket — 3–4 lb (pot roast)
- Bacon — 1 lb (for risotto & add-ins)
- Eggs — 2 dozen
Dairy & Eggs
- Butter — 2–3 sticks (or 1 lb)
- Heavy cream — 2–3 pints
- Cream cheese — 2–3 blocks (8 oz each)
- Sharp cheddar — 2–3 lb (shredded or block)
- Parmesan — 8 oz (block for grating)
- Sour cream — 1 tub (optional topping)
Pantry & Baking
- Almond flour — 1–2 lb
- Pork rinds — 2–3 bags (for crumb topping)
- Xanthan gum — small jar (tiny amounts go a long way)
- Chicken & beef broth (low sodium) — 6–8 quarts total
- Canned crushed tomatoes — 1–2 cans (small cans for chili)
- Tomato paste — 2 small cans
- Dijon mustard, Worcestershire sauce, tamari/soy sauce (small bottles)
- Olive oil & avocado oil
- Spices: chili powder, cumin, smoked paprika, thyme, rosemary, oregano, black pepper, sea salt
Optional / Extras
- Konjac noodles (if you want a konjac mac variation)
- Collagen or gelatin powder (for sauces)
- Parmesan frico or extra cheese for crisps
Batch-Cook Schedule — Two-Hour Sunday Prep (time estimates are conservative)
Goal: finish the major building blocks in ~2 hours so nightly assembly is quick.
Hour 1 — Roasts, Meats & Large Batches
- 00:00–00:10 — Setup. Preheat oven(s). Fill large pots. Line baking sheets. Label containers.
- 00:10–00:40 — Roast cauliflower (for mac & mash). Toss multiple heads on sheet pans at 425°F — roast 18–25 minutes. Remove and let cool; transfer to one large bowl.
- 00:10–00:40 — Start pot roast in slow cooker or oven. Sear meat (10 minutes), then braise low & slow (if using oven, it runs on its own; if slow cooker, set and continue).
- 00:40–00:60 — Brown ground meats. In two skillets, brown 2 lbs ground beef for chili and 1.5 lbs for shepherd’s pie; drain and store separately. Add aromatics (onion/garlic) to each pan and lightly cook.
Hour 2 — Sauces, Mash & Assembly-Ready Tasks
- 00:60–00:75 — Make cheese sauce/mac sauce. Prepare the Cauli Mac sauce; fold into half the roasted cauliflower and cool; portion into oven-ready containers (one for Monday dinner, one to freeze).
- 00:75–00:90 — Prepare cauliflower mash. Purée half the roasted cauliflower with butter/cream and store in an airtight container (shepherd’s pie topping + side for dinners).
- 00:90–01:10 — Make chili base. Combine brown beef, crushed tomatoes, spices, and simmer briefly just to marry flavors; cool and portion into 2–3 freezer containers (one for Thursday dinner, one extra).
- 01:10–01:20 — Make pot pie filling (base). Sauté aromatics and combine with shredded chicken + sauce (don’t thicken fully if freezing; finish thickening before baking). Portion and cool.
- 01:20–01:30 — Quick toppers & crumbs. Pulse pork rinds for panko; pre-mix almond-parm topping and store in a jar.
Optional add-ons if you have more time: bake a meatloaf, make cauliflower rice, or par-bake fathead crusts.
Evening Assembly Cheats (fast weeknight steps)
- From freezer to oven: If frozen, transfer to the refrigerator the night before. If baking from frozen, add 20–30 minutes to bake time and cover with foil for the first half so it heats through without burning the top.
- Skillet reheats: Rewarm chili or pot roast in a skillet on medium-low; add 2–4 tbsp broth per cup to restore silkiness.
- Re-crisp topping: For casseroles, re-crisp under broiler 1–2 minutes after reheating (watch closely).
Packaging & Labeling — Pro tips
- Use rigid, freezer-safe containers (BPA-free) for best stacking and reheating; use heavy-duty freezer bags for flat storage (saves space).
- Label format: Dish — Cooked on YYYY-MM-DD — Use by (fridge) or Freeze by (date) — Reheat to 165°F.
- Keep a freezer inventory list on your phone (photo of labels or a small note) so you know what you have without digging.
Quick calendar recap (what to do when)
- Sunday: Batch-cook (follow schedule above). Label & freeze/ fridge.
- Monday–Thursday evenings: Reheat assembled meals; assemble final touches (toppings, fresh herbs, salad).
- Friday: Fresh meatloaf or use leftover roast.
- Weekend: Enjoy leftovers, refresh sides, plan next week.
Troubleshooting: Texture + Flavor Issues
When keto comfort food goes wrong, it’s usually one of four things: too much water, not enough structure, overheated fat, or an off-flavor. Below you’ll find the cause, a step-by-step fix you can apply right now, prevention tips for next time, and quick one-line cheats if you need to rescue a dish fast.
Soggy crusts
Why it happens
- Moisture migration from a wet filling (steam) or high-water crust ingredients (undrained cauliflower).
- Underbaked/par-baked crust, so it never had a chance to set.
- Crust formula missing binder (egg/cheese/almond flour) or too much liquid in the mix.
Fix it now — step by step.
- If the dish is not yet baked: par-bake the crust 8–12 minutes at 400°F (200°C) until it firms and just begins to color, then assemble filling and finish baking.
- If the assembled dish is already soggy and baked, remove topping/crust pieces, place under high heat (425°F/220°C) or broil 1–2 minutes to dry and crisp the surface. (Watch closely; broiling burns fast.)
- For cauliflower crusts: remove the top, transfer the crust to a hot skillet to dry briefly, or transfer filling to a new par-baked crust.
Prevent next time
- Dry the cauliflower thoroughly: after cooking, squeeze it in a clean dish towel or cheesecloth until nearly dry. Aim for a dry, grainy texture — not mushy.
- Par-bake every crust (even almond-flour or fathead) to set the structure before it meets the moist filling.
- Add a binder: typical cauliflower crust ratio that works well — ~4 cups riced (very dry) cauliflower + 2 large eggs + ¼ cup almond flour + ½ cup shredded cheese pressed thin and par-baked. (Adjust by feel — dough should hold when pinched.)
- Use a shallow layer of fat or cheese as a moisture barrier: brush crust with melted butter or sprinkle a thin layer of grated Parmesan and bake briefly before adding wet filling.
One-line rescue
- Par-bake at 400°F for 8–12 minutes or broil for 1–2 minutes to crisp; squeeze and dry cauliflower before making the crust next time.
Watery fillings
Why it happens
- Veggies (cauliflower, mushrooms, frozen veg) release water when heated.
- Too much stock or under-reduction of sauce.
- Thickener used incorrectly (clumped xanthan) or not used at all.
Fix it now — step by step.
- Pull the filling back to the stovetop. Simmer uncovered on medium-low to evaporate excess water and concentrate flavor. Stir frequently to avoid scorching.
- If reduction alone won’t thicken fast enough, choose a stabilizer:
- Xanthan gum — whisk a tiny pinch (start with 1/8–1/4 tsp total) into 1–2 tbsp cold water, then drizzle into simmering filling while whisking; simmer 1–2 minutes to activate.
- Dissolved gelatin — bloom 1 tsp powdered gelatin in 1 tbsp cold water, warm until dissolved, then whisk into hot filling for body without cloudiness.
- Finish with a small spoon of cream cheese or heavy cream and simmer 1–2 minutes; dairy adds body and silkiness.
- If the filling is already in a crust and soggy, scoop it into a pot and thicken it, then reassemble and crisp the top.
Prevent next time
- Roast or drain vegetables (especially cauliflower and mushrooms) before adding to the filling. Roasting concentrates flavor and expels water.
- For frozen vegetables, thaw and press completely dry before use.
- Build sauces by reducing stock first; add cream or thickeners last so you control thickness.
- When using xanthan, always disperse it in cold liquid first to prevent lumps and sliminess.
One-line rescue
- Simmer uncovered to reduce; whisk in a tiny xanthan slurry or dissolved gelatin; finish with cream cheese.
Oily or separated cheese sauces
Why it happens
- Cheese overheated or cooked at high temperature — proteins seize, and fats separate.
- Sauce made too thin, or cheese added too fast to hot liquid.
- Low-quality shredded cheeses often contain anti-caking agents that resist melting smoothly.
Fix it now — step by step.
- Remove from heat immediately. If separation has begun, pull the pan off the burner.
- Whisk in a tablespoon of cream cheese or 2–3 tbsp heavy cream off-heat; these emulsifiers help re-bind fat and protein into a smooth sauce.
- If still broken, add a small cold splash of water or cream and whisk briskly until the emulsion reforms.
- Finish gently over very low heat — add cheese in small handfuls, stirring constantly.
Prevent next time
- Melt cheese off the heat or over very low heat; add cheese gradually and stir constantly.
- Use freshly grated cheese (shred from blocks) — it melts cleaner than pre-shredded.
- Build sauce on gentle heat: cream → cream cheese → small batches of shredded cheese. Avoid boiling.
- If using cream-based sauces for baking, cool slightly before adding to already hot ingredients.
One-line rescue
- Pull off the heat, whisk in cream cheese or heavy cream, then finish gently over low heat, adding small amounts of cheese.
Cauliflower “funk” or sulfur smell
Why it happens
- Overcooking cauliflower (especially boiling) releases sulfurous compounds — an unpleasant smell and bitter edge.
- Using old or low-quality cauliflower, or cooking it too long at a low temperature.
Fix it now — step by step.
- If the cauliflower is still whole or in large pieces: roast at high heat (425°F/220°C) to caramelize and improve flavor — roasting transforms sulfur notes into sweet, nutty compounds.
- Brighten the purée: stir in 1 tsp lemon juice or 1–2 tsp apple cider vinegar per batch (acid lifts and balances sulfurous bitterness).
- Add flavor masking & complexity: butter, garlic, Parmesan, bacon, or toasted nuts — these introduce fat and umami that distract from mild sulfur notes.
- If the cauliflower was boiled too long, and the flavor is strong, consider turning it into a sauced dish (cheese sauce + herbs) where robust flavors counter the funk.
Prevent next time
- Roast instead of boiling when possible — 425°F for 18–25 minutes until golden. Roasting reduces water and mellows the sulfur.
- If you must cook in water, steam briefly and then dry off in a hot pan to evaporate retained moisture.
- Use fresh cauliflower (firm head, no dark spots) and cook to just tender, not mushy.
One-line rescue
- Roast to caramelize, add an acid (lemon), and butter/cheese to mask any sulfur edge.
Quick diagnostic checklist (use this in the moment)
- Is the problem primarily wet → reduce/evaporate (simmer uncovered, roast vegetables).
- Is the problem structure/crumbly → add binder or par-bake (egg, cheese, psyllium; par-bake crust).
- Is the sauce separate? → remove from heat, whisk in cream or cream cheese.
- Sulfurous smell → roast + acid + umami.
Kitchen tool & temp reminders (handy rules)
- Par-bake crusts: 8–12 min at 400°F (200°C).
- Roast cauliflower: 425°F (220°C) for 18–25 min — aim for caramelized edges.
- Xanthan gum: tiny amounts — start 1/8–1/4 tsp per cup of liquid; whisk into cold liquid first.
- Cheese meltdown: keep under 180°F (82°C) when possible; melt cheeses off heat into warm cream for stability.
- Sauce test: a proper sauce will coat the back of a spoon — dip a spoon, run your finger across the back; if it leaves a clean trail, it’s thick enough.
Fast rescue cheats (the 30-second checklist)
- Soggy crust → par-bake or broil 1–2 minutes.
- Thin filling → simmer uncovered + whisk in tiny xanthan slurry.
- Broken cheese sauce → off heat + whisk in cream cheese or heavy cream.
- Cauliflower smell → roast and finish with lemon + butter/cheese.
Health & Safety Notes
When you’re turning comfort-food classics into keto versions, small safety and digestion details matter. Below are clear, practical rules for food safety (storage, cooling, reheating), handling dairy if you’re lactose-sensitive, and real-world GI advice for transitioning to a higher-fat, lower-carb menu. I’ve included quick-action checklists and when to see a clinician.
Food safety: store, cool, reheat — the essentials
- Cool and refrigerate promptly. Don’t leave cooked food at room temperature for more than 2 hours (1 hour if it’s hot outside). Bacteria grow quickly in the “danger zone” between 40–140°F (4–60°C). (20, 21)
- Portion & chill: Divide large batches into shallow containers (max 2-inch depth) so they chill fast in the fridge. This limits bacterial growth. (22)
- Refrigerator storage window: Eat refrigerated leftovers within 3–4 days. If you won’t eat them in that span, freeze them.
- Reheat to a safe temperature: Reheat leftovers until they reach 165°F (74°C) throughout — use an instant-read thermometer. This is the USDA/FSIS and CDC standard for leftovers, casseroles, and reheated dishes. (23, 24)
- Freezer life: For best quality, casseroles, bakes, and braises store well in the freezer for ~2–3 months; label with date and contents. Reheat from thawed for the best texture where possible.
Quick checklist before serving leftovers
- Was it stored within 2 hours of cooking?
- Has it been in the fridge ≤ 4 days (or frozen)?
- Does it reach 165°F when reheated?
If the answer is “no” to any, don’t serve — discard or re-freeze safely after cooking.
Dairy tolerances: dealing with lactose and sensitivity
- Know the symptoms: Lactose intolerance commonly causes gas, bloating, abdominal pain, and diarrhea 30 min–2 hours after dairy — severity depends on lactase activity. If you get these after eating dairy, lactose may be the issue. (25, 26)
- Smart swaps that keep flavor:
- Hard aged cheeses (Parmesan, aged cheddar) and butter are low in lactose and often tolerated.
- Fermented dairy (Greek yogurt, kefir) has lower lactose and may be better tolerated by some people.
- Lactose-free milk/cream and plant-based substitutes (unsweetened almond, coconut cream) work well in sauces and mash.
- Enzyme help: Over-the-counter lactase drops or tablets let many people enjoy lactose-containing foods without symptoms — take according to the product instructions.
- When dairy isn’t the problem: If symptoms persist despite avoiding lactose, consider non-dairy sensitivities (milk protein allergy, FODMAP sensitivity). A clinician or registered dietitian can help sort this out.
Quick dairy tolerance test
Try a small portion of cheese or yogurt and wait 24 hours. If symptoms occur, try lactose-free alternatives and consult your provider for testing.
GI tips for fiber & fat transition (practical, evidence-based)
Switching to keto or low-carb comfort food often means more fat and fewer grains — many people notice changes in bowel habits. Here’s how to make the shift without getting constipated or bloated.
Why does digestion change on keto?
- Lower intake of grains/legumes can reduce overall fiber and prebiotics, which changes stool habits and gut microbiome activity. The transition period commonly causes constipation, diarrhea, or bloating for some people. Reviews of ketogenic diets list digestive side effects among early symptoms. (27, 28)
Practical fixes — start here
- Add fiber gradually (don’t overload overnight). Target fiber from low-carb sources: leafy greens, broccoli, Brussels sprouts, avocado, chia/flax seeds, and raspberries. Increase intake from days to weeks to avoid gas. Harvard and Hopkins guidance emphasize gradual increases. (29, 30)
- Use psyllium or ground flax sparingly if needed. Psyllium husk (a teaspoon to a tablespoon daily, started slowly) can normalize stool consistency on low-carb diets — add water and increase gradually. (Start small to avoid bloating.) (31)
- Hydrate & replenish electrolytes. Higher-fat, low-carb diets change water and sodium balance; drinking enough fluid and ensuring sodium, potassium, and magnesium helps bowel motility and reduces cramps.
- Introduce fats gradually. If you’re new to a high-fat diet, ramp fat intake up over several days rather than slamming the system with heavy, greasy meals — this lowers the chance of diarrhea or nausea. NHS guidance notes that fatty foods can be harder to digest and recommends moderating fried/greasy choices. (32)
- Try a short-term, gentle laxative if needed (with guidance). For stubborn constipation, options like PEG (polyethylene glycol / MiraLAX) or magnesium citrate can be effective short-term; follow dosing instructions and consult your clinician if you have kidney disease or take other meds. Cleveland Clinic and Johns Hopkins outline these options. (33, 34)
- Probiotics may help some people. Evidence is mixed, but certain strains (eg, Bifidobacterium lactis) have shown small benefits for constipation in studies; they’re worth trying if symptoms persist, but pick reputable products and discuss with a clinician if you’re immunocompromised. (35, 36)
When fat causes diarrhea
- If rich, greasy meals trigger diarrhea, reduce portion size and choose easily digested fats (olive oil, avocado) and cooking methods (baked/roasted vs. deep-fried). Persistent oily diarrhea, especially after gallbladder removal or with known gallbladder disease, should be evaluated by a provider.
Red flags — when to stop and see a clinician
Seek medical advice if you experience:
- Severe abdominal pain, bloody stools, persistent vomiting, or fever.
- Diarrhea causing dehydration or inability to keep fluids down.
- New or severe symptoms after increasing fat (could indicate gallbladder or pancreatic issues).
- Unintentional weight loss, prolonged constipation (>2 weeks despite fixes), or ongoing GI symptoms that don’t respond to simple diet changes.
Quick action plan
If constipated on keto
- Add 1 serving of leafy greens + 1 tbsp chia or ground flax daily. (37)
- Drink an extra 1–2 cups of water/day and ensure salt intake is adequate.
- Try 1 tsp psyllium with a full glass of water, increasing slowly.
- If no improvement, consider a short course of PEG or magnesium citrate after medical advice.
If dairy upsets you
- Swap to aged cheeses, lactose-free cream, or plant creams; use lactase enzyme if desired.
Food-safety quick rules
- Cool within 2 hours, refrigerate shallow, reheat to 165°F, eat refrigerated within 3–4 days.
Keto Comfort Food for Special Diets / Swaps
Keto comfort food should make you feel cozy — not excluded. Whether you’re dairy-free, vegetarian, nut-allergic, or avoiding eggs, you can keep the textures, creaminess, and savory magic of comfort classics with smart swaps and technique. Below are practical, kitchen-tested substitutions, recipe-adaptation examples (for the flagship dishes), allergy-safety tips, and a compact shopping list so you can cook confidently.
Dairy-free keto: creamy without cow’s milk
Want all the richness but no dairy? The trick is to replace dairy’s fat, emulsifiers, and umami with plant fats + stabilizers.
Smart swaps & ingredients
- Coconut cream (full-fat, canned) — best direct swap for heavy cream in sauces and mash.
- Coconut yogurt/coconut cream cheese — use for tang and binding (watch coconut flavor).
- Avocado — blended into purées for silky texture in mashed “potatoes” or dressings.
- Olive oil/avocado oil/ghee alternative — for browning and mouthfeel (note: ghee is dairy-derived).
- Nutritional yeast — cheesy flavor without dairy.
- Agar-agar or gelatin — for stability in gravies and set fillings (agar is vegan).
- Xanthan gum or psyllium — micro-thickeners and binders that mimic creaminess.
Recipe examples
- Cauliflower Mac & “Cheese” → Make a “coconut cream + nutritional yeast” sauce: warm coconut cream, whisk in nutritional yeast and a spoon of coconut cream cheese; finish with lemon and mustard to balance. Roast the cauliflower hard to reduce water.
- Chicken Pot Pie → Replace heavy cream with coconut cream, thicken with dissolved agar or xanthan (tiny pinch). Add mushrooms and umami drops (tamari) for depth.
Flavor & texture tips
- Coconut adds a detectable flavor — balance with acid (1 tsp lemon or 1 tsp Dijon per cup of coconut cream) and savory boosters (tamari/Worcestershire).
- For silky mashes, blend avocado + olive oil + hot roasted cauliflower for a neutral taste.
Vegetarian keto: protein-forward, low-carb, meatless comfort
Vegetarian + keto means replacing meat protein and body without a carb surge. Focus on eggs, high-fat dairy (if allowed), tofu/tempeh, and mushrooms.
Smart swaps & ingredients
- Tofu (firm/extra-firm) — great shredded/sautéed in stews and casseroles.
- Tempeh — denser, more umami; marinate and crumble into bakes.
- Paneer/halloumi / full-fat cottage cheese — if dairy-allowed, these are protein-dense options.
- Mushrooms + tomato paste + tamari — excellent “meaty” base for bolognese-style fillings.
- Eggs & cheese — classic vegetarian keto protein sources; use for binding and richness.
- Pea protein or tofu-based crumbles — to boost protein in chili or shepherd’s pie.
Recipe examples
- Shepherd’s Pie → Use sautéed mushrooms + crumbled tempeh + tomato paste reduced with broth for the base; top with cheesy cauliflower mash (or dairy-free version).
- Keto Chili → Make a “three-mushroom + tempeh” chili with robust spices and a splash of low-carb broth; finish with shredded cheese or avocado.
Nutrient note
- Vegetarians on keto should watch B12, iron, and complete protein — consider fortified foods or supplements if intake is low.
Nut-free keto: crunchy, crumbly, and allergy-safe
Many keto recipes rely on almond flour or nut butters — but you can get the same structure and fat without nuts.
Smart swaps & ingredients
- Sunflower seed flour/pumpkin seed flour — excellent in baking and crusts (watch color change in some recipes).
- Ground pork rinds — superb breadcrumb substitute for coatings and crunchy toppings (not for vegetarians).
- Coconut flour — nut-free, very absorbent — use sparingly (more eggs or binder will be needed).
- Seed butters (sunflower seed butter) — for sauces or dressings when nut butter is used.
- Toasted seed blends (pumpkin, sunflower) — for finishing and texture.
Recipe examples
- Fathead crust / almond-flour biscuit → swap with sunflower seed flour + psyllium (1:1 starting point) and chill dough well before handling.
- Pork-rind panko → replace almond crumb topping with pulverized pork rinds + grated Parmesan for mac & cheese and casseroles.
Allergy safety tip
- Many with tree-nut allergies tolerate coconut — check with an allergist before using. Always read labels for “may contain” cross-contact warnings.
Egg-free keto: binders & leavening without eggs
Eggs are a major keto binder. If you need to skip them, rely on fiber binders and creative techniques — but note some egg-free keto baking will differ in texture.
Smart swaps & ingredients
- Psyllium husk (hydrated) — forms a gel that mimics gluten/egg structure.
- Ground chia or flax (flax “egg”) — 1 tbsp ground chia + 3 tbsp water → gel; good for binding (adds fiber).
- Aquafaba (chickpea brine) — foams like egg white; use cautiously — it contains some carbs, but small amounts can work in certain keto recipes.
- Commercial egg replacers — check carb content (many contain starches).
- Gelatin — can help bind savory patties or meatloaf if not vegetarian.
Recipe examples
- Meatloaf → bind with 1–2 tbsp psyllium + 1–2 tbsp water and extra grated cheese or pork rind crumbs instead of egg.
- Dumplings/biscuits → use ricotta or cream-cheese-based dumplings (dairy option) that set without eggs, or use psyllium + baking powder + almond/sunflower meal mix.
Texture caveats
- Egg-free baked goods can be denser and less risen. Consider small pans and gentle handling; chill batter/dough before baking.
Cross-contamination & allergy-safety best practices
- Separate prep areas & utensils when cooking for people with severe allergies.
- Label everything clearly when freezing (contains nuts/dairy/eggs).
- Clean high-touch equipment (toaster, blender lid, food processor bowl) thoroughly — nut oils linger.
- If serving others, always disclose potential allergens in a recipe note or menu label.
Mini shopping list for special diets
Dairy-free pantry: canned full-fat coconut cream, coconut yogurt, nutritional yeast, xanthan gum, agar.
Vegetarian-keto pantry: firm tofu, tempeh, paneer (if dairy OK), mushrooms, pea protein.
Nut-free pantry: sunflower seed flour, pumpkin seed flour, pork rinds, coconut flour.
Egg-free pantry: psyllium husk, ground chia/flax, gelatin/agar, aquafaba (if using small amounts).
Closing tips — practical mindset
Want the same cozy, spoon-friendly satisfaction? Focus on texture first, flavor second. If something lacks body, add a fat (butter or oil) + an umami booster (tamari, nutritional yeast, mushroom powder). If it falls apart, add a binder (psyllium, egg, or cream cheese). With a small pantry of allergy-safe alternatives and a few technique tweaks, you can keep the comforts coming — everyone at the table included.
Keto Comfort Food — Myths vs. Reality
There’s a lot of loud, contradictory advice about ketogenic diets floating around. Below I debunk the most common keto myths with concise, evidence-based replies you can actually use when writing or cooking — plus practical takeaways for readers. I cite reputable sources for the five load-bearing claims so your content stays trustworthy.
Myth 1 — “Ketosis is dangerous and the same as diabetic ketoacidosis (DKA).”
Reality: Nope. Nutritional ketosis (the state people aim for on a keto diet) is a controlled, mild rise in blood ketones that’s metabolically distinct from diabetic ketoacidosis (DKA), which is a life-threatening condition seen mostly in type 1 diabetes when insulin is absent, and ketones skyrocket. Nutritional ketosis typically shows blood ketone levels of ~0.5–3 mmol/L; DKA is far higher and accompanied by severe metabolic disturbance. For people with diabetes — especially type 1 — ketosis needs medical supervision. (38, 39)
Practical takeaway: Explain this clearly to readers: ketosis ≠, ketoacidosis. But also insert a safety line: anyone with diabetes, pregnant or breastfeeding, or on certain medications should check with their clinician before starting keto.
Myth 2 — “Keto automatically means you eat unlimited bacon and butter; it’s fine for heart health.”
Reality: The quality of fats matters. Some keto patterns emphasize whole food fats (olive oil, fatty fish, avocado) and leaner proteins; others lean heavily on saturated fats (processed meats, lots of butter). Several authoritative reviews and expert commentaries warn that some keto diets raise LDL cholesterol — a marker linked to heart disease risk — so blanket claims that all keto is heart-healthy are incorrect. Aim to swap some saturated fat for monounsaturated and polyunsaturated sources when possible. (40, 41)
Practical takeaway: When you write about “keto comfort food,” recommend fat quality: use olive oil, avocado, nuts (unless allergenic), fatty fish, and limit ultra-processed meats. Call out that readers should track lipid markers if they follow keto long-term.
Myth 3 — “Keto destroys your kidneys.”
Reality: For people with normal kidney function, moderate-protein ketogenic diets aren’t clearly proven to cause kidney failure. However, keto can be risky for people who already have chronic kidney disease (CKD) or severely impaired renal function — high protein loads and certain metabolic shifts may worsen those conditions. Medical guidance recommends caution and clinician oversight for people with kidney disease. (42, 43)
Practical takeaway: Add a clear advisory in posts: if you have kidney disease or reduced kidney function, talk with your healthcare provider before starting keto. For recipe posts, suggest lower-protein or physician-approved options for that audience.
Myth 4 — “Keto is a short-term magic bullet — weight loss will always be faster and permanent.”
Reality: Keto often produces faster short-term weight loss (mainly from water loss and appetite suppression early on) and can improve blood sugar control for some people. But long-term sustainability and superiority versus other diets are not established for everyone; many studies show benefits fade or converge with other approaches over time, and adherence is the main predictor of long-term success. Keto can be powerful short term, but framing it as a guaranteed permanent fix is misleading. (44)
Practical takeaway: Tell readers what to expect: fast initial results are common, but plan for maintenance, variety, and a realistic long-term approach. Encourage tracking, flexibility, and follow-up labs if they stay on keto for months.
Myth 5 — “Low-carb means low-vegetables; keto is nutrient-deficient.”
Reality: Keto can be low in fiber and some micronutrients if poorly planned, but a well-constructed keto plate includes low-carb vegetables (leafy greens, cruciferous veg, peppers, zucchini), nuts/seeds, and careful use of berries and high-fiber foods (chia, flax, psyllium). Nutrient shortfalls are avoidable with variety, supplementation when needed (eg, electrolytes, vitamin D), and an emphasis on nonstarchy vegetables.
Practical takeaway: In recipe content, spotlight nonstarchy veg sides, recommend fiber-rich keto ingredients (avocado, chia, artichoke hearts in moderation), and remind readers to consider a multivitamin or targeted supplements if their diet is very restrictive.
Myth 6 — “You’ll lose muscle on keto because you’re not eating carbs.”
Reality: Not necessarily. Preserving muscle depends on adequate protein, resistance training, and total energy intake — not carbs alone. Many people maintain or even gain lean mass on keto when they eat sufficient protein and lift weights. If muscle retention is a priority, include protein targets and strength training in your content. (45)
Practical takeaway: Provide simple protein guidelines in recipe posts (eg, aim for a serving of quality protein at each meal) and include strength-training tips or a link to an exercise resource.
Myth 7 — “Keto causes permanent bone loss / long-term harm.”
Reality: Some short-term studies have observed changes in bone-metabolism markers on very restrictive ketogenic regimens, but the long-term clinical significance is unclear and likely depends on the diet’s composition (micronutrient intake, protein, vitamin D, calcium). It’s prudent to monitor bone health in long-term restrictive diets, get enough calcium/vitamin D, and include weight-bearing exercise.
Practical takeaway: For long-form content, recommend routine checkups and sensible supplementation or dietary planning for readers who plan prolonged ketogenic dieting.
Quick summary — how to present keto responsibly in your content
- Be specific. Distinguish nutritional ketosis from ketoacidosis and note who needs medical supervision.
- Call out fat quality. Encourage unsaturated fats and whole-food sources over ultra-processed saturated-fat plates.
- Flag medical cautions. Mention kidney disease, pregnancy, and type 1 diabetes as groups needing clearance.
- Balance benefit claims. Highlight short-term wins (weight loss, glucose improvements) while acknowledging long-term evidence and sustainability questions.
Advanced Tips: Elevating Comfort Food
Want your keto comfort dishes to taste as they came from a chef’s kitchen — not just a home bake? These pro techniques (sous-vide/pan-roasting), flavor hacks (umami boosters), and texture layering tricks will get you there fast. Read on for step-by-step how-tos and dish-specific examples you can use immediately.
Sous-vide & pan-roasting — precision + sear = next-level texture
Why use both: sous-vide gives perfect doneness and tender, evenly cooked protein; pan-roasting (or a hot sear) adds Maillard browning and crunchy edge — the sensory combo that makes comfort food feel luxurious.
Quick sous-vide workflow (practical, safe)
- Vacuum or ziplock: Season proteins (salt, pepper, herbs); vacuum or use water displacement to remove air from a zip bag.
- Temperature guide (general ranges):
- Chicken breast: 140–150°F (60–65°C) — tender, juicy (finish by searing).
- Chicken thigh: 165°F (74°C) or lower for longer times for pasteurization and tenderness.
- Beef (chuck/short ribs): 131–144°F (55–62°C) depending on rare → medium doneness, then finish by pan-roasting or torching to render exterior fat.
- Fish/shrimp: 120–130°F (49–54°C) — delicate.
(Always follow safe sous-vide pasteurization charts if you’re keeping lower temps for longer times.)
- Time: depends on cut — chicken breasts 1–2 hrs; thighs 2–4 hrs; tough beef cuts 24–48 hrs for tenderizing.
- Finish: Dry surface with paper towel, then sear in a screaming-hot pan with a little oil or butter for 30–60 seconds per side to develop color and flavor.
How to apply in keto comfort dishes
- Keto Pot Roast / Braised Beef: Sous-vide chuck at 58–62°C for 24–48 hrs for a melt-in-your-mouth texture, then quickly sear and finish with a reduced pan sauce. Result: fork-tender roast without long active simmering.
- Chicken for Pot Pie: Sous-vide chicken breast for juicy shredding, then sauté shredded meat briefly in pan drippings to brown before folding into filling — it adds depth you can taste.
If you don’t have sous vide
- Use low-and-slow braising or a low oven (275–300°F / 135–150°C) to mimic long, gentle cooking, then finish with high heat to brown.
Pan-roasting tips (for veg & protein)
- Dry surfaces = better browning. Pat the proteins and roasted veg dry before searing.
- High heat + little movement: Let food develop a crust before flipping; this concentrates flavor.
- Finish with butter & aromatics: Toward the end of searing, add a knob of butter, smashed garlic, and thyme; spoon the foamy butter over the food (basting) to build flavor.
Using umami boosters — deepen flavor with small additions
Umami is the invisible “comfort” ingredient. Add tiny amounts and your low-carb dishes will taste richer and more savory without extra carbs.
Powerful umami boosters (and how to use them)
- Tomato paste: Browning a tablespoon or two in the pan (before adding stock) gives a deep roasted note. Great in shepherd’s pie, meatballs, and chili.
- Miso (white or red): Dissolve ½–1 tsp into sauces off the heat for savory complexity — excellent in gravy or mushroom risotto.
- Anchovies/fish sauce: One anchovy melted into the pan fat disappears but adds major depth (use sparingly and balance with acid). Perfect in beef ragu or pot roast sauces.
- Parmesan rind: Simmer a rind in broths or sauces, then remove — gives long, aged-cheese depth to cauliflower mac sauce.
- Dried porcini powder: Rehydrate dried porcini, reserve soaking liquid, and reduce for concentrated mushroom umami — fold into gravies, braises, or “risotto.”
- Soy/tamari or Worcestershire: A teaspoon in a meat base brightens and deepens without sweet carbs.
- Browned butter (beurre noisette): Adds nutty notes — drizzle over cauliflower mash or roasted veg.
Practical combos
- Cauliflower Mac & Cheese: Roast florets, melt butter and lightly brown it, add a spoon of tomato paste and deglaze with a splash of broth — then fold into cheese sauce. Or simmer a Parmesan rind in the cream.
- Keto Chili: Toast chili powder in the dry pan, add a small spoon of dark cocoa or espresso powder for background depth, and finish with a teaspoon of Worcestershire.
Safety & balance
- Umami boosters are potent — micro-amounts go far. Taste as you go and balance with acid (vinegar, lemon) and freshness (herbs) so dishes don’t taste flat or overly “meaty.”
Layering textures — the secret to comfort (creamy + crunchy + bright)
Comfort food works because it contrasts textures. Build interest on three planes: base/body (creamy), crunch (contrast), and finish (acid/freshness).
The three-layer texture framework
- Velvety base: silky cauliflower mash, cheese sauce, or slow-braised meat. This is the emotional center.
- Crisp contrast: frico shards, pork-rind panko, toasted nuts/seeds, or herb oil crunch. Adds excitement and “bite.”
- Bright finish: acid (lemon, vinegar), fresh herbs, pickled shallots, or chiles to cut richness and refresh the palate.
Examples applied
- Shepherd’s Pie: silky cauliflower mash (base) → crumbled Parmesan frico or pork-rind crumbs (crunch) → chopped parsley + a squeeze of lemon (finish).
- Cauliflower Mac & Cheese: creamy cheese sauce (base) → pork-rind / almond-parm crumble (crunch) → pickled red onion or tiny diced cornichons on the side (finish) to balance richness.
- Chili Bowl: melty chili (base) → crushed pork rind chips or toasted pepitas (crunch) → a spoonful of lime crema (lime + sour cream) and cilantro (finish).
Micro-techniques to add texture
- Compound butters: fold minced herbs, lemon zest, or crispy shallots into butter; finish a roast or mash with a pat on top so it melts into pools of gloss and flavor.
- Garnish crisps: make quick frico discs (bake parmesan rounds) or crisp prosciutto in the oven for 8–12 minutes at 400°F and crumble.
- Herb oils / infused vinegar: blitz olive oil with basil or chili, strain, and dot the plate for freshness and visual contrast.
- Flash-pickles: thinly slice red onion or radish and quick-pickle in 1:1 water-vinegar with a pinch of salt for 15–30 minutes. These boost brightness and cut through fat.
Finishing touches chefs use (tiny moves, big impact)
- Finish sauces with cold butter: off the heat, whisk in 1–2 tbsp cold butter for a glossy, silky sauce.
- Add a crunchy spoonful at plating: keep crunches separate until the last second so they stay crisp.
- Use smoke or torching: a culinary torch on cheese or a spritz of smoked salt can feel decadent — but a little goes a long way.
- Plate with contrast: dark bowls make creamy dishes “pop”; sprinkle micro herbs for color and aroma.
Quick checklist — elevate tonight
- If using protein: sous-vide (if available) → dry → sear hard.
- Add one umami booster to every savory base (tiny but deliberate).
- Layer textures: spoonable base + crunchy topping + bright finish.
- Finish the sauce off the heat with a knob of cold butter for a velvet sheen.
- Hold crunchy toppings separately until service.
The Bottom Line
Keto comfort food proves that you can keep both your taste buds and macros happy. The key is preserving the sensory drivers of comfort — creaminess, crispness, and umami — while swapping out starches for clever, texture-minded alternatives like cauliflower, almond-based batters, and smart thickeners. Use the blueprints and full recipes above to experiment in your kitchen tonight — start with the Cauliflower Mac & Cheese or the Chicken Pot Pie for immediate cozy wins.
FAQs
How do I make mashed potatoes on keto?
Use roasted cauliflower puréed with butter, cream, and cream cheese; squeeze out excess moisture first.
Can I freeze keto pot pie?
Yes — assemble raw and freeze. Bake from frozen, increasing cook time and ensuring internal temp reaches 165°F (74°C).
Will cauliflower taste like a potato?
Not exactly, but roasting and adding dairy/umami bring a similar mouthfeel and comfort.
How do I thicken keto gravy?
Use a tiny bit of xanthan gum whisked into cold liquid or reduce slowly; gelatin can add body for meaty sauces.
Are keto comfort meals healthy long-term?
They can be part of a balanced plan, but include non-starchy veggies and monitor saturated fat if you have specific health concerns — consult a clinician for personalized advice.
Keto Comfort Foods: Family Favorite Recipes Made Low-Carb and Healthy
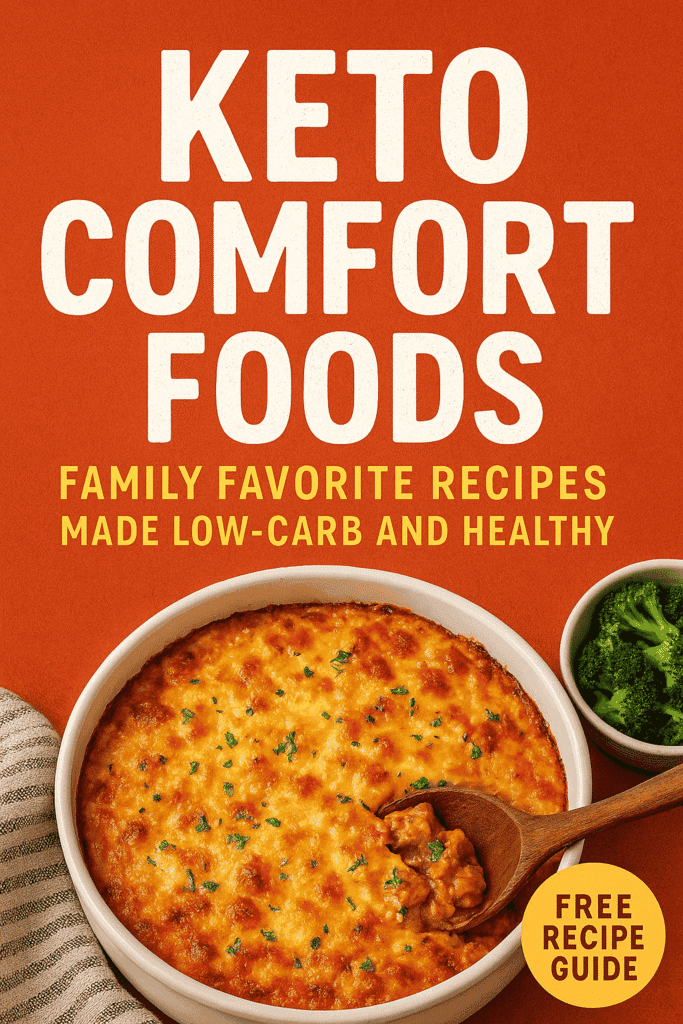
“Keto Comfort Foods: Family Favorite Recipes Made Low-Carb and Healthy” takes everything you love about homestyle comfort dishes and remakes them to fit a ketogenic lifestyle without sacrificing indulgence. This cookbook is a celebration of flavor, memory, and nourishment—175 recipes strong—designed to help you enjoy rich, satisfying meals while staying low in carbs and high in healthy fats. Whether you’re craving creamy casseroles, decadent desserts, classic breakfasts, or crowd-pleasing mains, this book shows that comfort food doesn’t have to mean carbs and sugar.
Why you’ll reach for this book again and again
This is not a clinical manual or a restrictive list of dos and don’ts—it’s a lovingly written collection that treats comfort food as part of life’s best moments. The author blends practical keto guidance (ingredients, pantry staples, tool recommendations) with stories about food’s role in family and celebration, making the book both useful and warm. Recipes are developed with real-world kitchens in mind: many include straightforward substitutions for pantry items, guidance on which sweeteners to use (and why), and tips on sourcing higher-quality fats, meats, and eggs. If you want to keep mealtime joyful while following a ketogenic approach, this book helps you do that sustainably—no deprivation, just smarter versions of the foods you already cherish.
What’s inside — practical, delicious, and family-friendly
You get more than recipes: the book opens with a thorough “Ketogenic Kitchen” primer that explains fats, proteins, vegetables, sweeteners, pantry essentials, and useful tools (from spiralizers to ice-cream makers). The recipe sections include Breakfast; Appetizers & Snacks; Soups, Salads & Sides; Main Dishes (organized by poultry, beef/lamb, fish/seafood, pork); Comfort Food Favorites; Sweet Endings; and Basics. Each recipe is annotated with nutritional info and “keto meters” that help you judge how often to enjoy a dish based on carb load—so you can plan holiday splurges and everyday meals with confidence. The result is a single volume that supports beginners and seasoned keto cooks alike.
Who this book is for
This cookbook suits anyone who wants to keep comfort and family meals central while following a low-carb, high-fat way of eating. It’s excellent for:
- Newcomers to keto who need a friendly, practical introduction and realistic meals.
- Parents who want safer, lower-sugar treats for kids without banning fun foods.
- Experienced keto cooks seeking creative comfort-food recipes and reliable technique notes.
- Home cooks who value flavor-first recipes that use whole foods and thoughtful ingredient swaps.
Taste without compromise
If you believe eating well shouldn’t mean eating boringly, this book proves you can have rich, nostalgic, satisfying meals while staying in ketosis. Maria Emmerich’s approachable voice, combined with tested recipes and clear kitchen guidance, makes this a go-to resource for weeknight dinners, holiday spreads, and everything in between. Treat yourself to a cookbook that restores pleasure to low-carb cooking—comfort foods remodeled so your family feels fed, satisfied, and a little bit spoiled (in the best way).


0 Comments