Busy evening? Hungry household? Low-carb Instant Pot dinners are a busy-night lifesaver — pressure cooking slashes active time, one-pot flavor builds fast, and swapping rice or potatoes for cauliflower and other veg keeps carbs low without sacrificing comfort. Below you’ll find a compact (but complete) guide: why this pairing works, Instant Pot best practices for low-carb cooking, make-ahead & freezing tips, plus 20 recipe ideas you can make tonight.
Why Low-carb Instant Pot dinners are a busy-night winner
If you want real weeknight magic — less chopping, less babysitting, more home-cooked meals that don’t rely on rice or potatoes — the Instant Pot + low-carb pairing is hard to beat. Below, I break down exactly why this combo works (speed, flavor, and texture), and why it’s especially useful for meal-prep, portion-control, and people managing blood sugar. Each key claim is backed by reputable sources, so you can use the facts in your article or guide with confidence.
Speed: Pressure cooking cuts active time dramatically
Pressure cooking raises the boiling point of water and cooks food at higher temperatures, which shortens cooking time for braises, stews, and whole proteins by a large margin compared with stovetop braising or oven roasting. In practice, that means a weeknight roast or shredded pork that normally needs hours in the oven will be fork-tender in about 45–75 minutes in an Instant Pot (including pressurizing and resting time), and chicken breasts or fish can be done in under 15 minutes. The Instant Pot manuals provide recommended settings and baseline cook times you can use as reliable starting points. (1, 2)
One-pot flavor building and nutrient retention
Pressure cooking concentrates flavors quickly. Browning (with the Sauté function) creates fond — browned bits that deglaze into the cooking liquid — and the high-pressure environment forces those flavors into meat and vegetables, so a one-pot meal tastes deeper than the time spent would suggest. Serious Eats’ coverage of pressure-cooker technique highlights how this faster Maillard/steam combination produces rich braises in far less time. (3)
On nutrients: shorter cook times and reduced water exposure often mean pressure cooking preserves vitamins and minerals better than long boiling. USDA retention-factor tables and reviews of cooking-method studies support the general idea that quick, high-heat methods (and steaming) retain more nutrients than long, water-heavy methods — so your low-carb veg and proteins keep more of their nutritional value when you pressure-cook them briefly. Use these sources when you want to reassure readers that fast doesn’t mean less nutritious. (4, 5)
Why low-carb recipes work so well in pressure cookers
Low-carb meals lean on three pillars: protein, vegetables, and flavorful fats — and pressure cookers excel at all three.
- Proteins: Tough cuts (pork shoulder, chuck) become shreddable without hours in the oven; poultry stays moist when timed correctly. Instant Pot timing charts are your friend here.
- Stews & one-pot mains: Long-simmer flavor in a fraction of the time — you still get collagen breakdown, reduced sauces, and rich broth without waiting all afternoon. Serious Eats’ pressure-cooker recipes show how to build deeply flavored stews quickly. (6)
- Vegetable swaps & texture control: Cauliflower, zucchini, cabbage, and leafy greens cook quickly and benefit from short pressure cycles or being added at the end — so you avoid mush while keeping meals vegetable-forward. Low-carb recipe collections (Diet Doctor, EatingWell) use pressure cookers to build low-carb bowls, chilis (no beans), and soups that are complete meals without starchy sides. (7)
Health & time benefits for busy cooks (meal-prep, portion control, diabetic-friendly notes)
For busy cooks, the Instant Pot is a time multiplier: batch-cook shredded meats, soups, and stews on a weekend and portion them for the week. That supports portion control (pre-measured servings), consistent plate composition (protein + veg), and lower temptation to order takeout. The Diabetes.org plate method and CDC meal-planning resources show how a protein-heavy, vegetable-forward plate helps with blood glucose management — and Instant Pot recipes map naturally onto that approach, making them useful for people managing diabetes. (8, 9)
Practical wins to highlight for you:
- Meal-prep friendly: make pulled pork or shredded chicken once, reuse in salads, lettuce wraps, soups.
- Portion control: Divide into single-serving containers to avoid overeating and make lunches effortless.
- Diabetic-friendly: low-carb Instant Pot meals (bean-free chilis, high-protein stews, non-starchy veg sides) let people reliably control carbs while still getting satisfying hot meals; link to ADA/CDC guidance on meal planning for credibility. (10)
Quick takeaway
The Instant Pot speeds up braises and stews, concentrates flavor in one pot, preserves nutrients better than long boiling, and lines up perfectly with the protein + veg focus of low-carb eating — making it a practical, health-friendly tool for busy people and anyone managing carbs or blood sugar. Link to the Instant Pot manual for timing, Serious Eats for technique, and CDC/ADA resources for diabetic meal-planning to make the page both actionable and authoritative.
How to use your Instant Pot for low-carb success (quick primer)
If you want fast, reliable low-carb dinners from your Instant Pot, think in three layers: technique (settings & timing), structure (protein + veg, not starch), and finishing (texture & safety). Below is a compact, practical primer with the exact settings you’ll use most, smart ways to thicken and finish without adding carbs, safety rules for cooling/freezing, and simple conversions so you can adapt any regular Instant Pot recipe to a low-carb plate.
Essential Instant Pot settings for low-carb mains (Meat, Poultry, Soup, Sauté)
Use these go-to buttons and timing as starting points — adjust for piece size, whether ingredients are fresh or frozen, and your model’s preset behavior. Instant Pot’s manuals and recipe pages are the best authority for exact defaults and presets. (11, 12)
- Poultry / Chicken (fresh): Poultry or Manual/Pressure Cook, High — 8–12 minutes for boneless breasts; 12–15 for bone-in pieces. Let rest 5–10 minutes after cooking for juiciness.
- Beef / Tough cuts (stew, chuck, pork shoulder): Meat/Stew or Pressure Cook, High — 30–60+ minutes depending on cut and size (pulled pork often 50–60 minutes; pot roast 45–60). Sear first with Sauté when you want a deeper crust and more flavor. (13)
- Fish / Seafood: very short high-pressure time (1–4 minutes) or use Steam / low pressure — fish cooks extremely fast; overcooking makes it dry.
- Soups & Stews: Soup or Pressure Cook, High — 8–20 minutes depending on protein size (e.g., shredded chicken 10–12; beef stew 20–25 after browning). Use manual release for short soups and natural release for big stews to preserve liquid and texture. (14)
- Sauté: Use the Sauté function before pressure cooking to brown meat, sweat aromatics (onion/garlic), and reduce liquids — it’s the single best trick to layer flavor in an Instant Pot.
Quick rule: the pressure cook timer starts after the pot reaches pressure. Built-in time for pressurizing and releasing when planning weeknight cooks.
Building good texture without starch: tricks for thickening & finishing
Low-carb cooking removes quick thickeners like flour and cornstarch — but you still want velvety soups and saucy braises. Here are low-carb-friendly techniques that keep texture rich without added carbs.
- Blend part or all of the pot.
Use an immersion blender to purée some vegetables (cauliflower, cooked onions, or cooked beans if you use them) into the broth — it thickens naturally and adds body without starch. Serious Eats’ approach to creamy vegetable soups is a great template: cook veg until fully tender, then blend to the consistency you want. (15) - Add fat for mouthfeel (cream, cream cheese, coconut milk, butter)
Finishing with heavy cream, cream cheese, mascarpone, or full-fat coconut milk gives a luxurious texture with virtually zero carbs. Add off-heat or on Sauté for 1–2 minutes to marry the sauce. (This is a classic low-carb move.) - Use xanthan gum carefully.
Xanthan gum is a powerful, flavorless thickener used in keto cooking — a very small pinch (start with 0.1–0.3% of the liquid weight) thickens quickly. It thickens even at cool temperatures, so disperse it (mix into a little oil or cold water and whisk) and add slowly while blending to avoid clumping or a gummy texture. Bob’s Red Mill and cooking guides explain safe usage and recommended ratios. (16, 17) - Cornstarch/arrowroot slurry — not carb-free but useful when you aren’t strictly keto
If you’re simply low-carb (not strictly keto) and need a glossy finish, a cornstarch slurry (1 tbsp cornstarch + 2 tbsp cold water) stirred in at the end thickens quickly — but note it adds carbs. Food & Wine explains this method well. (18) - Reduce & finish on Sauté or Broil for texture
After pressure cooking, remove the meat and reduce the cooking liquid on Sauté to concentrate flavors and thicken naturally. For a crispy finish (think pork crust, browned chicken skin), finish under a hot broiler or with an Instant Pot air-fryer / Pro Crisp lid for 1–5 minutes. That adds restaurant-style texture without extra carbs.
Practical tip: always taste and adjust seasoning after thickening — concentrated or creamy finishes often need a brightener (lemon, vinegar) to balance richness.
Safety & food-handling reminders (cooling, refrigerating, freezing)
Fast cooking is great — safety still matters. Follow these core rules to keep your low-carb Instant Pot meals safe and high quality.
- Refrigerate within 2 hours. Per USDA/FSIS guidance, refrigerate perishable leftovers within 2 hours (1 hour above 90°F) to avoid the “danger zone” (40–140°F) where bacteria multiply. Divide large batches into shallow containers to speed cooling. (19)
- Label & rotate. Use date labels. Refrigerator leftovers are generally safe for 3–4 days; freeze anything you won’t eat in that window. FSIS suggests freezing within 3–4 days for longer storage. (20)
- Freeze smart. Cool first in the fridge (don’t place very hot full pots into the freezer), then portion into airtight containers or vacuum bags. Most cooked low-carb meals keep good quality for ~2–4 months in a home freezer; leaner proteins may dry sooner, so add a bit of extra sauce or broth before freezing. (21)
- Reheat safely. Reheat to an internal temperature of 165°F (74°C). Reheat gently on the stove or microwave; add a splash of broth/cream to prevent drying and restore silkiness. If reheating from frozen, thaw overnight in the fridge or use the pot’s steam/reheat function and extend time.
Note on hot leftovers: modern guidance supports placing warm food into the refrigerator promptly rather than waiting for it to cool completely — dividing into shallow containers helps the fridge do the cooling safely. (This counters older myths about “never put hot food in the fridge.”) (22, 23)
Conversions: adapt a “regular” Instant Pot recipe to low-carb
You can convert most Instant Pot recipes to low-carb with a few strategic swaps. Follow these steps to keep flavor while ditching the carbs:
- Replace rice, pasta, and potatoes
- Swap beans (if desired)
- For chilis/stews where beans add bulk and creaminess, either omit them and increase meat and vegetables (peppers, mushrooms, eggplant) or purée a portion of cooked veggies to simulate body. For non-keto low-carb, you can use canned lentils sparingly, but beans add carbs. (26)
- Rethink thickening & sauces
- Replace flour/cornstarch roux with immersion blender, cream/cream cheese, or xanthan gum as described above. Finish on Sauté to reduce and concentrate.
- Cut added sugar in sauces
- Barbecue sauces, ketchup, and many jarred sauces add sugar. Use no-sugar or low-sugar versions, or make a quick vinegar/tomato paste-based sauce and sweeten lightly with a non-caloric sweetener (if desired). Taste and adjust acidity with vinegar or lemon to maintain brightness.
- Adjust liquid baselines
- Pressure cookers need some liquid to build pressure. Keep 1–1.5 cups of broth or water for most recipes (check your model’s minimum), then reduce on Sauté to concentrate the sauce once the main cooking is done. If you reduce starchy ingredients (rice/potatoes) that would otherwise absorb liquid, start with slightly less broth and plan to add at the end if needed.
- Timing tweaks
- Vegetables like cauliflower and greens cook quickly and can turn to mush if pressure-cooked with long braises. Add delicate veggies in the last 0–2 minutes (or steam them on a trivet) or cook them separately on Sauté while meats rest.
Quick checklist — convert any Instant Pot recipe in 5 minutes
- Remove rice/potato → add cauliflower rice or extra veg.
- Replace thickener with blending/cream/xanthan.
- Brown the meat on the Sauté first for maximum flavor.
- Use natural release for large cuts, quick release for delicate items.
- Cool and refrigerate leftovers within 2 hours.
20 Instant Pot low-carb dinner recipes (categorized)
Each stub includes: a one-line pitch, key ingredients, Instant Pot settings (pressure/time), a quick low-carb swap tip, an approximate carb count per serving, plus serving/side ideas. Two quick tips or easy variations follow every recipe. These ideas are based on trusted Instant Pot & low-carb recipe collections and food-safety guidance.
Chicken mains (6 recipes)
1. Instant Pot Lemon Garlic Chicken
- Pitch: Bright, tender chicken in a lemon-garlic sauce — shredded or served whole over cauliflower rice.
- Key ingredients: Chicken thighs or breasts, chicken broth, garlic, lemon zest + juice, oregano, salt, pepper, butter.
- Instant Pot settings: Sauté aromatics 2–3 min → Pressure Cook, High, 10 min (boneless) / 15 min (bone-in) → Natural release 5–10 min.
- Low-carb swap tip: Serve over cauliflower rice instead of couscous or white rice.
- Approx. Carbs/serving: ~3–5 g net.
- Serving/side ideas: Cauliflower rice, steamed broccoli, or a green salad with lemon vinaigrette.
Quick tips/variations
- Add capers and a splash of white wine for a piccata twist.
- For frozen chicken: increase pressure time by 4–6 minutes and allow a natural release.
2. Instant Pot Crack Chicken (Cheesy Bacon Chicken)
- Pitch: Creamy, cheesy shredded chicken loaded with bacon — a comfort classic that’s low in carbs.
- Key ingredients: Chicken breasts, cream cheese, shredded cheddar, cooked bacon, ranch seasoning, and chicken broth.
- Instant Pot settings: Pressure Cook, High, 10–12 min → Quick release → stir in cheeses & bacon on Sauté until melty.
- Low-carb swap tip: Use full-fat dairy (cream cheese/heavy cream) for richness with minimal carbs.
- Approx. Carbs/serving: ~2–4 g net.
- Serving/side ideas: Serve in lettuce cups, over zoodles, or with roasted Brussels sprouts.
Quick tips/variations
- Make it spicy: stir in a spoonful of buffalo sauce.
- Swap cheddar for smoked Gouda for a deeper flavor.
3. Instant Pot Greek Chicken Bowls
- Pitch: Herbaceous chicken with olives and feta — Mediterranean flavors, minimal carbs.
- Key ingredients: Chicken thighs, garlic, lemon, oregano, kalamata olives, cherry tomatoes (limited), feta, olive oil.
- Instant Pot settings: Sauté garlic & herbs → Pressure Cook, High, 8–10 min → quick release.
- Low-carb swap tip: Reduce tomatoes and serve on a bed of mixed greens instead of rice.
- Approx. Carbs/serving: ~4–6 g net.
- Serving/side ideas: Greek salad, cauliflower rice, or roasted zucchini.
Quick tips/variations
- Add a dollop of tzatziki (use Greek yogurt) for creaminess.
- Make it herbier: add fresh dill and parsley at the end.
4. Instant Pot Adobo Chicken Thighs
- Pitch: Filipino-style adobo with a low-sugar twist — tangy, garlicky, and great for meal prep.
- Key ingredients: Bone-in chicken thighs, soy sauce (or tamari), vinegar, garlic, bay leaves, black pepper.
- Instant Pot settings: Sear thighs on Sauté → add liquid → Pressure Cook, High, 12–15 min → Natural release 10 min.
- Low-carb swap tip: Skip added sugar in many adobo recipes; use a tiny sugar substitute or just let the vinegar balance the flavor.
- Approx. Carbs/serving: ~1–3 g net.
- Serving/side ideas: Cauliflower mash, steamed bok choy, or shredded cabbage slaw.
Quick tips/variations
- For a deeper color, brown extra on Sauté after pressure cooking.
- Add sliced chiles for heat (bird’s eye or jalapeño).
5. Instant Pot Buffalo Chicken (Shredded)
- Pitch: Quick shredded buffalo chicken perfect for salads, lettuce wraps, or low-carb sliders.
- Key ingredients: Chicken breasts, chicken broth, hot sauce, butter, ranch seasoning, celery & scallions to garnish.
- Instant Pot settings: Pressure Cook, High, 10–12 min (boneless) → Quick release → stir in butter & hot sauce.
- Low-carb swap tip: Skip carb-heavy buns — use lettuce cups or serve over roasted cauliflower.
- Approx. Carbs/serving: ~2–4 g net.
- Serving/side ideas: Romaine or butter lettuce wraps, celery sticks, cauliflower “mac” salad.
Quick tips/variations
- Make it creamy: fold in a spoonful of cream cheese or Greek yogurt after shredding.
- Temper the heat by mixing in more butter or a sugar-free BBQ sauce.
6. Instant Pot Chicken & Sausage Stew
- Pitch: Hearty, spice-forward stew with sausage and chicken — creamy when finished with cheese or cream.
- Key ingredients: Chicken thighs, kielbasa or smoked sausage (check carbs), onions, bell peppers, chicken broth, cream or cream cheese.
- Instant Pot settings: Sear sausage on Sauté → add aromatics & broth → Pressure Cook, High, 10–12 min → Quick release → finish with cream.
- Low-carb swap tip: Replace potatoes with cauliflower florets or daikon chunks.
- Approx. Carbs/serving: ~5–7 g net (depends on sausage).
- Serving/side ideas: Cauliflower mash, roasted asparagus, or a crisp green salad.
Quick tips/variations
- Add a teaspoon of smoked paprika for depth.
- For a lighter version, omit cream and finish with lemon and herbs.
Beef & pork (5 recipes)
7. Pulled Pork (Low-Carb BBQ Rub + Sugar Substitute Tips)
- Pitch: Fork-tender pulled pork with a low-sugar rub; ideal for batch cooking.
- Key ingredients: Pork shoulder, smoked paprika, garlic powder, onion powder, apple cider vinegar, sugar-free BBQ sauce, or vinegar-based mop.
- Instant Pot settings: Sear on Sauté → add 1 cup broth → Pressure Cook, High, 50–60 min (depending on size) → Natural release 10–15 min → shred.
- Low-carb swap tip: Use a sugar-free or vinegar-based BBQ sauce, or sweeten with a small amount of erythritol if desired.
- Approx.carbs/serving: ~2–5 g net (varies by sauce).
- Serving/side ideas: Lettuce wraps, coleslaw (no sugar), roasted cauliflower.
Quick tips/variations
- For crisp edges, broil shredded pork on a baking tray for 3–5 minutes.
- Make carnitas: finish in a hot skillet to crisp the edges.
8. Southwestern Pot Roast
- Pitch: Spiced chuck roast with chiles and cumin — bold flavor without starchy fillers.
- Key ingredients: Chuck roast, beef broth, ancho or chipotle chiles, cumin, oregano, garlic, and onion.
- Instant Pot settings: Sear roast on Sauté → add liquid & chiles → Pressure Cook, High, 60–75 min → Natural release.
- Low-carb swap tip: Add extra zucchini or mushrooms instead of potatoes.
- Approx. Carbs/serving: ~4–7 g net.
- Serving/side ideas: Cauliflower mash, roasted peppers, or low-carb tortillas for tacos.
Quick tips/variations
- Slice and serve with avocado and cilantro for tacos.
- Add a splash of lime at the end to brighten flavors.
9. Beef Bourguignon (Low-Carb Herb Swap)
- Pitch: Classic French braise adapted to skip flour and heavy-carb thickeners — rich and satisfying.
- Key ingredients: Chuck roast, red wine (optional small amount), beef broth, mushrooms, pearl onions (or shallots), thyme, bay leaf.
- Instant Pot settings: Sauté beef in batches → add liquids & aromatics → Pressure Cook, High, 40–50 min → Natural release → reduce on Sauté.
- Low-carb swap tip: Skip flour; thicken by blending some mushrooms or reducing the sauce.
- Approx. Carbs/serving: ~6–8 g net (mainly from mushrooms/onions).
- Serving/side ideas: Cauliflower mash, sautéed greens, or roasted radishes.
Quick tips/variations
- Use a low-carb red wine alternative or a small splash of wine plus extra broth.
- For a deeper flavor, marinate beef briefly in herbs and garlic overnight.
10. Salsa Pork Chops (Bright, Fast, Low-Carb)
- Pitch: Juicy pork chops cooked in a tangy salsa base — ready fast and naturally low in carbs.
- Key ingredients: Pork chops (thick cut), salsa (choose low-sugar), onion, cumin, lime.
- Instant Pot settings: Sear chops on Sauté → add salsa & 1/2 cup broth → Pressure Cook, High, 8–10 min → Quick release.
- Low-carb swap tip: Use homemade salsa (tomatoes + chiles + lime) or check labels for low sugar.
- Approx. Carbs/serving: ~4–6 g net.
- Serving/side ideas: Cabbage slaw, grilled zucchini, or cauliflower rice.
Quick tips/variations
- Add a slice of pepper jack on top for a melty finish.
- Finish with chopped cilantro and lime juice for brightness.
11. Spicy Shredded Beef (for Lettuce Tacos)
- Pitch: Robust shredded beef simmered with chilies and spices — excellent for low-carb tacos.
- Key ingredients: Beef chuck, chipotle or ancho chiles, cumin, garlic, beef broth, lime.
- Instant Pot settings: Sear beef → Pressure Cook, High, 60 min → Natural release 10 min → shred and reduce sauce on Sauté.
- Low-carb swap tip: Skip corn tortillas — use romaine leaves or low-carb tortillas.
- Approx. Carbs/serving: ~3–5 g net.
- Serving/side ideas: Lettuce taco shells, avocado slices, pickled onions.
Quick tips/variations
- Make a slow cooker version if you prefer set-and-forget.
- Mix in chopped roasted poblano for smoky sweetness without many carbs.
Seafood & fish (2 recipes)
12. Salmon & Mustard-Dill Steam
- Pitch: Super-fast, delicate salmon steamed with mustard and dill for a weeknight win.
- Key ingredients: Salmon fillets, lemon slices, Dijon mustard, fresh dill, white wine or broth.
- Instant Pot settings: Place salmon on trivet with 1 cup liquid → Pressure Cook, High, 1–3 min (depending on thickness) → Quick release.
- Low-carb swap tip: Serve with a lemon-butter drizzle and low-carb veg instead of grains.
- Approx. Carbs/serving: ~1–2 g net.
- Serving/side ideas: Sautéed spinach, asparagus, or cauliflower pilaf.
Quick tips/variations
- For flaky salmon, remove from pot immediately and rest 2 min.
- Use horseradish or capers instead of dill for a tangy variation.
13. Seafood Cioppino (Low-Carb Tomato Base + Zucchini)
- Pitch: A seafood stew with a lighter, low-sugar tomato base and vegetables that add bulk without carbs.
- Key ingredients: Mixed seafood (shrimp, mussels, white fish), low-sugar canned tomatoes, fennel, zucchini, garlic, and fish stock.
- Instant Pot settings: Sauté aromatics → add tomatoes & stock → Pressure Cook, High, 5–7 min → quick release → add delicate seafood and simmer on Sauté 2–3 min.
- Low-carb swap tip: Keep tomato quantity moderate and bulk up with zucchini & fennel to keep carbs low.
- Approx. Carbs/serving: ~6–8 g net.
- Serving/side ideas: Grilled eggplant slices, roasted broccoli, or a side salad.
Quick tips/variations
- Add saffron for a fragrant, luxurious twist.
- Swap mussels for clams or firmer white fish, depending on availability.
Soups & stews (4 recipes)
14. White Chicken “Chili” (Bean-Free)
- Pitch: All the comforts of chicken chili without beans — creamy, spicy, and kid-friendly with shredded chicken.
- Key ingredients: Chicken breasts/thighs, green chiles, onions, garlic, chicken broth, cream or Monterey Jack, cumin.
- Instant Pot settings: Sauté aromatics → add chicken & broth → Pressure Cook, High, 10–12 min → Quick release → shred & finish with cheese/cream.
- Low-carb swap tip: Omit beans entirely; add extra peppers and cauliflower for bulk.
- Approx.Carbs/serving: ~4–6 g net.
- Serving/side ideas: Low-carb tortilla chips, avocado slices, cilantro.
Quick tips/variations
- Make a crockpot version by extending the time and using the low setting.
- Add jalapeños or a dash of chipotle for smoky heat.
15. Tomato & Roasted Red Pepper Soup
- Pitch: Silky tomato soup brightened with roasted red peppers — finish with cream or coconut cream for body.
- Key ingredients: Canned tomatoes (no sugar), roasted red peppers, onion, garlic, basil, heavy cream or coconut cream.
- Instant Pot settings: Sauté onion/garlic → add tomatoes & peppers → Pressure Cook, High, 8–10 min → Quick release → blend until smooth → finish with cream on Sauté.
- Low-carb swap tip: Use full-fat cream rather than thickeners; check canned tomatoes for added sugars.
- Approx. Carbs/serving: ~6–8 g net.
- Serving/side ideas: Grilled halloumi, arugula salad, or a smear of basil pesto.
Quick tips/variations
- Roast your peppers for a smokier flavor.
- Stir in a spoonful of mascarpone for ultra-silky texture.
16. Cauliflower & Cheese Soup (Velvety, Low-Carb)
- Pitch: A creamy, comforting soup that’s all about cauliflower’s ability to mimic mashed potato texture when blended.
- Key ingredients: Cauliflower, chicken or vegetable broth, onion, garlic, cheddar or gruyère, heavy cream.
- Instant Pot settings: Pressure Cook, High, 6–8 min → Quick release → blend until smooth → finish with cheese & cream on Sauté.
- Low-carb swap tip: Use full-fat dairy to add richness while keeping carbs minimal.
- Approx. Carbs/serving: ~5–7 g net.
- Serving/side ideas: Crumbled bacon, chives, or roasted broccoli.
Quick tips/variations
- Make it vegan: use coconut cream and nutritional yeast.
- Top with toasted almond slivers for crunch.
17. Beef & Poblano Chili (No Beans)
- Pitch: Hearty, smoky chili without beans — full of veggies and big on flavor.
- Key ingredients: Ground beef or cubed chuck, poblano peppers, tomatoes (low-sugar), chili powder, cumin, beef broth.
- Instant Pot settings: Sauté beef → add peppers & liquids → Pressure Cook, High, 15–20 min → Quick release → reduce on Sauté if desired.
- Low-carb swap tip: Replace any beans with extra mushrooms or diced turnip for texture.
- Approx. Carbs/serving: ~5–7 g net.
- Serving/side ideas: Cauliflower rice, shredded cheddar, sliced avocado.
Quick tips/variations
- Add a square of dark chocolate (small amount) for depth.
- For extra smokiness, use a touch of liquid smoke or smoked paprika.
Vegetarian & egg-based (3 recipes)
18. Cheesy Jalapeño Egg Bites
- Pitch: Portable, high-protein egg bites that work for breakfast or a low-carb dinner.
- Key ingredients: Eggs, cottage cheese or cream cheese, shredded cheddar, diced jalapeño, bacon bits optional.
- Instant Pot settings: Pour into silicone molds on trivet with 1 cup water → Pressure Cook, High, 8–10 min → Quick release → cool slightly.
- Low-carb swap tip: Use cottage cheese or cream cheese for creaminess and low carbs.
- Approx. Carbs/serving (2-3 bites): ~2–4 g net.
- Serving/side ideas: Baby spinach salad, sliced cucumbers, or avocado.
Quick tips/variations
- Add smoked salmon and dill for a luxe version.
- Make mini muffins with cauliflower rice mixed in for extra bulk.
19. Crustless Quiche / Frittata
- Pitch: A quick, crustless egg bake filled with low-carb vegetables and cheese — dinner in one dish.
- Key ingredients: Eggs, heavy cream, spinach or kale, mushrooms, goat cheese or cheddar, and herbs.
- Instant Pot settings: Pour into oven-safe dish on trivet → Pressure Cook, High, 18–20 min (depending on depth) → Quick release → cool slightly and slice.
- Low-carb swap tip: Avoid starchy vegetables (potatoes); use zucchini, spinach, or broccoli.
- Approx. Carbs/serving: ~3–5 g net.
- Serving/side ideas: Mixed green salad, sliced tomatoes, or roasted radishes.
Quick tips/variations
- Make a mini-version in silicone muffin cups for grab-and-go meals.
- Add sun-dried tomatoes sparingly for extra flavor.
20. Instant Pot Ratatouille
- Pitch: Vegetable-forward, aromatic ratatouille that’s hearty enough to serve as a main or a side.
- Key ingredients: Eggplant, zucchini, bell pepper, tomato (moderate), onion, garlic, basil, olive oil.
- Instant Pot settings: Sauté onions & garlic → add vegetables → Pressure Cook, High, 3–5 min → quick release → finish with fresh herbs.
- Low-carb swap tip: Reduce the tomato amount and bulk up with extra eggplant and zucchini.
- Approx. Carbs/serving: ~8–10 g net (vegetable-heavy; varies by tomato).
- Serving/side ideas: Burrata or grilled halloumi, or serve atop cauliflower polenta.
Quick tips/variations
- Add olives and capers for Mediterranean saltiness.
- Finish with a splash of aged balsamic for sweetness (small amount).
Instant Pot tips for juicy meats & low-carb sides
These are the practical, high-impact techniques I use every week to get tender meat and satisfying low-carb sides from the Instant Pot — with minimal fuss. Read fast (or save as a fridge cheat-sheet): salt smart, brown hard, finish for texture, and treat cauliflower like your new starch stand-in.
Salt early vs salt late — what I recommend
Short answer: it depends — but for most whole cuts (roasts, thighs, steaks) I recommend dry-brining (salt ahead) when you can, and salting just before cooking for quick, thin pieces or ground meat.
Why? Salt does two useful things: it seasons throughout the cut via osmosis, and over time, it changes protein structure so cooked meat holds more moisture. For a big, dense cut, you’ll notice better flavor and juiciness if you salt at least 40 minutes — ideally several hours to overnight. For thin pieces or burgers, salt right before cooking to avoid a wetter surface or a dense burger texture. These guidelines come from chef-tested experiments and kitchen science writeups (Kenji/Serious Eats-style testing). (27, 28)
Practical rule set
- Large cuts (roasts, whole chicken, thick steaks): Salt 4–24 hours ahead (refrigerate uncovered if you want crisp skin). Dry brining = deeper seasoning + better browning.
- Thin cuts (cutlets, thin pork chops) & ground meat: Salt immediately before cooking. For burgers, salt right before searing. (29)
- Quick weeknight proteins in the Instant Pot: If you forgot to salt ahead, season just before sauté/pressure cooking — you’ll still get good surface seasoning and fast results. Taste and adjust at the end. (30)
Pro tips
- If you plan to finish under the broiler or with an air-fryer lid, dry-brine overnight to help develop a browning advantage when you crisp.
- Use kosher salt for even coverage (it’s easier to control than fine table salt). A light hand + tasting at the end is safer than over-salting.
Using the sauté function to caramelize/build flavor
Want restaurant-level depth from a one-pot meal? Browning is non-negotiable. The sauté function is your flavor engine: it triggers the Maillard reaction and caramelizes surface sugars so the pressure-cooked result tastes deeper, even when the cook time is short. Several Instant Pot recipe tests confirm that searing first gives a better flavor baseline. (31, 32)
How to brown like a pro (3 steps)
- Dry & season: Pat meat dry with paper towels, season (salt, pepper). Moisture = steam, and steam prevents browning.
- Preheat sauté on HIGH: Add a high-smoke-point oil (grapeseed, avocado, or light olive oil). Wait until it shimmers — a drop of water should sizzle immediately.
- Don’t crowd the pot: Brown in batches so surfaces roast, not steam. Remove browned pieces, deglaze the pot with a splash of broth, wine, or vinegar, and scrape up the fond — that browned residue dissolves into the sauce and multiplies flavor.
Timing & power notes
Most brownings take 2–6 minutes per side, depending on cut thickness. Use the Instant Pot Sauté (High) setting. If your model has LOW/MED/HIGH sauté levels, pick HIGH for fast browni, then reduce when you add aromatics.
Why deglazing matters
Never pressure-cook over scorched fond — liquid must be present to bring the pot to pressure. Always pour a little liquid in after browning, scrape the browned bits, then add the rest of the cooking liquid. That fond = concentrated, savory backbone for your low-carb gravies and stews.
Quick flavor hacks
- Toss in a spoonful of tomato paste while sautéing aromatics and let it darken a minute — instant umami.
- Add whole spices (cinnamon stick, star anise) when toasting aromatics for global flavors.
Cauliflower rice, mashed cauliflower, and veg “fries” (how to finish)
Cauliflower is the low-carb MVP — it takes texture and fat well and can replace mash, rice, and even some casserole bases. Here’s how to make it sing in and after the Instant Pot.
Cauliflower rice — fluffy, not soggy
- Cook method: You can steam florets in the Instant Pot (trivet + 1 cup water, 0–2 minutes high pressure depending on texture), then pulse in a food processor to rice. Or pulse raw florets to rice, then Sauté with a little butter/oil for 3–5 minutes to dry and flavor. Quick hands, less mush. (Many Instant Pot cauliflower rice recipes use brief pressure times or sauté finishing to avoid limp rice.) (33, 34)
- Finish: Squeeze out excess water in a towel if needed, then toss with butter, chopped herbs, lemon zest, or grated parmesan for flavor and a dry, “separate-grain” mouthfeel.
Mashed cauliflower — creamy, luscious
- Cook method: Pressure cook cauliflower florets with a clove or two of garlic for 6–8 minutes, quick release. Drain and transfer to a blender or use an immersion blender/food mill. Add cream cheese, heavy cream, butter, and salt. Blend to the desired texture. The Kitchn and Instant Pot mash recipes recommend briefly pressure cooking and then blitzing for the creamiest result. (35)
- Finish: Stir in grated cheese or chives; top with crisp bacon or toasted almond slivers for crunch.
Veg “fries” — crispy edges after pressure cooking
For veggies you want crispy (eggplant sticks, zucchini fries, or even par-cooked potato alternatives like turnip fries), pressure cook briefly to tenderize (1–3 min), then dry and finish under high dry heat — either in the oven broiler or air fryer lid — for 4–8 minutes to brown and crisp.
Pro tip: For any of these cauliflower/veg finishes, fat = flavor and mouthfeel. A spoonful of butter or a drizzle of olive oil before broiling/air-frying helps color and crisp.
How to get crisp finishes (broil/air fry after pressure cook)
The Instant Pot is great for tenderizing, not for crisping — so use a two-step approach: pressure cook first; crisp second.
You have two clear paths to crisp: transfer to your oven broiler, or use an Instant Pot model or lid with an air-fryer (Pro Crisp, Duo Crisp) function. Official Instant Pot guidance and user manuals explain how to safely switch lids and get EvenCrisp results.
Safe, effective workflow
- Finish pressure cooking and release pressure. Never attempt to place an air-fryer lid on a pressurized pot — always ensure pressure is released and the float valve is down first. Instant Pot manuals repeatedly emphasize this safety step. (36)
- Remove pressure lid & pat food dry. Excess surface moisture prevents crisping; dab sauces if you’ll be air-frying or broiling.
- Option A — Air-fryer lid (Duo Crisp / Pro Crisp): Swap to the crisping lid, set air-fry temperature (often 400°F/200°C or the manufacturer’s recommended setting), and crisp 3–10 minutes depending on item. Most Instant Pot air-fryer lids use EvenCrisp™ tech and require no extra preheating beyond manufacturer instructions.
- Option B — Broiler/oven finish: Transfer food to a baking sheet, broil 2–8 minutes (watch closely). This is ideal for crispy skin on poultry or caramelized edges on pulled pork. If broiling, rotate the pan for even color.
Examples
- Pulled pork carnitas: Shred, spread on a rimmed sheet, and broil 4–6 min to crisp the edges.
- Pressure-cooked chicken thighs: Finish under air-fryer lid on “Crisp” 4–7 min for crackly skin.
- Vegetable fries: Air fry at 400°F for 6–10 min, shaking once halfway.
Caveats & testing notes
The Instant Pot air-fryer lids vary by model — some reviewers note differences in evenness/size compared to standalone air fryers. For best results, work in single layers and don’t overcrowd the basket. Serious Eats testing and user reviews suggest the crisping feature is great for many foods, but not identical to a full-size air fryer.
Quick recap — my kitchen checklist for juicy meat + perfect low-carb sides
- Salt large cuts ahead; salt thin cuts right before cooking. Dry-brine when possible. (37)
- Always brown on Sauté (don’t skip it). Deglaze to capture the fond.
- Use cauliflower: steam/blitz for rice or mash, then dry-finish on Sauté for best texture.
- Crisp after pressure: release pressure fully, then air-fry or broil for texture. Don’t ever air-fry with the pot still pressurized.
Make-ahead, batch cooking & freezing instructions
Make-ahead cooking and smart batch-cooking are your Instant Pot superpowers — especially on a low-carb plan. Cook big batches of sturdy proteins and soups, portion them, and freeze or refrigerate for fast dinners that reheat like champs. Below you’ll find practical, safety-first strategies, timing rules from USDA/FSIS, foolproof reheating methods that avoid dryness, and container recommendations so your food keeps flavor and texture in the fridge and freezer.
Best make-ahead recipes and assembly strategies
What to cook ahead (best performers)
- Pulled/shredded meats (pulled pork, shredded chicken, shredded beef) — they reheat well, tolerate sauces, and make quick bowls or lettuce tacos.
- Soups & stews (beef stew, chilis, creamy soups) — flavors often improve after a day in the fridge.
- Egg dishes (egg bites, crustless quiche, frittatas) — great frozen or refrigerated for grab-and-go meals.
- Sauces & finishing elements (low-carb gravy, chimichurri, pesto, salad dressings) — store separately to keep textures bright.
Smart assembly strategies
- Cook in bulk, assemble later. Cook a large protein (e.g., pork shoulder) and freeze in portioned packages. When it’s dinner time, mix with a fresh low-carb side (cauliflower mash, salad) to keep meals interesting.
- Store components separately. Keep proteins, sauces, and soft vegetables (like riced cauliflower) in separate containers. This prevents sogginess and allows different reheating methods per component (stovetop for meats, microwave for veg).
- Batch two ways: make one batch ready-to-eat (fridge for 3–4 days) and one batch for the freezer for longer storage — label both with contents and date.
- Flash/prepare for freezing: cool portions, then flash-freeze on a tray (so items don’t clump) before bagging — this makes single-portion grabs easier.
Why this works: proteins and hearty soups are forgiving and reheat into good texture; delicate sides are best cooked or finished fresh for top quality.
Portion, cool, label: USDA fridge & freezer timing (cite USDA/FSIS)
Follow safety rules to keep food safe and delicious.
Cooling & refrigeration basics
- Refrigerate within 2 hours (1 hour if ambient temperature >90°F). Divide large batches into shallow containers to speed cooling — this reduces the time food spends in the temperature “danger zone.” (38)
- Use refrigerated leftovers within 3–4 days. FSIS/USDA recommends consuming cooked leftovers within that window.
Freezing & storage guidelines
Freezing keeps food safe indefinitely, but quality declines over time; Foodsafety.gov and USDA provide charts for suggested freezer storage times for best quality (use these as a guide). Label packages with date and plan to eat most frozen meals within 2–4 months for best texture and flavor. (39)
Labeling checklist (what to write)
- Dish name (e.g., “Pulled Pork — BBQ rub”)
- Date cooked/frozen (YYYY-MM-DD)
- Reheat instructions (e.g., “Thaw overnight; reheat to 165°F”)
- Portion size (e.g., “1 cup / 1 serving”)
Use a permanent marker and freezer-grade tape or preprinted labels to avoid confusion.
How to reheat without drying out (stove, microwave, oven)
Key rule: reheat gently and add moisture when needed. Always reheat to a safe internal temperature (165°F / 74°C) measured with an instant-read thermometer. (40)
Stovetop (best for stews, shredded meats, sauced dishes)
- Place food in a skillet or saucepan with a splash of broth, water, or a spoonful of sauce/cream. Cover and reheat over low–medium heat, stirring occasionally until steaming and 165°F. This restores moisture and prevents overcooking. (Works great for pulled pork, chili, and crack chicken.) (41, 42)
Oven (best for larger pieces or to preserve texture)
- Preheat oven to 275–325°F (135–160°C). Put food in an oven-safe dish, add a little liquid (broth, sauce), cover tightly with foil, and warm slowly until internal temp reaches 165°F. For shredded meats, spread on a rimmed sheet and tent with foil so edges can crisp slightly if desired. Low, slow heat prevents drying. (43)
Microwave (fastest; use technique to avoid hot/dry spots)
- Cover food with a microwave-safe lid or damp paper towel to trap steam. Reheat in 30–60 second bursts, stirring/rotating between intervals to distribute heat evenly. Finish by checking with a thermometer. For liquids (soups), bring to a rolling boil briefly. (44)
Sous-vide/water bath (best for precision & texture)
- If food is vacuum-sealed, reheat in a warm water bath set slightly below the original cooking finish temp (or set to 130–140°F for slow, gentle reheating) until warmed through — this preserves moisture and prevents overcooking. Great for steaks, chicken, and large roasts. Serious Eats and sous vide guides recommend this for top texture control. (45)
Steam revival (for rice/cauliflower rice/veg)
- Re-steam delicate sides briefly in a steamer basket over simmering water or use the pot’s steam function. Add a knob of butter or oil afterward for mouthfeel.
Practical pro tips
- Always add a little sauce, stock, or fat back before reheating.
- Reheat only what you’ll eat that sitting — repeated reheating degrades quality and safety.
- Use an instant-read thermometer to confirm 165°F for leftovers.
Freezer-friendly low-carb meal prep containers & tips
Best container types
- Vacuum-seal bags/systems — top choice for long freezer life and preventing freezer burn; pros (chefs) and consumer guides recommend vacuum sealing for maximum freshness. Vacuum-sealed cooked proteins and soups reheat well. (46, 47)
- Tempered glass airtight containers (oven-safe lids or vented microwave lids) — excellent for reheating and eco-friendly; they don’t stain or absorb odors. Many buyers and reviews list Pyrex and similar products as reliable picks. (48, 49)
- Reusable silicone freezer bags / heavy-duty freezer zip bags — flexible, space-saving, and good for flat-freezing portions. Remove as much air as possible. (50)
Container features to look for
- Freezer-safe rating and BPA-free labeling
- Airtight seals to prevent freezer burn
- Stackable shapes for organized freezers
- Microwave/oven safe (for glass) for direct reheating convenience
Freezing tips for the best quality
- Cool before freezing. Chill in the fridge first; don’t shove very hot food into the freezer (it can raise freezer temperature and degrade surrounding items). (51)
- Portion for use. Freeze single servings or family meals so you only defrost what you need.
- Flat freeze soups/cauliflower rice in flat bags so they stack easily.
- Pre-freeze tricky items (like individual egg bites or meatballs) on a sheet pan, then transfer to bags — prevents clumping. Many egg-bite and quiche recipes freeze well if fully cooled and flash-frozen first. (52, 53)
- Label clearly (see earlier) and use first-in, first-out rotation. Foodsafety.gov and USDA charts are good references for typical fridge/freezer timelines.
Foods that freeze particularly well (low-carb friendly)
- Stews, chilis, shredded meats, most soups, vacuum-sealed salmon, and egg bites/quiches (without watery veg). Cauliflower in many forms freezes well if prepped properly (uncooked riced cauliflower or blanched florets freeze best for texture). (54)
Foods to be cautious about
- High-water salads (lettuce), mayonnaise-heavy dressings (may separate), and some creamy emulsions may change texture after freezing. Reheat or reassemble fresh where possible.
Wrap-up — quick checklist (pin this)
- Cook bulk protein; portion into single-meal packs.
- Cool the food to fridge a temp within 2 hours; shallow containers help.
- Freeze in vacuum bags, glass containers, or silicone bags; label with date + reheat instructions. (55)
- Reheat gently (stovetop w/ splash, low oven covered, microwave in bursts) and always hit 165°F.
How to adapt other Instant Pot recipes for low-carb
Turning a standard Instant Pot recipe into a low-carb winner is mostly about three things: smart swaps, careful sauce/thickening choices, and tiny timing tweaks so vegetables (and proteins) end up with the right texture. Below, I give you plug-and-play swaps, exact technique notes, example conversions, and safety/timing reminders so you can convert almost any recipe in 5–15 minutes of prep decision-making.
Swap ideas: rice → cauliflower rice, potatoes → turnips / daikon (quick reference + how-to)
Why these swaps work
Rice and potatoes soak up liquid and hold structure; cauliflower, turnips, and daikon provide bulk and mouthfeel with far fewer carbs. They also take flavor well (but often need different cook methods and shorter pressure times). Use these swaps to keep the plate familiar while slashing carbs.
Plug-and-play swap table
- White/Basmati/Jasmine rice → Riced cauliflower
- Brown rice / risotto → Cauliflower “risotto”
- How to use: Pressure-cook the main dish as written, but prepare cauliflower risotto separately (sauté riced cauliflower with butter, cream, and cheese)
- Russet / Yukon potatoes (mash/steamed) → Mashed cauliflower or cooked daikon/turnip medallions
Example conversion (beef stew with potatoes → low-carb)
- Omit potatoes. Add 2 cups of cauliflower florets (add during the last 3–4 minutes of pressure cook or steam separately).
- If the original recipe relied on potatoes to thicken the stew, finish by blending 1–2 cups of the cooked cauliflower into the broth for body, or use a pinch of xanthan gum (see next section).
- Reduce the initial liquid by ~¼ cup because potatoes normally absorb more liquid. If unsure, keep the original liquid; reduce on Sauté at the end. (60)
Sauce swaps: cut sugar, use xanthan or cream for thickness
1) Cut or replace sugar in sauces
- Why: Many store sauces (BBQ, teriyaki, bottled ketchup) pack sugar; that adds carbs and can derail a low-carb plate.
- How to swap: Use a vinegar/tomato paste base + herbs + an optional low-calorie sweetener (erythritol, monk fruit) in tiny amounts. Or use a concentrated flavor booster (anchovy paste, miso, bouillon paste) so you can reduce sweet/tangy ingredients.
Example: For a BBQ braise, replace 1/4 cup brown sugar with 2 tsp apple cider vinegar + 1–2 tbsp sugar-free sweetener + smoked paprika and a little tomato paste. Taste and balance.
2) Thickening without flour/cornstarch
You have three low-carb options that are fast and reliable:
A. Blend & reduce
- Blend part of the cooked veg or meat/liquid (immersion blender) to add body naturally. This is foolproof for stews and soups.
B. Cream/cream cheese/coconut cream
- Finish hot dishes with heavy cream, cream cheese, mascarpone, or coconut cream for body and silkiness. Add off-heat or on low Sauté and whisk to combine. This is the classic low-carb thick-and-rich move. (61)
C. Xanthan gum (use sparingly)
- What it does: An extremely potent, flavorless thickener that works cold or hot and stabilizes emulsions (great for sauces). Use tiny amounts — it can go gummy if overused. Modernist and culinary guides recommend starting very low (0.1–0.3% of liquid weight; practically ~1/8–1/4 tsp per cup of liquid as a safe beginner rule). Mix xanthan into a little oil or cold liquid first, or use an immersion blender to disperse and avoid clumps. (62, 63)
Practical xanthan rule of thumb (safe starter):
Start with 1/8 teaspoon per cup (240 ml) of sauce/liquid — blend in, wait 1–2 minutes, and add more by tiny increments if needed. For thicker gravies, you might approach 1/4 tsp per cup, but don’t exceed that without testing. (If you have a scale, aim for 0.1–0.3% of the liquid weight.)
Quick demo: convert a cornstarch slurry to xanthan
- Original slurry: 1 tbsp cornstarch + 2 tbsp cold water → thickens 1–2 cups liquid (adds carbs).
- Xanthan swap: Start with 1/8 tsp xanthan + whisk into 1–2 tbsp oil or cold liquid, then blend into the hot sauce; wait 60–90 seconds — it will thicken with little to no added carbs. Adjust in 1/8 tsp increments.
Adjusting timing when cutting starches out
When you remove rice/potatoes from a recipe, you often also remove an absorber of liquid and a timing anchor. That means you must tweak both pressure times and the order you add ingredients so vegetables stay perfect.
General timing rules
- Vegetables that replace starch often cook faster (cauliflower, zucchini, spinach). Add them late — either during the final 0–5 minutes of pressure time, or cook them separately and combine. Overcooked cauliflower = mush.
- Tough proteins unchanged: Long braises (pork shoulder, chuck roast) still need the same long pressure times (30–75 min depending on size); don’t shorten those just because you removed potatoes. Instead, add veggies later. Use an Instant Pot manual or timing chart as a baseline. (64)
Practical timing patterns (examples)
- One-pot curry originally calls for potatoes:
- Pressure cook meat on original time (e.g., chicken 10–12 min, beef 30–40 min).
- After pressure release, add cauliflower florets and set Sauté 3–4 minutes (or steam 0–2 min at high pressure on trivet for a quick add). This prevents overcooked cauliflower.
- Chili that used beans & potatoes:
- Omit beans/potatoes, pressure cook meat for the same time, then add riced cauliflower or finely diced turnip and simmer 3–5 minutes in Sauté for texture. Alternatively, you can blend part of the chili to add body as a thickener.
- Risotto → cauliflower “risotto”:
- Make the protein and sauce in the Instant Pot per recipe, but prepare cauliflower risotto separately in a skillet (sauté riced cauliflower with butter/stock & cheese). This avoids both long pressure times and soggy results.
Liquid adjustment guidance
- Because rice and potatoes absorb liquid, you may safely reduce initial cooking liquid by ¼ cup to ½ cup for recipes that rely on starch to soak up broth. If in doubt, keep liquid the same and reduce on Sauté after pressure cooking — reduction is safer than under-liquifying (and you can thicken as above).
Extra practical conversion checklist (follow these 6 steps)
- Identify the starch the recipe depends on (rice, potato, pasta).
- Choose a low-carb substitute (cauliflower rice, mashed cauliflower, daikon/turnip). (65)
- Plan where to add it — late in the pressure cycle, steam on a trivet, or cook separately.
- Adjust liquids slightly (reduce ¼–½ cup) or plan to reduce after cooking.
- Pick a thickening method (blend, cream, xanthan) and have it ready for finishing.
- Taste & correct: after thickening and finishing, always taste and adjust acid (vinegar/lemon), salt, and heat — cream and fat can mute brightness.
Quick conversion examples (2 ready to use)
- Beef Stroganoff → Low-Carb Stroganoff
- Swap egg noodles → shirataki or sautéed riced cauliflower on the side.
- Omit flour; after pressure cooking beef, remove meat, set pot to Sauté, reduce broth, stir in ½ cup sour cream and 2 tbsp cream cheese off heat. Add a pinch (1/8 tsp) of xanthan if you want extra body.
- Chicken Teriyaki → Low-Carb Teriyaki Bowl
- Replace rice → cauliflower rice.
- Make teriyaki sauce with tamari + rice vinegar + a little sugar-free sweetener and a small amount of tomato paste for color. Thicken with 1/8 tsp xanthan blended into the sauce or reduce on Sauté until syrupy. Add veggies at the end so they stay bright.
Smart shopping & pantry guide for Instant Pot low-carb cooking
Stocking the right pantry turns weeknight Instant Pot recipes from “meh” into “wow” — especially when you’re eating low-carb. Below, I break the pantry into two must-have groups: staples (the building blocks you’ll use every week) and concentrated flavor boosters (the small jars and tubes that make big flavor with zero carbs). I’ll also give buying, storage, and usage tips so you get the most value and flavor from each item.
Staples: broths, nut flours, coconut milk, cream, cheeses
These are the baseline ingredients that keep low-carb Instant Pot cooking fast, flexible, and delicious.
Broths & stocks — why keep several kinds
- Keep on hand: low-sodium chicken broth, beef broth, and an unsalted or low-sodium bone broth.
- Why they matter: Broth is the default liquid for pressure cooking — it adds body and seasoning so you don’t rely on starchy thickeners. A good concentrated paste (below) is handy, but ready broth speeds set-and-forget cooking. Epicurious and cooking pros note that concentrated pastes can outperform boxed broth for flavor, but a good stocked carton is faster for busy cooks. (66)
Buy & storage tips
- Buy low-sodium versions so you control salt.
- Store cartons unopened in the pantry; refrigerate after opening and use within manufacturer recommendations (or freeze in 1–2 cup portions). Glass bottles and boxed cartons both work.
Nut flours — almond & coconut for low-carb baking & coatings
- Almond flour: the workhorse for low-carb baking and breading (lower carbs, good texture). Healthline and other nutrition resources recommend almond flour as a common keto substitute. (67)
- Coconut flour: very absorbent — great for specific recipes, but not 1:1 with almond flour. Cleveland Clinic and baking guides remind cooks that coconut flour behaves differently and needs added eggs/liquid. (68)
Buy & storage tips
- Choose blanched almond flour for baked goods (finer texture).
- Store both in the fridge or freezer for the longest shelf life — nut flours can go rancid at room temperature for months.
Canned coconut milk & coconut cream
- When to pick: buy unsweetened full-fat canned coconut milk (and coconut cream if you want ultra-rich finishes). Keto/paleo guides list canned coconut milk as a staple fat source and creamer alternative for dairy-free dishes. (69)
How to use
- Use in curries, soups, and creamy finishes (great for dairy-free cauliflower soups or Thai-style stews). Shake well or stir the separated solids into the pot for body and silkiness.
Storage
- Unopened cans keep on the shelf; once opened, transfer to a sealed container and refrigerate (use within a few days) or freeze portions for later.
Heavy cream, cream cheese & full-fat dairy
- Heavy cream / whipping cream: excellent for finishing sauces and soups — a small splash transforms texture and mouthfeel with minimal carbs.
- Cream cheese/mascarpone / sour cream: melt into stews, chili, and “creamy” soups for body and tang.
Why full-fat matters: low-carb cooking leans on fat to provide satiety and creaminess; full-fat dairy gives superior texture and minimal carbs.
Cheeses to keep stocked
- Shreddable staples: cheddar, Monterey Jack, mozzarella (for melting).
- Flavor boosters: Parmesan or Pecorino rind (save leftover rinds to simmer in broths for extra umami), feta for Mediterranean bowls.
- Soft cheeses: goat cheese or ricotta for quick finishes.
Usage tip: grate or shred in advance and vacuum-seal or freeze in small portions so cheese is ready for finishing soups, casseroles, or a quick melt on top of a bowl.
Quick shopping list (start here)
- Low-sodium chicken & beef broth (cartons)
- Canned unsweetened coconut milk & coconut cream
- Heavy cream, cream cheese
- Almond flour, coconut flour
- Shredded cheddar, grated Parmesan, feta
- Butter or ghee (high-smoke-point fat for sautéing)
Spice blends & concentrated flavor boosters (anchovy paste, bouillon pastes)
A little jar of concentrated umami goes a long way — especially in low-carb cooking where you’re relying on fats and proteins for satisfaction. These pantry micro-ingredients punch above their weight and rescue quick weeknight meals.
Anchovy paste & canned anchovies — umami without fishiness
- What it is: concentrated ground anchovies in a tube or jar; dissolves into sauces and stews. Bon Appétit and Serious Eats both praise anchovy paste as a secret weapon that adds deep savoriness without a fishy taste when used sparingly. (70, 71)
- How to use: stir a pea-sized amount into tomato sauces, braises, chilis, or pan sauces while sautéing aromatics — it amplifies meatiness and balances acidity.
- Storage: keep refrigerated after opening; paste lasts a long time and is easy to dose.
Quick ideas: Add a tiny dab to chili or bolognese, or blend into Caesar-style dressings and butter-based pan sauces.
Bouillon & concentrate pastes (Better Than Bouillon style)
- Why they’re great: concentrated flavor with long shelf life and precise dosing — one teaspoon can replace several tablespoons of broth. Epicurious and the Better Than Bouillon brand both highlight the flavor advantage of concentrated pastes over weak boxed broths. (73)
- How to use: dissolve into hot water for instant broth, or stir a small spoonful directly into stews, gravies, or sauces to deepen flavor without extra liquid. Great for finishing when you want a savory lift without extra carbs.
- Storage: jars keep well in the fridge; a little goes a long way.
Pro tip: keep an umami kit: one jar of chicken base, one jar of beef base, and a vegetable base — you’ll be able to tailor any Instant Pot dish quickly.
Other concentrated boosters to stock
- Tomato paste (tube or can): quick umami and sweetness concentrator. A small spoon caramelized in the sauté step adds instant depth. (74)
- Miso paste: adds savory depth to broths and Asian-inspired stews — add at the end to preserve probiotics.
- Fish sauce/tamari/soy sauce: salty, savory liquids for Asian profiles — use low-sodium tamari if watching salt.
- Parmesan rind: simmer a rind in broth to add long-lasting savory depth (discard before serving).
- Dried mushrooms or mushroom powder: concentrate umami in vegetarian and meat dishes. Serious Eats highlights mushroom powder as a powerful pantry booster.
Practical shopping & usage strategies (save money, boost flavor)
- Buy small, high-impact jars first. Anchovy paste, miso, and bouillon pots are cheap relative to how much flavor they add. A single jar can last months.
- Choose unsweetened & low-sodium where possible. This gives you control over final salt and sugar — particularly important for low-carb sauces and dressings.
- Freeze extras in portioned cubes. Freeze leftover broth, concentrated sauces, or coconut cream in ice cube trays so you can add a measured boost to a pan without thawing a whole can.
- Save and reuse: Parmesan rinds, roasted bones, and vegetable scraps can be made into rich broth for future pots.
- Label your “flavor jars.” Write the date opened on small jars (anchovy paste, miso) so you rotate older items first.
Quick recipe applications (how to use these pantry items in Instant Pot low-carb meals)
- Pulled pork braise: sear, then add 1 tsp beef bouillon paste + 1 tbsp apple cider vinegar + smoked paprika → pressure cook. Finish with a small broil for crisp edges.
- Creamy cauliflower soup: pressure-cook cauliflower + onion in chicken broth, blend, then finish with heavy cream and ½ tsp Better Than Bouillon (chicken) for extra depth.
- Umami boost for vegetable stews: stir in 1/2 tsp anchovy paste while sautéing garlic/onion — it melts away and deepens tomato flavors without tasting fishy.
Final pantry checklist
Essentials (buy first):
- Low-sodium chicken & beef broth cartons
- Canned unsweetened full-fat coconut milk & coconut cream
- Heavy cream, cream cheese
- Almond flour, coconut flour
- Shredded cheddar, grated Parmesan, feta
- Butter or ghee
Flavor boosters (high impact, small jars):
- Anchovy paste (tube) — tiny amount, huge umami.
- Better Than Bouillon or similar base jars (chicken, beef, veg).
- Tomato paste (tube), miso, fish sauce/tamari
- Dried mushrooms or mushroom powder, Parmesan rind
Storage & usage tips:
- Keep nut flours chilled; store opened cans in fridge; label jars with dates; freeze extra broth in cubes.
Meal plans & weekly sample menus (2 weeks, low-carb Instant Pot focus)
Below are two practical, flavorful weeks of meals built around Instant Pot low-carb dinners. Each day includes dinner (Instant Pot focused), plus simple low-carb breakfast and snack ideas, approximate net carbs for dinners, reheating notes, and swap/vegetarian options. At the end, you’ll find a consolidated shopping list, a single batch-cook day plan (what to cook first, when), and storage/reheating reminders based on FSIS/USDA guidance. Use these plans to save time, lower carbs, and eat well all week.
Week 1 — Fast, protein-first week
Notes: Target dinner net carbs are shown as approximate net carbs per serving. Calorie ranges depend on portions and added fats — typical low-carb dinners below are ~350–700 kcal depending on protein and sides.
Monday
- Dinner: Instant Pot Lemon Garlic Chicken — serve over cauliflower rice. Net carbs: ~4 g.
- Breakfast: Greek yogurt (full-fat) + a few raspberries.
- Snack: Celery sticks + almond butter.
- Reheat tip: Microwave cauliflower rice 60–90 seconds with a pat of butter; reheat chicken gently on the stovetop with a splash of broth.
Tuesday
- Dinner: Pulled Pork (low-sugar BBQ rub) — lettuce cups. Net carbs: ~3–5 g.
- Breakfast: Omelette with spinach & feta.
- Snack: Hard-boiled egg.
- Reheat tip: Reheat pork in a skillet with a splash of broth, then broil briefly for crisp edges.
Wednesday
- Dinner: White Chicken “Chili” (bean-free) — topped with avocado. Net carbs: ~5–6 g.
- Breakfast: Chia pudding (unsweetened almond milk).
- Snack: Olives + cheese cubes.
- Reheat tip: Reheat on stovetop gently; add cream at the end to revive texture.
Thursday
- Dinner: Beef Bourguignon (low-carb) — cauliflower mash. Net carbs: ~6–8 g.
- Breakfast: Cottage cheese + cucumber slices.
- Snack: A small handful of macadamia nuts.
- Reheat tip: Oven-warm at 300°F covered to preserve tenderness.
Friday
- Dinner: Instant Pot Crack Chicken (cheesy bacon) — serve in lettuce cups. Net carbs: ~3–4 g.
- Breakfast: Avocado + smoked salmon.
- Snack: Pepperoni + baby spinach.
- Reheat tip: Microwave short bursts or reheat on the stovetop with a splash of water/broth.
Saturday — Batch/family night
- Dinner: Southwestern Pot Roast with roasted veggies (make extra for freezing). Net carbs: ~6–8 g.
- Breakfast: Egg bites (make ahead).
- Snack: Cherry tomatoes + mozzarella.
- Reheat tip: Slow oven or stovetop reheat for large roast pieces; slice and crisp if desired.
Sunday — Leftovers / assemble night
- Dinner: Mix pulled pork + crack chicken + fresh veg for bowls. Net carbs vary 3–7 g.
- Breakfast: Low-carb smoothie (spinach, protein powder, almond milk).
- Snack: Pickled veggies.
- Reheat tip: Reheat components separately to preserve texture.
Week 2 — Variety & lighter seafood/veg focus
Monday
- Dinner: Salmon & Mustard-Dill Steam + sautéed asparagus. Net carbs: ~2–3 g.
- Breakfast: Scrambled eggs + sautéed mushrooms.
- Snack: Almonds.
Tuesday
- Dinner: Salsa Pork Chops + cabbage slaw. Net carbs: ~5–6 g.
- Breakfast: Greek yogurt + cinnamon.
- Snack: Cucumber + hummus (small portion).
Wednesday
- Dinner: Beef & Poblano Chili (no beans) — top with cheddar & avocado. Net carbs: ~5–7 g.
- Breakfast: Frittata slice.
- Snack: Cheese crisps.
Thursday
- Dinner: Cauliflower & Cheese Soup + side salad. Net carbs: ~6 g.
- Breakfast: Smoked mackerel + cucumber.
- Snack: A few walnuts.
Friday
- Dinner: Instant Pot Greek Chicken Bowls (serve over greens). Net carbs: ~4–6 g.
- Breakfast: Yogurt + nuts.
- Snack: Radish + herb dip.
Saturday
- Dinner: Seafood Cioppino (low-sugar base + zucchini) — serve with grilled halloumi. Net carbs: ~6–9 g.
- Breakfast: Egg bites.
- Snack: Olives + pepperoni.
Sunday — Meal prep & refresh
- Dinner: Chicken & Sausage Stew (make extra for next week). Net carbs: ~6–7 g.
- Breakfast: Leftover egg bites/yogurt.
- Snack: Celery + cream cheese.
Batch-Cook Day (ideal: Saturday morning) — what to cook and when
Goal: Cook 3–4 proteins + 2 soups and prep 1 vegetable base (cauliflower rice) to cover both weeks.
Suggested schedule (3–4 hrs):
- 00:00–00:20 — Prep: Chop veggies, season meats, set up Instant Pot(s).
- 00:20–01:40 — Cook pork shoulder (Pulled Pork): Sear (Sauté) 10 min, pressure cook 60 min, natural release 10–15 min. Shred and portion. (Makes 6–8 servings.)
- 01:00–01:40 — While pork cooks: Make Cauliflower & Cheese Soup (pressure 6–8 min), blend, finish with cream; cool and portion.
- 01:40–02:10 — Cook shredded chicken (Crack Chicken or Buffalo): Pressure 10–12 min, quick release, finish with cheese/sauce.
- 02:10–02:40 — Cook pot roast or beef stew (Southwestern Pot Roast): Pressure cook 45–60 min depending on cut.
- 02:40–03:00 — Quick sides & finishes: Pulse cauliflower into rice and sauté, make slaws/dressings, roast a tray of veg if you like.
Portioning: Use shallow containers; cool to fridge temp within 2 hours per FSIS guidance and freeze what you won’t eat within 3–4 days.
Consolidated Shopping List (core items for 2 weeks)
- Produce: cauliflower (3–4 heads or 2–3 bags riced), zucchini, asparagus, broccoli, bell peppers, onions, garlic, lemons, limes, avocados, mixed salad greens, cherry tomatoes.
- Proteins: chicken thighs/breasts (6–8), pork shoulder (3–4 lb), ground beef or chuck (2–3 lb), salmon fillets (4), sausage or kielbasa (1–2 links), mixed seafood (1–2 lb).
- Dairy & pantry: heavy cream, cream cheese, shredded cheddar, feta, almond flour, coconut milk, low-sodium chicken & beef broth, anchovy paste or bouillon paste, olive oil, butter, spices (paprika, cumin, chili powder, oregano), xanthan gum (optional), hot sauce, sugar-free BBQ or erythritol.
- Extras: lettuce for cups, low-carb tortillas (optional), nuts/seeds for snacks.
Vegetarian & allergy swaps
- Vegetarian protein: Replace meat with tempeh, tofu (press and sear), or extra mushrooms, and use vegetable broth. Use canned chickpeas sparingly (higher carb) or edamame (lower carb than many beans). Diet Doctor and Kalyn’s Kitchen have vegetarian Instant Pot options. (75, 76)
- Dairy-free: Replace cream with canned coconut milk; swap cheeses for nutritional yeast or dairy-free cheeses.
- Nut allergies: Skip almond flour; use crushed pork rinds for coatings (if not vegetarian) or coconut flour cautiously.
Reheating & safety reminders (quick)
- Refrigerate within 2 hours and use refrigerated meals within 3–4 days; freeze extras (FSIS/USDA).
- Reheat shredded meats/stews on the stovetop with a splash of broth to 165°F (74°C). For crisp edges, broil or air-fry for 2–6 minutes after reheating.
- Label freezer packs with date & dish; prioritize first-in, first-out.
Quick tips to keep carbs low & variety high
- Swap rice/pasta for cauliflower rice or extra roasted veg.
- Make dressings & sauces sugar-free (vinegar, herbs, and a touch of sugar-free sweetener if needed).
- Rotate proteins and toppings (avocado, olives, nuts) to keep meals interesting and nutrient-diverse.
FAQs
Are Instant Pot dinners suitable for low-carb?
Yes — Instant Pots excel with proteins, soups, stews, and vegetable-forward dishes that naturally align with low-carb and keto approaches. Collections and roundups from low-carb sites confirm the Instant Pot’s versatility for these diets.
How to adapt recipes for low carb in the Instant Pot?
Swap starches for lower-carb veggies, reduce added sugars in sauces, and finish with fat (cream, cheese, butter) or thickeners like xanthan if needed.
Best Instant Pot settings for low-carb meats?
Poultry/poultry manual for chicken (8–12 minutes fresh; 12 for frozen breasts), Meat/Stew for tougher cuts (30–60+ minutes depending on size), Soup for one-pot soups (timing varies). Use manufacturer manuals as a reference.
Can you make low-carb casseroles in an Instant Pot?
Yes — crustless quiches, frittatas, and “casserole” style egg bites or a layered meat & veggie bake can be pressure-cooked and finished under the broiler or with an air-fryer lid.
How to meal prep with Instant Pot low-carb dinners?
Double recipes and freeze in individual portions, cook bulk proteins (pulled pork, shredded chicken), and rotate sauces/veggies through the week for variety. Follow USDA cooling and freezing guidelines.
The Bottom Line
Pairing an Instant Pot with a low-carb approach gives you fast, flavorful weeknight dinners that scale for meal-prep and cut dependence on starchy sides — perfect for busy schedules and sensible portion control. Make safety part of the plan by cooling and storing leftovers promptly (refrigerate within 2 hours and use within 3–4 days) to keep meals safe and ready to reheat. Try one of the recipes above this week, batch-cook a protein, and you’ll see how easily “instant” and “low-carb” become a reliable, delicious routine.
Instant Pot Pro — 10-in-1 Kitchen Powerhouse (Make Dinner Easier)
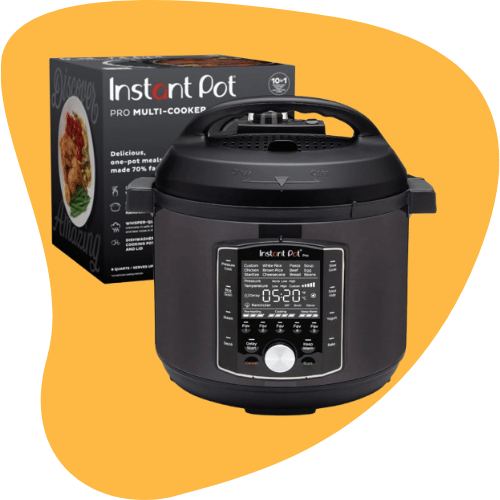
Turn chaotic weeknights into calm, delicious evenings with the Instant Pot Pro 6-Quart — a true all-in-one cooker that pressure cooks, slow cooks, sautés, sous-vides, steams, makes yogurt, sterilizes, and keeps food warm. It gives you pro-level results with minimal fuss: faster preheat and cooking times, intuitive smart programs, and a roomy 6-quart pot that handles family meals.
Cook faster and eat better with the Instant Pot Pro 6-Quart. This 10-in-1 multi-cooker pressure cooks, sous-vides, and slow cooks, and includes an app with 800+ recipes — perfect for busy families and adventurous cooks.

Turbo Speed & Game-Changing Performance — Cook Faster, Eat Sooner

Meet the COSORI TurboBlaze 6-Quart: a powerful 9-in-1 air fryer built to shave time off dinner without skimping on results. Its efficient DC motor and Turbo modes deliver noticeably faster cook times (COSORI compares this model to their prior generation), so weeknight meals finish sooner and you spend less time hovering over the stove. With a wide 90–450°F temperature range and precise heat control, you get sear, crisp, or slow-cook performance from one compact machine.
Cook faster and eat healthier with the COSORI TurboBlaze 6-Qt 9-in-1 air fryer. Precise 90–450°F heat, Turbo modes, and up to 95% less oil deliver crispy, flavorful results for family meals. Discover speed, versatility, and easy cleanup today.


I’m curious to find out what blog system you happen to be working with? I’m having some minor security issues with my latest blog and I’d like to find something more safe. Do you have any recommendations?
Nice question — thanks for asking! I’m using WordPress with the Divi theme on this blog. If you’re seeing security problems on your site, here are a few practical, high-value steps you can try right away:
– Add a firewall / CDN like Cloudflare to block bot attacks, DDoS and known WordPress exploits before they reach your site.
– Install a security plugin or monitoring service (examples: Wordfence or Sucuri)
Yeah bookmaking this wasn’t a bad determination outstanding post! .
Thanks so much — I’m really glad you enjoyed the post! I appreciate you bookmarking it. If there’s anything you’d like to see in a follow-up, let me know — I’d love to hear your ideas. 🙏💛