Best Keto Instant Pot Recipes — if you follow a low-carb or keto lifestyle, you already know the value of efficient meal prep and nutrient-dense cooking. The Instant Pot — or any quality electric pressure cooker — is a secret weapon: it shreds meats, tenderizes fibrous vegetables, and squeezes big flavor out of humble ingredients, all while saving time. This guide helps you select the best Instant Pot model for keto cooking, explains why pressure cooking is ideal for low-carb diets, and provides practical recipes and meal-prep strategies to help you enjoy clean, tasty keto meals all week.
Why Instant Pots and Keto Are a Perfect Match
If you’re doing keto, you want meals that are high in healthy fats, rich in protein and collagen, and low in carbs — and you want them fast. Enter the Instant Pot: a pressure cooker that turns tough, inexpensive cuts of meat into tender, shreddable goodness, extracts collagen-rich bone broths in hours (not days), and lets you batch-cook nutrient-dense meals with almost no babysitting required. It’s basically a time machine for low-carb cooks.
Pressure cooking’s speed isn’t just about convenience — it also helps preserve nutrients compared to long, water-heavy boiling, and it concentrates flavor, so you don’t need sugary sauces or carb-heavy fillers to make food satisfying. (1, 2)
Quick wins for keto cooks (what Instant Pots do especially well)
- Make gelatinous bone broth quickly — extract collagen, minerals, and amino acids in a fraction of the time it takes to simmer on the stovetop. (3, 4)
- Transform cheap cuts into meal-prep staples — pork shoulder, beef chuck, and whole chickens become pull-apart proteins for salads, bowls, and keto tacos.
- One-pot, low-carb dinners — cook protein + vegetable + flavorful fats together, then portion and track macros.
- Energy + time savings — pressure cooking is often much faster than slow simmering, freeing up evenings for life (not stirring a pot). (5, 6)
Why does that matter on keto?
Keto isn’t just about cutting carbs — it’s about replacing calories with the right fats and keeping meals satiating.
Collagen and fatty broths are hugely useful: they add texture, electrolytes, and fullness without carbs. The Instant Pot accelerates the extraction of those components, so you can make a week’s worth of broth or shredded meat in a single afternoon instead of spending a full day (or paying for expensive store-bought broth).
A realistic note on expectations
Not every single “broth in two hours” claim is identical — chefs and nutrition writers still recommend longer cooks (up to 12–24 hours) for the richest, most gelatinous bone broths when using traditional simmering; pressure cooking shortens that time a lot, but results vary by bone type and method. If you want max gelatin, you might still opt for longer pressure-cooker cycles or combine roasting + a multi-hour pressure cycle. (7, 8)
For anyone on a low-carb or ketogenic plan, the Instant Pot is one of the most practical appliances you can own: it saves time, helps you lock in flavor and nutrients, and makes batch cooking simple. In the sections that follow, I’ll show which models and features matter for keto cooks, practical recipe timings, and meal-prep strategies so your week of low-carb meals is effortless and delicious.
How Pressure Cooking Works — The Science
Pressure cooking sounds like kitchen alchemy, but it’s mostly straightforward physics plus trapped steam. In a sealed pot, the steam can’t escape, so pressure rises. Higher pressure raises the boiling point of water, which lets the liquid inside the pot reach temperatures well above 100°C (212°F). Higher temperature + steam = much faster breakdown of connective tissue in meat, faster softening of vegetables, and quicker extraction of compounds (like collagen from bones). Modern electric pressure cookers (Instant Pot style) automate the pressure, heat, and safety features, so you get the speed without the old-school anxiety. (9, 10)
Pressure + temperature basics
- What actually changes: In an open pot, water can’t get hotter than its boiling point at the given altitude. In a sealed pressure cooker, the trapped steam increases pressure inside the vessel, which raises the boiling point of water — so the liquid (and everything in contact with it) reaches higher temperatures than plain boiling, accelerating chemical reactions that cook food. That’s the same reason a pressure-cooked roast can be fork-tender long before an oven-roasted one is. (11, 12)
- Electric vs stovetop pressure: Stovetop pressure cookers can typically achieve higher maximum pressures (commonly ~15 psi) than many electric multi-cookers, which often run at slightly lower pressures for safety and convenience. Lower pressure still gives big time savings, but it’s why some professional chefs prefer stovetop models for certain tasks. Electric models trade a little top-end pressure for automation, presets, and safety interlocks.
- Practical outcome for cooking: Higher temp = faster collagen breakdown (collagen → gelatin), faster starch gelatinization (good for beans/roots), and faster denaturation of proteins (so meats firm up and become tender faster). That’s why pressure cooking is so effective for tough cuts, beans, and bone broths. (13)
Why shorter cook times matter for nutrients
- Time often beats temperature for nutrient retention. Many water-soluble vitamins (like vitamin C and B vitamins) and some phytonutrients are sensitive to time and heat. Shorter cooking times usually mean less leaching and thermal degradation — so even though pressure cooking uses higher temperatures, the much shorter exposure often preserves more nutrients than long boiling. Studies and reviews comparing methods (boiling, steaming, microwaving, pressure cooking) generally show pressure cooking performs as well as — and often better than — conventional boiling, with results depending on the specific vegetable or nutrient. (14)
- Not one-size-fits-all: Different foods react differently. For example, some research found pressure-cooked spinach lost fewer nutrients than boiled spinach when cook times were shorter, while microwaving sometimes outperformed both for specific antioxidants. In short: method + time + food type = outcome. For keto cooks, the upshot is that pressure-cooking broths and meats rapidly extracts collagen and minerals without long simmer times, and pressure-steamed or -cooked low-carb vegetables often retain texture and nutrients better than long, watery boiling. (15)
- Flavor matters for adherence: Beyond vitamins, pressure cooking concentrates flavor — less water, more taste — which helps keep keto meals satisfying without needing carb-heavy sauces or sweeteners. Better flavor → better diet adherence, which is a real (if indirect) nutritional win. Sources summarizing nutrient and antioxidant outcomes emphasize both the chemistry and practical cooking times. (16)
Safety basics
- Read the manual first: Modern electric pressure cookers have multiple safety interlocks, but the manufacturer’s instructions matter. Typical safe-practice guidance includes checking the gasket, not overfilling, using the recommended minimum liquid, and ensuring vents are clear before pressurizing. Always follow the model’s instructions for maximum fill levels — fatty foamers like beans or starchy dishes can clog vents if overfilled. (17, 18)
- Pressure release methods affect results and safety: You’ll see three common release methods: natural release (let pressure drop on its own), quick release (open the valve to vent steam), and cold-water release (mainly for some stove-top canner tasks). Quick-release throws out a lot of hot steam fast — good for vegetables you don’t want to overcook, but it’s vigorous and can spray. Natural release is gentler and often recommended for large roasts or bone broth to avoid splatter and to let gelatin finish setting. Choose the release method the recipe (and your appliance manual) recommends.
- Canning warning — Instant Pot is not a pressure canner: Important safety note if you’re thinking of canning low-acid foods (meats, vegetables): most small electric multi-cookers, including popular Instant Pot models, are not approved for pressure canning. USDA/National Center for Home Food Preservation guidance and extension services advise using a tested pressure canner that can hold the required number of jars and sustain the USDA-specified pressures for safe low-acid canning. Don’t substitute your countertop appliance for a proper pressure canner. (19)
- Common troubleshooting & safe habits: If you see a “burn” warning or uneven cooking, it’s often due to insufficient liquid or thick sauces stuck to the bottom — deglaze the pot after sautéing and add the minimum recommended liquid. Replace worn gaskets and keep valve openings clear. Use a meat thermometer to confirm safe internal temperatures before serving. These simple habits cut down on errors and keep pressure cooking fast and safe.
Bottom-line practical tips for keto cooks: always use enough liquid to reach pressure but not so much that you dilute flavors; brown proteins on sauté mode first when you can (it builds flavor); use natural release for bone broths and big cuts; and never use your electric multi-cooker for water-bath or low-acid pressure canning. These small steps keep your meals tasty, nutrient-dense, and safe.
Benefits of Pressure Cooking on Keto
Pressure cooking and the keto diet are a natural power couple. Pressure cooking turns humble ingredients into nutrient-dense, high-fat, low-carb meals quickly — which is exactly what most keto eaters want. Below, I break down the four biggest wins for keto cooks and give you practical tips you can use today.
Quickly tenderizes meats & fibrous veggies.
Pressure cookers speed up the breakdown of collagen and connective tissue by cooking at higher temperatures than plain boiling (because the trapped steam raises the boiling point). That means cheap, fatty cuts — pork shoulder, beef chuck, oxtail — become fork-tender and shreddable in a fraction of the time it takes in an oven or on the stove. You get a melt-in-your-mouth texture without babysitting a pot for hours. (20)
Why that’s huge for keto: those tougher, fattier cuts are gold for ketogenic macros — they’re inexpensive, full of fat and collagen, and make batches of shredded meat you can use all week (bowl, salad, taco wrap). Pressure cooking turns them into convenient, repeatable staples.
Quick tips:
- Sear on Sauté first (if your model has it) — browning adds Maillard flavor that pressure alone can’t build.
- Typical timings: chicken breasts 8–12 min, thighs 10–12 min, pork shoulder 45–60 min for 2–3 lb pieces (adjust for size). Use natural release for large roasts to keep juices.
Locks in nutrients and flavor
Pressure cooking usually uses less water and less time than boiling. That combination reduces the leaching and thermal breakdown of water-soluble vitamins and many phytonutrients — so pressure-cooked vegetables and broths often keep more of their nutrition compared with long, water-heavy methods. Reviews and clinical summaries consistently place pressure cooking among the better methods for nutrient retention.
On the flavor side: because you’re using less water and the pot is sealed, volatile aromatics and fat-soluble flavor compounds stay in the pot. That concentrated flavor means you’re less likely to reach for sugar, starchy thickeners, or carb-heavy sauces to make a dish satisfying — a practical win for keto adherence.
Quick tips:
- Use just enough liquid to reach pressure — too much dilutes flavor.
- Deglaze after searing to capture browned bits; this prevents burn errors and locks in taste.
- For delicate vegetables, use short high-pressure bursts (or steam) to avoid mushiness and preserve nutrients.
Saves time and energy for busy meal-preppers
Pressure cookers dramatically cut cook time — that’s obvious — but they’re also energy-efficient. Modern electric multi-cookers use less total energy than an oven or multiple stovetop burners for the same job. That’s both greener and cheaper if you’re batch-cooking keto meals regularly. For busy people who want to eat well, saving hours and lowering energy use makes it much easier to stick to low-carb goals. (21, 22)
Practical payoff: one afternoon of pressure-cooking can produce shredded meat, bone broth, and a steamed vegetable side that feeds you for several meals — freeing evenings and cutting down on food waste.
Quick tips:
- Cook full batches (8-quart or 6-quart, depending on household) and portion into meal-prep containers.
- Use the low-power Keep Warm sparingly — it’s convenient but uses energy over long periods; prefer refrigeration for multi-day storage.
Makes bone broth, collagen, and nutrient-dense broths faster
Bone broth is a keto superfood: collagen, glycine, minerals, and electrolytes all in one cup. Traditional simmering can take 12–24+ hours for full extraction; pressure cooking shortens that to a few hours while still yielding gelatinous, nutrient-rich stock. Pressure converts collagen to gelatin efficiently because of the higher temperature + moisture under pressure, which accelerates extraction. Many cooks report equal or better body and mouthfeel from pressure-broths vs long-simmered ones.
Practical approach:
- Roast bones first for deeper flavor (optional).
- Add a splash of acid (1–2 tbsp apple cider vinegar) to help draw minerals.
- Pressure-cook chicken bones ~90–120 min; beef bones 120–240 min, depending on the bones and desired body. Use natural release for the best clarity and gelatin. (23, 24)
Quick tips:
- Keep knuckles, marrow bones, and joint pieces for the most gelatinous result.
- Chill and skim fat if you prefer lower visible fat; keep the fat if you need extra calories on keto.
- Freeze in single-serving portions — broth is an easy electrolyte boost when you’re low on sodium or feeling keto flu symptoms. (25)
Wrap-up: practical checklist
- Search first for flavor.
- Use minimal liquid — less dilution, better nutrient retention.
- Pick natural release for big cuts and broths to keep texture and clarity.
- Batch and portion to save time and energy over the week.
Keto Cooking Needs: What Makes a Model “Keto-Friendly”?
If you cook keto regularly, an Instant Pot isn’t just another gadget — it’s a workhorse that must do a few specific things really well. Below, I break down the exact features that make an electric pressure cooker genuinely useful for low-carb meal plans, with practical tips so you know what to look for when buying (or upgrading).
Sauté power — why browning matters more than you think
Want juicy, flavorful shredded pork or a deeply savory stew? Searing first is where the magic starts. The Instant Pot’s Sauté (or “Brown”) mode lets you caramelize meats and aromatics right in the insert so that all that concentrated Maillard flavor stays in the pot instead of washing down the drain. That step is especially important on keto, since flavor — not carbs — has to carry the meal. Models with stronger, more even sauté heat will brown faster and with less sticking; weak sauté modes can leave you frustrated and create extra cleanup. (26, 27)
Practical buying tip: if you like recipes that start with a sear (most keto stews, carnitas, pork shoulder), prioritize models reviewers praise for sauté performance — test notes often call this out. If your model’s sauté is weak, you’ll still get good results, but you might prefer searing in a skillet first.
Sealed pressure — consistent, reliable pressure control
“Keto-friendly” cooking often means extracting collagen (broth) and getting tough cuts silky — both rely on consistent pressure and tight seals. Modern multi-cookers vary in how aggressively they pressurize; electric models trade a bit of top-end pressure for automation and safety, but what matters most is consistency and the ability to hold pressure without frequent error codes. A model that struggles to build or hold pressure will produce uneven texture and waste time.
Practical buying tip: look for models with multiple pressure levels (high/low) and solid user reviews about steady pressurization, especially if you plan long bone-broth or big-cut cooking sessions. Tech reviews that include hands-on testing will flag pressure stability.
Capacity — pick the right size for meal-prep success
Size matters. The “best” pot depends on whether you’re batch-cooking broths and pulled meat for the week, or just making single-meal sides:
- 3-quart — great as a second, space-saving pot for sides, eggs, or single portions.
- 6-quart — the sweet spot for most keto households (feeds 2–5 and fits most recipes unmodified).
- 8-10 quart — ideal if you batch broil bones, roast whole squashes, or cook for a family. (28, 29)
Practical buying tip: if you’re on keto and plan to make bone broth or big roasts regularly, err toward an 8-quart so you don’t end up doing multiple batches. If counter space is limited and you mainly cook for one or two, a 3-qt plus a 6-qt (or just a 6-qt) covers most needs.
Easy-clean — because fatty, collagen-rich foods can be messy
Keto cooking often uses fatty cuts and broths that leave residue and odors. A “keto-friendly” Instant Pot should be easy to clean and maintain: removable stainless steel inserts (dishwasher-safe), lids that disassemble for washing, and a sealing ring that’s easy to remove and clean (or swap). Odor-holding sealing rings are a common annoyance; routine cleaning or having spare rings for sweet vs savory will save you headaches. Guides from reputable food sites show quick methods — vinegar soak, steam-clean cycles, or rotating rings — that keep smells at bay. (30)
Practical buying tip: check user comments about how the lid and valves disassemble (some newer models make it simpler). Buy at least one extra sealing ring if you plan to switch between broths and desserts frequently.
Presets — convenience without losing control
Presets (bone broth, meat/stew, soup, rice, yogurt) are lifesavers for busy cooks — they simplify common keto tasks, especially for beginners. That said, experienced cooks sometimes prefer manual modes for precision. The ideal “keto-friendly” model gives you both: useful, tested presets plus manual pressure/temperature control so you can tweak time and pressure for collagen extraction or delicate vegetables. Recent hands-on reviews recommend models that balance smart presets with customizable settings.
Practical buying tip: if you love set-and-forget batch jobs, prioritize models whose bone broth and meat presets get consistently positive review notes. If you tweak recipes often, make sure the model exposes pressure level and time adjustments easily.
Quick checklist — is this model keto-friendly for you?
- Strong, even sauté heat for browning? ✔️
- Reliable pressure hold with high/low options? ✔️
- Capacity that matches your batch-cooking needs (6 qt = most users)? ✔️
- Easy-to-clean lid, dishwasher-safe inner pot, and spare sealing rings? ✔️
- Helpful presets plus manual control for advanced tweaks? ✔️
Top Instant Pot Models for Keto Cooking — Detailed Picks
Pressure cookers vary a lot — and for keto cooks, some differences matter more than others (sauté power, pressure stability, capacity, and extras like air-fry lids or Wi-Fi). Below, I break down the top Instant Pot models most useful for low-carb kitchens, with features, pros/cons, best uses, and an easy “quick pick” table so you can decide fast.
Instant Pot Pro (Best overall) — Features, pros/cons, best uses
Why it stands out: The Instant Pot Pro is widely recommended by testers as the best overall multi-cooker: strong sauté/browning performance, consistent pressure control, and a useful set of cooking modes that matter for keto (bone broth, meat/stew, sauté, sous-vide). Serious Eats and other reviewers praise its searing ability and reliable pressure behavior — useful when you want great braises, gelatinous broths, and well-seared shredded meats.
Key features
- Powerful sauté that browns evenly (helps build flavor before pressure cooking).
- Multi-function: pressure cook, slow cook, sauté, steam, sous vide, yogurt.
- Stainless steel inner pot, good safety interlocks, and solid build.
Pros
- Excellent searing & flavor development for braises and carnitas.
- Consistent pressure for reliable texture (important for collagen extraction).
- Good balance of price and performance for home cooks.
Cons
- Slightly pricier than the basic Duo models.
- No built-in air-fry function (requires a separate crisping lid if you want to air-fry).
Best uses (keto)
- Bone broth & collagen extraction (long pressure cycles).
- Large batch of shredded pork or beef for meal prep.
- Braised keto stews and one-pot casseroles.
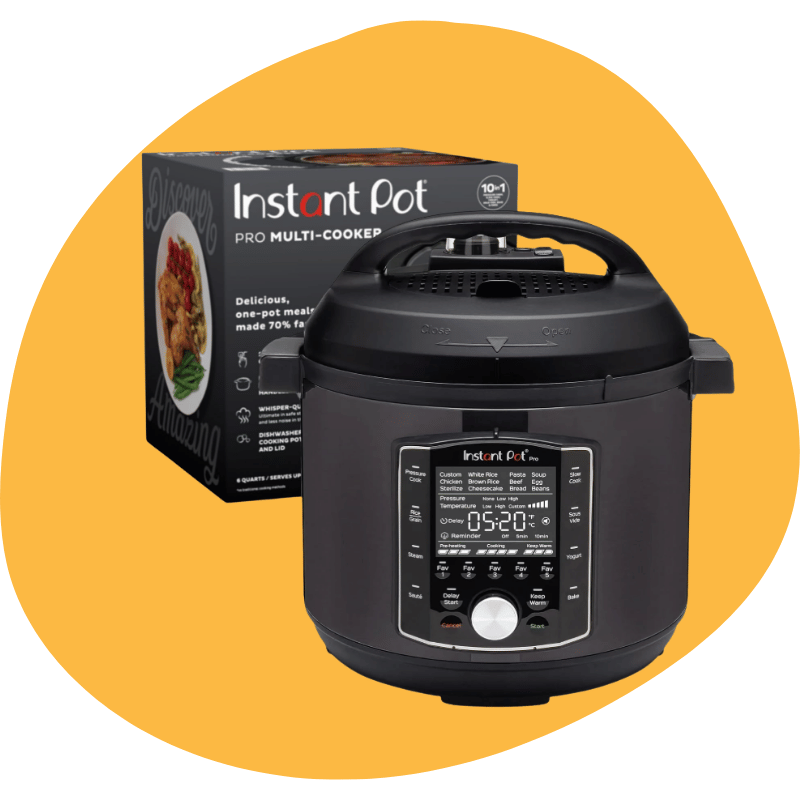
Instant Pot Pro 10-in-1 (6 Quart) — pressure cooker, slow cooker, rice/grain cooker, steamer, sous-vide, yogurt maker, sterilizer, and warmer.
Precise control for healthy cooking: sous vide and homemade yogurt preserve nutrients and textures.
Save time and space — replaces multiple appliances, reduces dishes, and speeds up cooking.
App included with 800+ guided recipes and built-in safety features for easy, worry-free cooking.

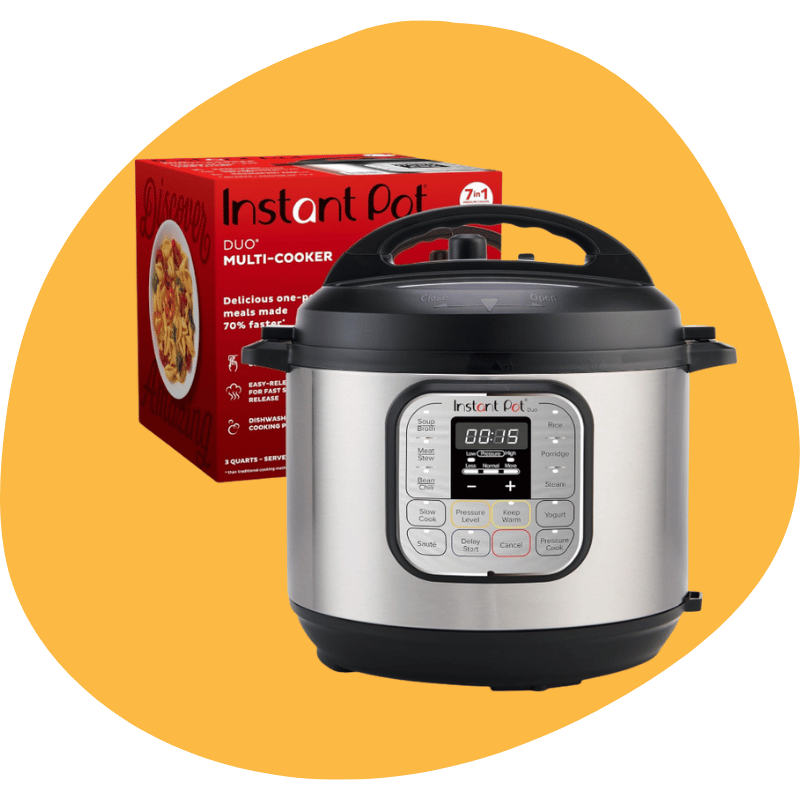
Instant Pot Duo (Best value/beginner)
Why it stands out: The Duo (and Duo Nova variant) is the classic, entry-level Instant Pot — affordable, simple, and reliable for everyday pressure-cooking. Reviewers and buying guides recommend the 6-quart Duo as the best value for most home cooks, especially beginners who want straightforward presets for soups, meat, and steaming.
Key features
- Basic but useful presets: Soup/Broth, Meat/Stew, Rice, Steam, Sauté.
- 6-quart size is commonly recommended as the sweet spot for families and meal prep.
Pros
- Great price-to-features ratio — affordable and versatile.
- Easy to use for beginners; strong community and plentiful recipes.
Cons
- Sauté performance is good but not as strong as Pro series — you may prefer pan-searing for deep browning.
- Fewer advanced/custom features and no Wi-Fi.
Best uses (keto)
- Everyday keto dinners: shredded chicken, soups, steamed vegetables.
- Beginners building a meal-prep routine who want reliable results with minimal fuss.
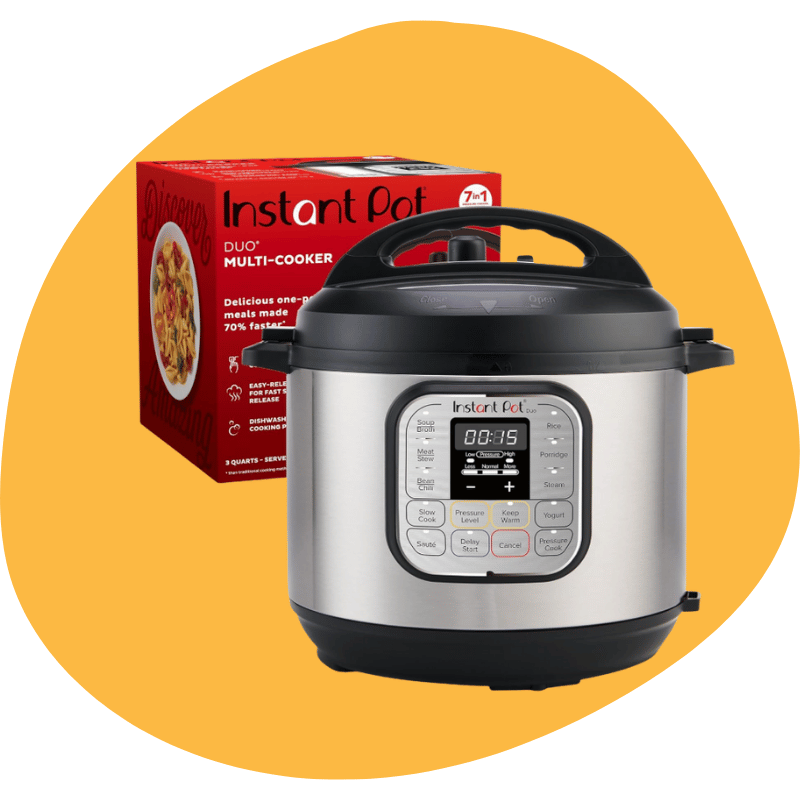
Instant Pot Duo 7-in-1 (6 Quart) — electric pressure cooker, slow cooker, rice cooker, steamer, sauté, yogurt maker, warmer & sterilizer in one stainless steel unit.
Delivers precise, consistent results for healthy meals — gentle steaming and yogurt-making preserve nutrients and texture.
Saves time and counter space by replacing multiple appliances and reducing cleanup.
Includes app with 800+ guided recipes and built-in safety features for easy, worry-free cooking.
Instant Pot Duo Crisp / Pro Crisp (Air-fry + pressure)
Why it stands out: If you want pressure cooking and crispy finishes without a second appliance, the Duo Crisp (or Pro Crisp) pairs a pressure-cooker base with an air-fry (crisping) lid. That’s perfect for keto cooks who want pressure-tender meats and then a quick crisp on the skin or a crunchy topping. Reviews praise the versatility — pressure cook, then switch lids to air-crisp.
Key features
- Two-lid system: pressure lid + air-fry/crisping lid.
- Many models include rotisserie, broil, and bake-like functions with the crisping lid.
Pros
- True 2-in-1: pressure + air crisp without buying two appliances.
- Excellent for keto textures — tender inside, crispy outside (think pork belly, skin-on chicken).
Cons
- Larger footprint and heavier (air-fry lid adds weight and height).
- Pricier than basic pressure-only models.
Best uses (keto)
- Pork belly, crispy-skinned chicken, keto “breaded” air-fried cutlets (using almond-flour crust).
- Re-crisping leftovers or adding texture to casseroles after pressure cooking.
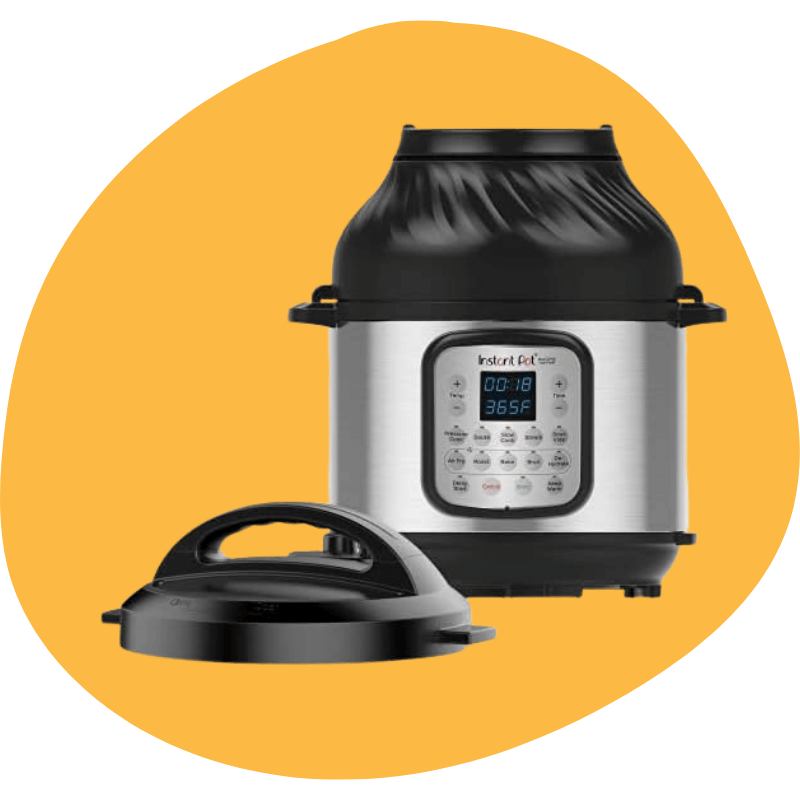
Instant Pot Duo Crisp 11-in-1 (8 Qt) — pressure cooker, air fryer, roast, bake, dehydrate, sauté, sauté and more in one powerful unit.
Pressure cooking speeds things up; the air-fryer function delivers golden, crispy finishes without extra oil.
Includes genuine Instant Pot tempered glass lid (10″ / 26 cm, 8-Quart) for added versatility and easy serving.
Saves counter space, cuts cleanup, and gives consistent, restaurant-style results for family-size cooking.
Instant Pot Pro Plus / Wi-Fi models (Smart features)
Why it stands out: The Pro Plus brings Wi-Fi, an app with guided recipes, and touchscreen controls for cooks who like remote monitoring and recipe integration. Reviews note that the smart features are helpful (step-by-step guidance and remote monitoring), and the Pro Plus also offers strong cooking performance — some versions even reach higher pressure levels used by advanced cooks. Tom’s Guide and Wired reviewed the Pro Plus as a premium, feature-rich smart option.
Key features
- Wi-Fi app control + guided recipes.
- Touchscreen controls and expanded presets (NutriBoost, sous-vide, etc.).
- Good heating and sauté performance; some Pro models pressure at higher PSI.
Pros
- Remote control & recipe integration — handy for busy households.
- Advanced presets designed for nutrient retention (NutriBoost) and texture control.
Cons
- Higher price point (you pay extra for smart features).
- Some reviewers caution that the app’s recipe quality varies — treat it as a convenience, not gospel.
Best uses (keto)
- Cooks who batch-prep and like to start/monitor cooks remotely.
- People who value guided programs and want “set and forget” control with more advanced modes.
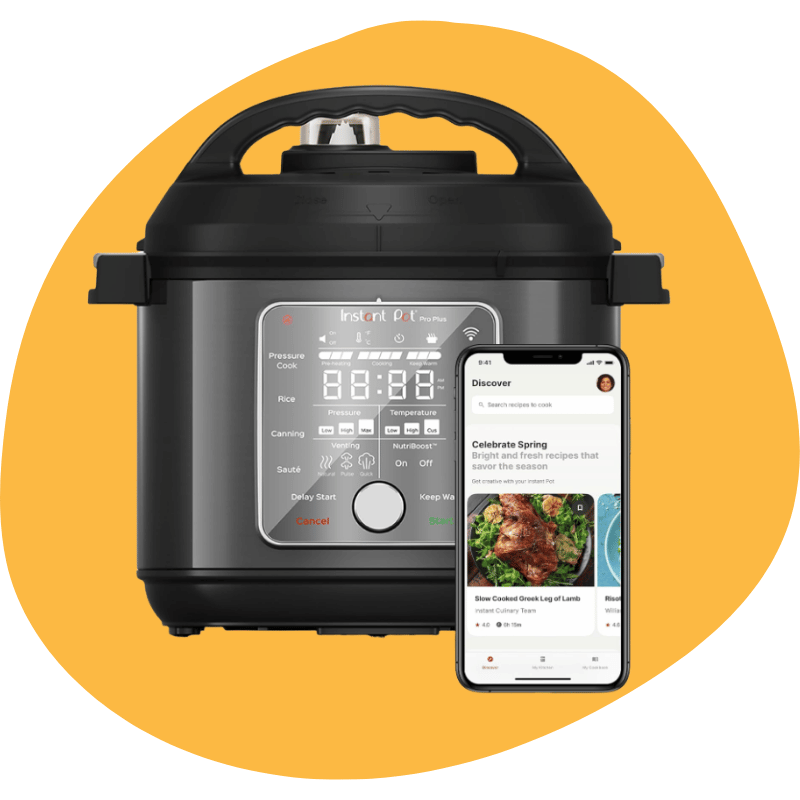
Instant Pot Pro Plus Wi-Fi Smart 10-in-1 (6 Quart) — pressure cooker, slow cooker, rice cooker, steamer, sauté pan, yogurt maker, warmer, canning pot, and sous-vide with smart Wi-Fi control.
Wi-Fi connectivity and companion app (800+ recipes) let you start, monitor, and adjust cooks remotely for consistent results.
Precise temperature control for delicate sous-vide and safe canning, plus versatile sauté and steam for healthy meals.
Saves counter space, reduces cleanup, and includes built-in safety features for worry-free, chef-quality cooking at home.
Mini & Large-capacity options (3-quart, 6-quart, 8-quart)
How to choose size: Capacity matters for keto meal-prep. Most reviewers and buying guides recommend the 6-quart as the versatile sweet spot for most households; a 3-quart is a good secondary pot for single servings or sides; an 8-quart is recommended if you make large batches of broth or cook for a family. Epicurious, Instant Pot’s product info, and hands-on buyers’ guides all echo this sizing advice.
Practical notes
- 3-quart: Great for limited counter space and single-serving work (eggs, small sides).
- 6-quart: Best for most keto cooks — fits a 3–4 lb roast or standard bone-broth batch.
- 8-quart: Ideal for large bone broths, whole roasts, or families who meal-prep weekly. Adjust liquid amounts per model instructions.
Instant Pot Duo 7-in-1 Mini (Stainless Steel) — pressure cooker, slow cooker, rice cooker, steamer, sauté, yogurt maker, warmer & sterilizer; available in 3-, 6- and 8-quart sizes.
Compact yet powerful: perfect for small kitchens, singles, or families who want full-size results without the bulk.
Speeds up meal prep, reduces dishes, and delivers consistent, hands-off cooking for soups, grains, and yogurt.
Includes a free app with 1,900+ guided recipes and built-in safety features for easy, confident cooking.
Tip: Instant Pot documentation suggests you don’t usually change pressure-cook times between sizes, but you must increase liquid amounts for larger pots (and avoid overfilling).
Quick pick table (short specs + who each model is for)
| Model | Typical capacity | Standout feature | Best for |
|---|---|---|---|
| Instant Pot Pro | 6 qt (also 8 qt) | Strong sauté, reliable pressure control | Home cooks who want top flavor and consistent braises/broths. |
| Instant Pot Duo / Duo Nova | 6 qt (also 3/8/10 qt) | Best value, easy presets | Beginners and budget shoppers; everyday keto dinners. |
| Instant Pot Duo Crisp / Pro Crisp | 6–8 qt | Pressure + air-fry (crisping lid) | Keto cooks who want crispy finishes without a second appliance. |
| Instant Pot Pro Plus (Wi-Fi) | 6 qt | App control, guided recipes, advanced presets | Techy cooks who want remote monitoring & recipe guidance. |
| Mini (3-qt) | 3 qt | Compact, space-saving | Singles / couples who want a second small pot for sides. |
| Large (8-qt) | 8 qt | Big capacity for bone broth & batch cooking | Families and heavy batch-preppers. |
Short buying advice (quick summary)
- If you want the best all-around performance for keto (searing, broths, multi-mode): Instant Pot Pro.
- If budget and simplicity matter, the Instant Pot Duo (6-qt) is the reliable starter pick.
- If you want crisp texture + pressure cooking: Duo Crisp / Pro Crisp — excellent for pork belly and keto “fried” textures.
- If you value app control and guided cooking, Pro Plus (Wi-Fi) — handy, but you pay for the smart features.
Buying Guide: What to Look For
When you’re buying an Instant Pot (or any electric multi-cooker) for a keto kitchen, you’re not just picking an appliance — you’re choosing a weekly meal-prep partner. Below, I break down the five decision areas that move the needle most: capacity, power & heating, presets & smart features, accessories & safety parts, and warranty/value. Each section has actionable tips so you can compare models quickly and confidently.
Capacity & family size
Pick the pot size that matches how often you batch-cook and how many mouths you feed.
- 3-quart — best as a second pot or for singles/couples who cook small sides, eggs, or single servings. Good for tight counters.
- 6-quart — the sweet spot for most people. Fits 3–4 lb roasts, standard bone-broth batch, and most family recipes; widely recommended by reviewers and manufacturers as the “do everything” size.
- 8–10 quart — choose this if you routinely make large bone broths, whole roasts, or batch-cook for a family or meal-prep week. Bigger pots let you do one big batch instead of multiples, saving time.
Practical tip: when in doubt, size up one step if you have the counter/storage space — you can always cook smaller portions in a larger pot, but a too-small pot forces multiple batches.
Wattage, performance & heating speed
Wattage affects how fast your cooker heats, how well it sears in Sauté mode, and how quickly it reaches pressure.
- Typical range: Most multi-cookers draw roughly 700–1200 watts, with common 6-qt models around 900–1,000W. Higher wattage models generally heat and reach pressure faster and deliver stronger sautéing performance. (31)
- Why it matters for keto: Strong sauté power gives you a better sear (more Maillard flavor) before pressure cooking — an inexpensive shortcut to more satisfying, savory low-carb meals. Faster heat-up also reduces total cook time for quick weeknight meals.
Practical tip: if you plan heavy searing or frequent large batches, favor models that reviewers praise for sauté strength and faster come-to-pressure times.
Presets, programmable features & app connectivity
Features that save time should still let you keep control.
- Presets (bone broth, meat, soup, steam, yogurt): Useful for beginners and busy cooks — they remove guesswork for common keto jobs (broths, stews, shredded meats). Look for bone broth and meat/stew presets that reviewers confirm work well.
- Manual controls: Advanced users want adjustable pressure, time, and sauté temperature — a must if you tinker with collagen-extraction times or do delicate vegetables.
- Smart features & apps: Wi-Fi or app control (Pro Plus and similar models) can be handy for remote starts, guided recipes, and push notifications — useful when you’re juggling errands and meal prep. Don’t buy into the hype: smart features add convenience but cost more; prioritize cooking performance first.
Practical tip: if you want “set-and-forget” convenience, pick a model with reliable presets; if you enjoy tweaking recipes, confirm the model exposes manual pressure/temperature controls.
Accessories, lids, sealing rings & safety features
Small parts matter for longevity, food safety, and low-maintenance keto cooking.
- Sealing rings: These silicone rings absorb odors over time (especially from broths and curry). Many brands recommend replacing them every 12–18 months, or sooner if you notice smells — it’s wise to buy a spare ring (or color-code rings: one for savory, one for sweet).
- Lids & valves: Removable, easy-to-clean lids and accessible steam valves reduce “burn” errors and make maintenance simpler. Read user notes about how easily the lid disassembles. (32)
- Inner pot material: Stainless steel (tri-ply bottom) is preferable for searing and longevity versus nonstick inserts that scratch. Most mid- to high-range models use stainless steel inserts.
- Accessories to consider: steam basket/trivet, glass storage jars, extra sealing rings, silicone mitts, and (if you want crisping) an air-fry/crisping lid. The Duo Crisp / Pro Crisp bundles the crisping lid for those who want pressure + crisping in one unit.
- Safety features: modern electric multi-cookers include multiple interlocks, pressure sensors, and automatic shut-offs. Check reviews and safety listings (UL/ULC) in product specs.
Practical tip: get at least one extra sealing ring and wash/dry rings regularly (vinegar soak or dishwasher) to limit cross-flavor and extend ring life.
Warranty, price vs longevity
A longer warranty and reputable support matter because this is an appliance you’ll use several times a week.
- Standard warranty: Instant Pot brand typically offers a 1-year limited warranty on new appliances; some sellers or models may offer extended coverage or retailer promotions. Always check the manufacturer’s warranty page and retain your proof of purchase. (33, 34)
- Price vs longevity: Higher-priced models often add better build quality (stronger motors, stainless components, advanced presets) and sometimes longer support. That said, the basic Duo remains a durable, budget-friendly workhorse for many homes. Look at hands-on reviews and consumer feedback for durability signals.
Practical tip: balance upfront cost with features you’ll actually use. If you’ll use air-fry features weekly, the Duo Crisp may pay off; if not, a Pro or Duo gives better value for core pressure-cooking needs.
Quick buying checklist
- Do you need a 6-qt or an 8-qt for weekly batch cooking? ✔️
- Does the model have ≥900W and good sauté reviews? ✔️
- Are there bone broth & meat presets and manual control? ✔️
- Can you buy extra sealing rings, and are the parts easy to clean? ✔️
- Is the warranty acceptable (usually 1 year), and is customer support reputable? ✔️
Keto Instant Pot Recipes
Below are tight, Instant Pot recipes and smart tips tailored for keto cooking: timings, step-by-step methods, texture notes, and meal-prep ideas. I keep each recipe practical (no fluff), include reliable timing ranges, and cite reputable sources so you can trust the timing and technique.
Rich Bone Broth & Meaty Soups — recipe, tips, timing
Why it’s great for keto: Bone broth is liquid gold on keto — collagen, glycine, minerals, and electrolytes in an easy cup. Pressure-cooking extracts collagen much faster than long stovetop simmers. (35, 36)
Ingredients (6–8 cups finished)
- 2–4 lb mixed bones (knuckles, marrow, necks, feet, or a roasted carcass)
- 1 large onion, quartered
- 2 celery stalks, roughly chop
- 2 carrots, rough chop (optional — for flavor; discard for very low-carb)
- 2 tbsp apple cider vinegar (helps extract minerals)
- 1–2 bay leaves, 6–8 peppercorns, a few sprigs of thyme or parsley stems
- Cold water to cover (~3/4 full of the inner pot)
Method (Instant Pot)
- Optional: roast bones 30–45 min at 425°F for deeper flavor (skip if short on time).
- Put bones, vegetables, vinegar, and seasonings in the pot; add water to just cover (do not exceed max fill). Wipe rim dry, lock lid, set valve to Sealing.
- Pressure-cook on High for 120 minutes (2 hours) for chicken; 120–240 minutes for beef/mixed bones, depending on how gelatinous you want it. Allow natural pressure release (NPR) for 10–20 minutes, then quick release if needed. Strain and cool.
Timing notes & variations
Chicken bones: ~90–120 min often yield good gelatin. Beef/marrow/joint bones: 120–240 min for maximum body. Some cooks repeat shorter pressure cycles to build gelatin (prolonged total time improves body). (37)
Tips for keto cooks
- Chill and skim fat or reserve fat (tallow, schmaltz) to add to meals for extra calories.
- Portion into single-serving jars (1 cup) for quick electrolytes or soups.
- Freeze in flat bags to save space and thaw quickly.
Shredded Chicken or Pork (for tacos, bowls) — recipe + timing
Why it’s great for keto: Shredded proteins are meal-prep staples — mix with keto sauces, pile on greens, or use in low-carb tortillas. Instant Pot makes them fast and juicy. (38, 39)
Shredded Chicken (breasts or thighs) — Total time ≈ 20–30 min (plus pressurizing)
Ingredients (serves 4)
- 2 lb boneless chicken breasts or thighs
- 1 cup chicken broth (or water + 1 tsp bouillon)
- 1 tsp salt, 1/2 tsp pepper, 1 tsp smoked paprika (or taco seasoning)
- 1 tbsp olive oil or butter (optional, for sauté)
Method
- Sear chicken quickly in Sauté mode (optional) for color.
- Add broth, nestle chicken in liquid, lock lid, set to High Pressure 8–10 minutes for breasts, 8–12 minutes for thighs (thighs slightly more forgiving). Let NPR 8–10 minutes, then quick-release any remaining pressure. Shred with forks and toss with 1/4 cup reserved cooking liquid to keep moist. (40)
Tips
- For frozen chicken, add ~5–8 minutes to cook time (check manufacturer guidance).
- Save the cooking liquid — it’s great for thinning sauces and keeping meat juicy.
Shredded Pork / Carnitas — Total time ≈ 60–90 min
Ingredients
- 3–4 lb pork shoulder (boneless), cut into 2–3 large chunks
- 1 cup chicken broth or water
- 1 tbsp oil, 1 tbsp cumin, 1 tbsp oregano, 2 tsp salt, 1 tsp pepper, zest of 1 orange (optional)
- 2–3 cloves of garlic, 1 onion sliced
Method
- Sear pork chunks on all sides in Sauté mode to brown.
- Add broth and aromatics, lock lid, High Pressure 30–60 minutes depending on cut and chunk size (many tested recipes work in 30–45 min for small chunks; larger shoulders up to 60 min). Let NPR 10–15 minutes for best shredding. For extra crispy carnitas, spread shredded pork on a tray and crisp under a broiler or in an air-fryer lid for a few minutes. (41, 42)
Tips
- If you want super-shreddable pork with deep pull-apart texture, 45–60 min on high with a full NPR is safest.
- Reserve some cooking liquid to re-moisten meat for bowls or lettuce wraps.
Cauliflower “Risotto” / Mashed Cauli — recipe + texture tips
Why it’s great: Cauliflower makes a creamy, low-carb risotto or mash that feels indulgent but keeps carbs low. Instant Pot gives an even texture fast. (43)
Cauliflower “Risotto” (serves 4)
Ingredients
- 1 large head of cauliflower, cut into florets or 4–5 cups riced cauliflower
- 1 tbsp butter or olive oil
- 1 cup low-sodium chicken broth
- 1 cup sliced mushrooms (optional), 1/4 cup grated Parmesan or mascarpone, salt & pepper, 1 clove garlic minced
Method
- Use Sauté to soften mushrooms and garlic in butter. Add cauliflower rice or florets and toss for 2–3 minutes.
- Pour in 1 cup broth, lock lid, High Pressure 2–6 minutes depending on desired bite (2–3 minutes for florets/riced cauliflower for al dente; up to 6 minutes if you want very soft). Quick release. Stir in cheese/cream and finish with parsley. (44)
Texture tips
- Use shorter pressure for better tooth-feel; quick release stops carryover cooking.
- For ultra-creamy mash, blend a portion with cream cheese or butter using an immersion blender. Add beaten egg yolk or mascarpone for richness (watch temperature if adding egg).
One-pot keto casseroles & frittatas — recipe + how to convert
Why it’s great: One-pot egg bakes, frittatas, and casseroles are perfect for protein-packed breakfasts or reheatable dinners. They scale well and are easy to meal-prep. Instant Pot can steam a springform or oven-safe dish with consistent results. (45, 46)
Simple Instant Pot Frittata (6–8 servings)
Ingredients
- 10 eggs, 1/2 cup heavy cream or full-fat coconut milk
- 1–2 cups cooked keto vegetables (spinach, mushrooms, peppers), 1 cup shredded cheese, salt & pepper, cooked bacon or sausage chunks
Method
- Whisk eggs + cream + seasoning. Stir in fillings. Grease a 7-inch springform or oven-safe dish.
- Pour mixture into pan, cover loosely with foil. Add 1 cup of water to the pot, place the trivet, and lower the pan onto the trivet. Lock lid, High Pressure 8–12 minutes (many recipes use ~10–12 minutes) and NPR 10 minutes to finish gently. Remove, cool slightly, slice, and serve. (47)
Conversion tips (from slow cooker/oven recipes)
For slow-cooker casserole (8 hours low), convert to ~10–12 minutes high pressure with NPR — but always test with your pan size. Instant Pot cooks eggs faster; too-long pressure = rubbery eggs.
Serving & storage
Slice into portions, refrigerate up to 4 days, or freeze slices for quick breakfasts. Reheat gently to avoid drying.
Keto dessert in Instant Pot (cheesecake, custard)
Why it’s useful: Yes — Instant Pot makes excellent low-carb cheesecakes and custards because steam/pressure gives a creamy, stable texture without high oven heat. Great for special occasions when you want dessert on keto. (48, 49)
Instant Pot Cheesecake (6–8 servings)
- Ingredients (crustless or almond-flour crust)
- 16 oz (450 g) cream cheese, room temp
- 2/3 cup sugar substitute (erythritol/xylitol monk fruit blend) or to taste
- 2 eggs + 1 yolk, 1/3 cup sour cream, 1 tsp vanilla, optional almond crust
Method
- Beat cream cheese + sweetener until smooth, add eggs one at a time, then sour cream & vanilla. Pour into a greased 7-inch springform pan. (For crust: press almond flour + butter + sweetener into pan.)
- Add 1 cup of water to the Instant Pot, place the trivet/sling, and lower the pan on the trivet. Lock lid, High Pressure 30–40 minutes (many recipes use 35 minutes), then NPR 10–20 minutes before removing. Chill at least 4 hours (overnight is best).
Custard / Crème brûlée-style (single-serve ramekins)
Pressure-cook ramekins 8–13 minutes on high with NPR 10 minutes (times vary by recipe and depth). Check for set edges and a slightly jiggly center.
Tips for keto desserts
- Use a tested sugar substitute that tolerates heat (erythritol blends or monk fruit blends recommended).
- Chill fully before unmolding; pressure cookers set custards quickly, but chilling develops texture.
Quick Meal-Prep & Macro Tips
- Portion control: weigh cooked proteins into 4–6 oz servings and add measured fats (1 tbsp olive oil / 1 tbsp butter ≈ , 100–110 kcal) when tracking macros.
- Reheating: reheat gently (microwave, short bursts, or stovetop) to preserve texture; add a splash of broth when reheating shredded meats.
- Storage: broth 4–5 days refrigerated (or freeze), shredded meats 3–4 days refrigerated, frittata 4 days refrigerated.
Instant Pot vs Stovetop & Slow Cooker
Quick snapshot: pressure cookers (Instant Pot-style electric multi-cookers) cook much faster than slow cookers and often faster than stovetop braises, while delivering tender meats, concentrated flavor, and good nutrient retention for many foods. Which one you should use depends on time, texture goals, and the dish. Below, I break it down so your keto meal plans win every time.
Cooking time & texture differences
- Pressure cooker (Instant Pot-style): Uses trapped steam and higher internal temperatures to break down collagen fast — tough cuts (pork shoulder, beef chuck, oxtail) become shreddable in 30–90 minutes instead of many hours. That means you can get week-prep quantities of pull-aparts and rich stews on a weeknight.
- Stovetop braise/oven roast: Great for slow dry-heat flavor development (browned crust, caramelized edges) and subtle texture control. Stovetop/oven methods often produce a different mouthfeel — drier exterior, deeper roast aroma — but take more time and attention.
- Slow cooker (Crock-Pot): Hands-off and forgiving — ideal for all-day simmering and hands-free cooking. However, vegetables can get mushy, and broths tend to be thinner compared with pressure-cooked stock; slow cookers won’t give you quick results. Use it when you want minimal babysitting and time isn’t an issue. (50, 51)
Practical rule: Use pressure cooking when you need tender texture fast; use slow cooker when you prefer “set-it-and-forget-it” and have the time; use stovetop/oven when you want surface browning or roasting character that pressure alone can’t create.
Convenience features (pre-sets, timers)
- Instant Pot / electric multi-cookers: Offer presets (soup, meat, bone broth, steam), programmable timers, Keep-Warm functions, and often sauté mode so you can brown and pressure-cook in one pot. Smart models add app control and recipe guides for extra convenience. These features make them extremely user-friendly for busy keto cooks who batch-prep.
- Stovetop: No presets — full manual control. Good for cooks who like to monitor and tweak temperature and finish (and for searing/roasting tasks).
- Slow cooker: Simple dials or low/med/high timers; extremely easy but less flexible than an electric multi-cooker for quick mode switching (sauté → pressure → air crisp). (52)
Practical tip: If you value “one pot” workflow — sauté to brown, then pressure for tenderness, then optionally crisp with an air-fry lid — an Instant Pot Duo/Pro/Crisp-style model combines convenience and texture control in a single appliance.
Nutrient retention & flavor
- Nutrients: Research reviews and nutrition experts show that pressure cooking often preserves more water-soluble vitamins and reduces nutrient loss versus prolonged boiling because cook times are much shorter, though steaming can sometimes be best for some veggies. In practice, pressure cooking strikes a strong balance: it tenderizes and concentrates flavor while often maintaining good nutrient levels compared with long simmering. (53)
- Flavor: Because pressure cookers use less liquid and stay sealed, volatile aromatics and fat-soluble flavors concentrate in the pot. That makes broths richer and one-pot meals more intensely flavored — a big win for keto, where fat and flavor must do the heavy lifting.
Practical tip: For delicate vegetables, use short pressure bursts or steam to avoid mushiness and preserve both texture and nutrients; for broths and meats, pressure cooking usually gives richer results faster.
When to use which
Use the table below as a quick decision tool.
| Goal / Dish | Best Choice | Why |
|---|---|---|
| Fast tender shredded meat (weeknight) | Instant Pot / pressure | Tender in 30–90 min; great for meal-prep. |
| Deeply roasted flavor & crispy exterior | Stovetop → oven | Maillard crust & dry-heat aromas pressure won’t fully replicate. |
| All-day, hands-off simmering (low attention) | Slow cooker | “Set-and-forget” for long stews; gentler on some cuts. |
| Best nutrient retention for delicate greens | Steaming (or short pressure steam) | Minimizes leaching and thermal loss. |
| Making rich bone broth fast | Instant Pot / pressure | Extracts collagen & flavor much faster than stove/slow cooker. |
| Canning low-acid foods | Neither — use a USDA-approved pressure canner | Most countertop electric multi-cookers (including many Instant Pot models) are not safe for pressure canning. Follow extension/USDA guidance. |
Final practical takeaways
- Speed vs. slow flavor: Pressure = speed + tenderness; stovetop/oven = deeper roast aroma; slow cooker = convenience + long, gentle cooking.
- Nutrients: Pressure cooking generally keeps more nutrients than prolonged boiling and concentrates flavor — steaming still edges out pressure for some veggie nutrients.
- Safety note: Don’t pressure-can in a standard countertop multi-cooker unless the manufacturer and USDA/extension guidance explicitly approve it. Use a tested pressure canner for home canning low-acid foods. (54)
Meal-Prep Strategies & Batch Cooking on Keto
Batch-cooking is the keto cook’s secret weapon: one focused session turns raw ingredients into a week of low-carb, high-fat meals that save money, time, and decision fatigue. Below, I’ll walk you through practical strategies for batching broths and shredded meats, portioning macros reliably, safe storage & reheating that preserves texture, and Instant-Pot-specific freezer tips so your meals taste fresh all week.
Batch broths, shredded meat, portioning macros
Batch broths — why and how
- Why: Broth is a fast electrolyte/electrolyte booster on keto and a versatile base for soups, sauces, and reheating shredded meats without drying them out.
- How to batch: Make 4–8 cups per batch, depending on pot size. Use a mix of marrow/knuckle/joint bones for gelatin. Roast bones for deeper flavor (optional), add acid (apple cider vinegar) to help extraction, and pressure-cook 90–240 minutes, depending on bone type and desired gelatin. Cool, skim (or keep) fat, then portion.
- Portioning idea: Store broth in 1-cup (250 ml) jars for quick cups or 2-cup jars for recipes.
Batch shredded meat — core rules
- Choose the right cuts: Pork shoulder, beef chuck, whole chicken, and bone-in thighs are ideal — they’re fatty, inexpensive, and shred well after pressure cooking.
- Cook once, use many ways: One batch can become tacos (lettuce cups), bowl protein, soup add-ins, or salad toppers.
- Timing (rule of thumb): Smaller chicken pieces = ~8–12 min high pressure; pork shoulder = 30–60+ min depending on size; beef chuck = 45–60 min. Always use natural pressure release for large cuts to retain moisture. (Adjust per your appliance manual.)
- Finish for texture: After shredding, toss with a little reserved cooking liquid or fat to keep moist.
Smart portioning & tracking macros
- Weigh, don’t guess: Use a kitchen scale and weigh cooked portions (e.g., 100–150 g cooked protein per meal). Cooked weight is what counts in most macro apps.
- Record once, reuse often: Create a “meal template” in your tracking app (MyFitnessPal, Cronometer) for each batch (e.g., “Shredded Pork — 120 g = Xg protein, Yg fat”). That saves time during the week.
- Include added fats: On keto, added fats (butter, ghee, olive oil) move the macros. Measure fats when portioning (1 tbsp = 1 serving of added fat for tracking).
- Labeling: On each container, put: contents | date cooked | cooked weight or portions | quick macro note (e.g., “120 g = 30P / 18F”).
Storage, reheating, preserving texture
Fridge & freezer safety (practical guidance)
- Refrigerator: Store cooked meats, soups, and casseroles 3–4 days. Bone broth: 3–4 days refrigerated (or longer if you keep it very cold and well-sealed).
- Freezer (best quality): Most cooked meats and broths keep quality 2–6 months (fatty broths and fatty cuts tend to freeze very well). Label with date and use the oldest first.
- Cooling tip: Rapidly cool hot foods in shallow containers so they hit refrigeration temperature quickly — that preserves quality and safety.
Best container types
- Glass jars (mason) — great for broth and sauces; they stack and don’t absorb odors.
- BPA-free plastic containers — lightweight and safe for short-term fridge use.
- Vacuum seal or heavy-duty freezer bags — best for long-term freezer storage and space saving (lay flat to freeze).
- Silicone molds/portion trays — perfect for freezing fat cubes or single-serving broths.
Reheating without drying
- Low & gentle: Reheat on low heat on stovetop or use microwave at 50–70% power in short bursts. For meats, add 1–2 tbsp broth or fat per portion to rehydrate and keep silky.
- Avoid overcooking: Reheating at too high heat makes proteins dry and cauliflower sides mushy — a short steam or quick skillet finish works best.
- Crisp restoration: If you want crispy edges after reheating frozen shredded pork or chicken, spread it thin on a baking sheet and blast under a hot broiler or in an air-fryer/air-fry lid for 3–6 minutes to reintroduce texture.
Texture rescue tips
- Cauliflower & vegetable: If they get soggy after freezing/reheating, reheat uncovered in a hot skillet or air-fryer to evaporate excess water and restore bite.
- Soups & stews: They often taste better the next day — reheat gently and stir in fresh herbs, citrus, or butter to enliven flavor.
- Frittatas & egg bakes: Reheat low and slow (oven at 300°F / 150°C or microwave at medium) to avoid rubbery eggs.
Freezer-friendly Instant Pot tips
Plan your batch session for maximum output (example 2–3 hour Sunday session)
- Start bone broth first (longest cook): roast bones (optional) → Instant Pot for broth 2–4 hours.
- While broth cooks, prepare and sear pork shoulder or beef chuck; pressure-cook (30–60 min).
- Use pot space & steam: Steam/pressure-cook cauliflower, eggs, or vegetables on a trivet while meat brines (2–6 min depending on vegetable).
- Finish with quick items: make mashed cauliflower or a frittata using a springform or stackable pans. Portion, cool, label, and store.
Freezer portioning hacks
- Single-serving flat bags: Portion cooked meat into individual servings and freeze flat — they thaw quickly in cold water.
- Broth cubes: Freeze broth in silicone ice cube trays (1–2 tbsp portions) for quick sauce-thinning or to add flavor during reheats.
- Fat coins: Freeze rendered tallow or ghee in small silicone molds for measured fat additions to meals.
Thawing safely and efficiently
- Preferred: thaw overnight in the fridge.
- Faster: submerge sealed bag in cold water (change water every 20–30 min) until pliable, then reheat immediately.
- Microwave: Use the defrost setting only if you’ll reheat immediately.
Avoiding common freezer problems
- Freezer burn: remove as much air as possible (vacuum seals help) and use freezer-safe containers/bags.
- Flavor transfer: double-wrap strongly flavored foods or store them separately to prevent cross-flavoring.
- Ice crystals: often caused by partial thaw/refreeze — keep a steady freezer temp and rely on portioning to avoid partial thawing.
Quick 7-day Instant-Pot Keto Meal-Prep sample
Sunday session (approx. 2–3 hours):
- Make 6–8 cups of bone broth (pressure 2–3 hours). Portion into jars (3×2-cup jars + single-cup jars).
- Cook 3–4 lb pork shoulder (45–60 min). Shred and divide into 6 portions (vacuum seal/zip).
- Steam/pressure cauliflower (2–4 min) and mash with butter & cream cheese; divide into 4–6 containers.
- Make a frittata (10 min pressure + NPR) and cut into 6 slices for breakfast.
Week usage idea:
- Mon/Wed/Fri dinners: shredded pork + cauliflower mash + greens.
- Tue/Thu lunches: shredded chicken (from separate batch) over salad + broth cup.
- Weekends: use leftover broth for soups or fast stews.
Pro tips to level up your batch cooking
- Label like a pro: content | cooked date | thaw-by date | reheating note (e.g., “microwave 60-90s, add 1 tbsp broth”).
- Macro cheatsheet: keep a small printable that tells you the cooked weight → macro mapping for each batch (e.g., “100 g shredded pork = X P / Y F”) — calculate once and reuse.
- Rotate flavors: change finishing sauces and herbs rather than proteins to avoid boredom (chimichurri one day, garlic-butter another).
- Keep a “rescue box”: jars of olives, canned fish, hard cheeses, and pickles for fast add-ons that keep plates interesting and keto-friendly.
Timing & Conversion Charts
Pressure-cooker timing is one of the best shortcuts for busy keto cooks — but it requires a few clear rules to ensure you don’t overcook or undercook. Below is a practical guide you can drop into a blog post or print as a cheat sheet: a quick timing chart for common proteins and vegetables, plus a reliable method for converting slow-cooker recipes to pressure-cooker times.
Quick chart for common proteins & vegetables
Times below are pressure-cook times (the cooker’s timer starts after full pressure is reached). Times assume High Pressure on most electric multi-cookers (Instant Pot style). I add the recommended release method (NPR = natural pressure release; QR = quick release). Always follow your appliance manual for max fill and liquid minimums. For reference charts from the manufacturer and tested guides, see the Instant Pot timing tables and conversion guides. (55, 56)
Proteins (High pressure)
| Food | Cut / Size | Pressure time (min) | Release |
|---|---|---|---|
| Chicken breasts | Boneless, 1–2 in thick | 8–10 | NPR 5–10 min, then QR. |
| Chicken thighs | Boneless | 8–12 | NPR 5–10 min. |
| Whole chicken | 3–5 lb | 25–30 | NPR 10–15 min (rest helps juices redistribute). |
| Pork shoulder / Boston butt | 2–4 lb chunks | 45–60 | NPR 10–20 min for shredding. |
| Pork loin | Lean roast, 2–3 lb | 20–25 | QR or short NPR (lean—don’t overcook). |
| Beef chuck roast | 2–4 lb | 45–60 | NPR 10–15 min for tender shredding. |
| Beef short ribs / oxtail | Large pieces | 40–60 | NPR 10–15 min for best texture. |
| Ground meat | 1–2 lb (in sauce) | 5–8 | QR (already cooked; timing for flavors/heat-through). |
Vegetables (High pressure — most on 0–3 minutes)
Quick-cook vegetable often uses very short times because pressure build + release does much of the work; many cooks use 0 minutes for broccoli/cauli (builds pressure, then QR) to avoid mush. For guidance on zero-minute tricks and short bursts, see Instant Pot vegetable timing guides. (57, 58)
| Vegetable | Cut/Size | Pressure time (min) | Release |
|---|---|---|---|
| Broccoli florets | Medium florets | 0–1 | Quick release (QR). |
| Cauliflower (florets / riced) | 1–2 in florets or riced | 0–3 | QR for bite; 3 min for softer mash. |
| Green beans / asparagus | Whole / trimmed | 0–2 | QR. |
| Carrots | 1/2 in slices | 1–3 | QR or short NPR for slightly softer. |
| Butternut squash / winter squash | 1–2 in cubes | 4–6 | QR for firmer pieces; 6 for very soft. |
| Root veg (turnip, rutabaga) | 1 in cubes | 6–8 | QR or short NPR. |
Notes:
- The cooker build time (time to reach pressure) often adds 8–15+ minutes (depends on volume and model) — factor that into “total” meal time. Manufacturer’s tables list cook times after pressure builds.
- For very tender results, prefer NPR for large cuts and gelatin-rich broths; use QR for quick vegetables to stop carryover cooking. See NPR/QR guidance below.
Converting slow-cooker recipes to pressure-cooker times
Pressure cooking is not a simple “time-slice” of a slow cooker — it’s a different method. But you can convert reliably with a few sensible rules:
Rule-of-thumb conversion (fast reference)
- Slow cooker: 8 hours on LOW → Pressure cooker: about 25–30 minutes on HIGH (plus pressurizing & release time).
- Slow cooker: 4 hours on HIGH → Pressure cooker: about 12–15 minutes on HIGH.
- These are handy starting points — dense roasts and large joints often need longer (30–60 min) to reach shreddable tenderness. Multiple reputable guides and recipe converters use ~25–30 min as the typical conversion for an 8-hour low slow-cooker recipe. (59)
Step-by-step conversion method (recommended)
- Evaluate the ingredients: If the slow-cooker recipe mostly cooks meat (tough cut) + liquid → it’s a good candidate. If it relies on dairy, delicate vegetables added late, or thickened condensed soups, adapt (see step 2). (60)
- Omit or delay delicate ingredients: Dairy and quick-cooking vegetables shouldn’t be added at the start. Add after pressure cooking or use short QR/NPR as appropriate.
- Reduce liquid slightly: Slow cookers lose less liquid over time; pressure cookers need a minimum of 1 cup (250 ml) of liquid to create steam — but overall, you can often reduce recipe liquid by ~25% (don’t go below your model’s minimum).
- Pick an initial cook time from the chart: If the slow recipe says 8 hours low, try 25–30 minutes on high pressure for small/medium chunks; for large roasts, choose 45–60 minutes and expect longer NPR.
- Use the release method to control texture:
- Large cuts & bones: NPR (10–20 min).
- Quick vegetable or delicate seafood: QR.
- Thick stews: short NPR (5–10 min) to minimize splatter.
- Adjust for frozen meat: If converting a slow-cooker frozen-meat recipe, increase pressure time by ~50% (or use manufacturer guidance) — but best practice is to thaw if possible. (Instant Pot and recipe guides note frozen cooking is possible, but requires a longer time.) (61)
Example conversions
- Pot roast (8 hr low slow cooker) → try 45–60 min high pressure (depending on roast size), NPR 10–15 min.
- Beef stew (8 hr low slow cooker) → 25–30 min high pressure for 1–1.5 in cubes; QR or short NPR.
- Pulled pork (8 hr low) → 45–60 min high pressure for whole shoulder pieces; NPR 10–15 min.
Extra timing & conversion tips
- Build-time matters: Remember, the cook timer begins after pressure is reached. A 30-minute pressure cook can actually take 45–75 minutes total once you add pressurizing and release time. Manufacturer tables explicitly note this.
- Use zero-minute hacks for quick vegetables: For broccoli/cauliflower, many recipes use 0 minutes (the pot reaches pressure and you immediately QR) to avoid overcooking — this is widely used by recipe testers.
- Thicker sauces & condensed soups: These can scorch during pressure build-up — thin them slightly before pressure-cooking and thicken after. Some slow-cooker recipes use condensed soups that are too thick for pressure cookers without extra liquid.
- Test once, record forever: Convert a single slow-cooker favorite once, note the exact pressure time and release method, then save that as your “Instant Pot version.” Many cooks keep a simple spreadsheet of conversions.
- When in doubt, add time, not less: You can always pressure-cook a bit more (add 5–15 min) if the meat isn’t tender, but undercooked dense cuts are harder to rescue quickly.
Printable cheat-sheet
- Chicken breasts: 8–10 min high + NPR 5–10.
- Pork shoulder (2–4 lb): 45–60 min high + NPR 10–15.
- Beef chuck roast: 45–60 min high + NPR 10–15.
- Vegetables (broccoli/cauli): 0–1 min high + QR.
- Slow-cooker 8 hr low → start with 25–30 min high (small cubes) or 45–60 min for large roasts; NPR for large cuts.
Accessories That Boost Keto Cooking
Small accessories turn your Instant Pot from “nice to have” into a keto meal-prep powerhouse. Below, I cover the most useful add-ons — what they do, why they matter for low-carb cooking, how to use them, and quick buying/maintenance tips so they pay for themselves fast.
Steamer baskets, silicone mitts, extra sealing rings
Steamerbaskets/trivett combos — why they matter
A good steamer basket (or a set of stackable stainless-steel steam racks) lets you cook multiple items at once: bone broth in the bottom while you steam cauliflower riced for a side, or a tray of eggs above shredded pork. “Pot-in-pot” cooking multiplies what you can batch-make in one session and keeps flavors separate when you need them to be. Practical, space-saving, and great for portioned meal prep.
How to use them (keto examples)
- Steam cauliflower florets on a trivet (0–3 minutes high pressure) while a protein cooks below.
- Stack a silicone pan or springform on a trivet to make frittatas or cheesecakes while broth simmers beneath.
- Use an egg rack to cook perfect hard-boiled eggs for breakfast packs.
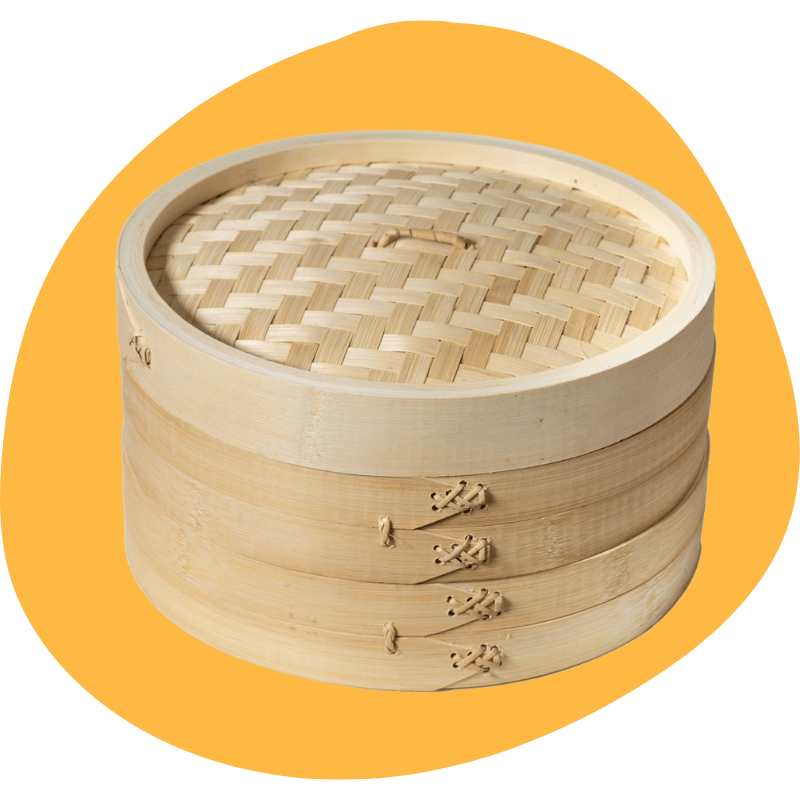
Joyce Chen 2-Tier Bamboo Steamer Baskets
A classic 2-tier, 10-inch bamboo steamer for dumplings, bao, veggies, fish, and more — stack the tiers to steam multiple items at once.
Made from traditional natural bamboo (renewable and lightweight); fits most 10″ woks/pots and is used by placing over simmering water — hand wash and air dry to preserve it.
Eco-friendly and authentic for Asian-style steaming — lightweight and easy to store, though some independent tests have reported occasional fit/nesting or warping issues with heavy long-term use.
Silicone oven mitts — tiny buy, big payoff
Thick, long silicone mitts protect hands and make handling hot inner pots and air-fryer lids safer and faster than thin cloth mitts. They also resist oil and are easy to clean — useful when you’re handling fatty broths or crisp trays. A good pair reduces spill risk and speeds up batch sessions.

GORILLA GRIP BPA-Free Soft Silicone Oven Mitts — Waterproof, Heat-Resistant up to 484°F, Thick Cotton Lining (Set of 2)
Durable silicone mitts with a textured honeycomb surface for superior non-slip grip and generous forearm coverage — perfect for lifting hot pans and baking sheets.
Food-grade, BPA-free, and waterproof silicone with a soft, thick cotton lining for comfort; easy to rinse or wipe clean after messy jobs.
Rated for heat protection up to 484°F, this is suitable for oven, grill, and general kitchen use — a practical, easy-care choice for baking and BBQ.
Extra sealing rings — non-negotiable for keto cooks
Sealing rings absorb odors (garlic, curry, bone broth) and can hold onto them even after washing. Many experienced users keep at least two rings: one reserved for savory/broths and one for neutral/sweet uses (or one spare while one dries). If your ring smells, a vinegar soak + sun-drying or a steam cycle can help; replace rings if they crack or stay persistently scented.

Instant Pot 2-Pack Color Sealing Rings — Food-Grade Silicone Inner Pot Gaskets (Red & Blue)
Soft, food-grade silicone sealing rings (red + blue) that replace your Instant Pot gasket to maintain a safe, airtight seal — BPA-free, dishwasher-safe, and tested to FDA/LFGB standards.
Color coding helps prevent flavor/odor transfer (use one ring for sweet/dairy and the other for savory), and Instant Pot recommends replacing rings about every 12–18 months (or sooner if discolored/odorous).
Practical buying & maintenance tips
- Buy a stainless-steel basket or collapsible silicone steamer set for versatility.
- Keep 1–2 spare sealing rings and label them (savory/sweet). Soak smelly rings in white vinegar or run a steam cycle with water + lemon peel to deodorize.
- Use long, quality silicone mitts (not thin cotton) to avoid burns when switching lids or pulling hot racks.
Air-fryer lids, stainless steel inserts, silicone egg-bites mold
Air-fryer / crisping lids — get texture without a second appliance
If you love crispy pork belly, crunchy-skinned chicken, or a browned topping on a casserole, an air-fryer or crisping lid (like the Instant Pot Duo Crisp line or Ultimate Lid variants) lets you finish foods without moving to a separate appliance. It’s especially useful on keto because many high-fat foods benefit hugely from a quick crisp for texture contrast. Reviewers praise the convenience — though some note weight, size, and safety/design tradeoffs vs standalone air fryers.
How to use it (keto wins)
- After pressure-cooking pork shoulder, spread the shredded pork thin and crisp under the air-fry lid for a carnitas texture.
- Crisp skin on a pressure-cooked whole chicken (pressure → switch lids → air crisp at high temp).
- Re-crisp leftovers (cauliflower “tots,” almond-coated cutlets) fast.
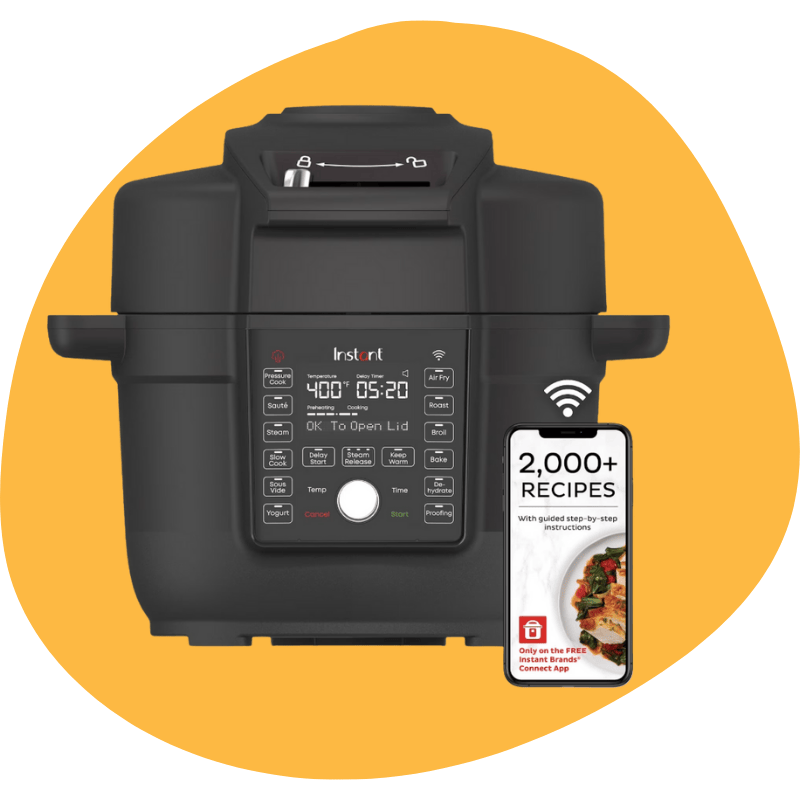
Instant Pot Duo Crisp 6.5-Quart — Ultimate Lid Wi-Fi Smart Multi-Cooker (13-in-1 Air Fryer + Pressure Cooker)
One-lid 13-in-1 multi-cooker that pairs high-pressure cooking with built-in air frying (the Ultimate/Crisp lid) and Wi-Fi guided recipes/remote monitoring for hands-off cooking.
6.5-quart capacity, ~1500W power, and presets covering pressure cook, air fry, slow cook, steam, sauté, roast, bake, broil, dehydrate, sous-vide, yogurt, proof, and keep-warm.
Easy cleanup with dishwasher-safe inner pot and lid components, whisper-quiet steam release, and included crisp/air-fry rack — a versatile all-in-one for weeknight meals and meal prep.
Stainless-steel inner pots vs nonstick
Stainless steel inserts are the durable pro choice: they tolerate high-heat sautéing and scrubbing without scratching and won’t lose coating over time. Nonstick/ceramic inserts make cleanup easy but can wear and flake—many serious users keep the stock stainless insert and accept a small extra cleanup time for longer life and better searing. If you sear a lot (key for flavor on keto), stainless wins.

Instant Pot 6-Quart Stainless Steel Inner Cooking Pot — Polished Surface & Tri-Ply Bottom
Premium 6-quart stainless-steel inner pot with a mirror-polished cooking surface that helps food stick less and makes cleanup faster.
Made from durable 304 (18/8) stainless steel with rolled edges, embossed max-fill lines, and an impact-bonded tri-ply bottom for more even heating; dishwasher-safe.
Compatible with most 6-quart Instant Pot multi-cookers — handy as a spare or replacement for rice, batch cooking, and swapping recipes mid-prep.
Silicone egg-bites / muffin molds — tiny tool, massive versatility
Silicone egg-bite molds (or silicone muffin pans) are perfect for keto breakfasts and portable snacks: egg bites, mini frittatas, custards, and single-serve portions of bone-broth gelatin. They’re easy to pop out, freeze well, and give you perfectly portioned macros. They also double as sauce or fat molds (freeze ghee/tallow in measured portions).
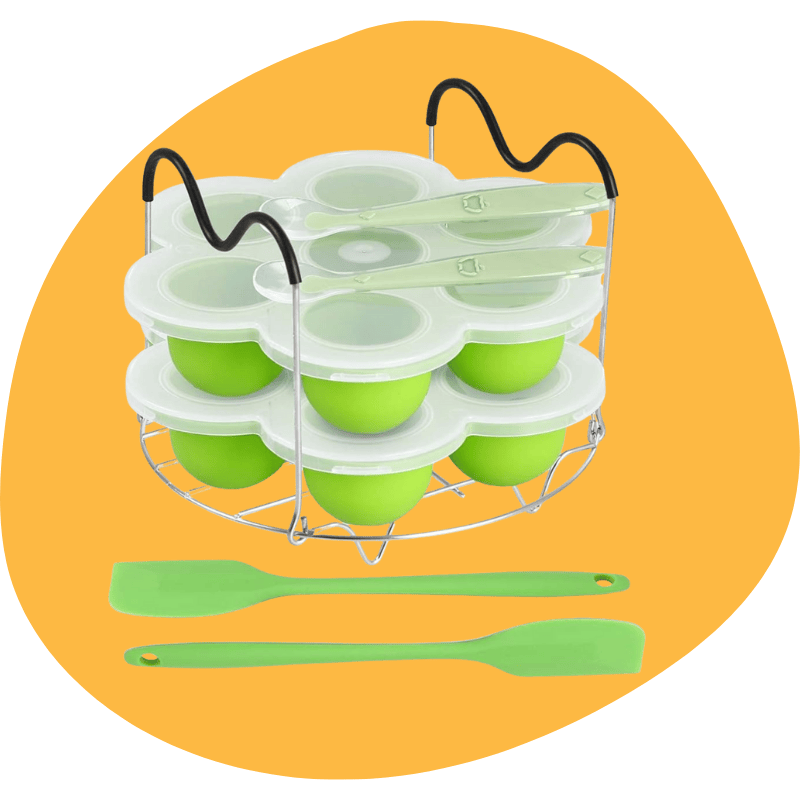
ROTTAY 7-Piece Silicone Egg Bites Molds & Steamer Rack Set — Fits 6Qt & 8Qt Instant Pot (Includes 2 Spoons + Silicone Spatula)
Flexible, food-grade silicone egg-bite molds plus a steaming/trivet rack with heat-resistant handles — make perfect egg bites, mini frittatas, and portioned snacks in your 6- or 8-quart pressure cooker.
Includes two spoons and a silicone spatula so you can fill, lift, and serve without extra tools.
Nonstick, dishwasher-friendly materials and compact nesting design speed cleanup and storage.
Buying & safety tips
- If you buy an air-fry/crisping lid, read reviews for safety notes (some models expose heating elements) and consider footprint/weight for your kitchen. Use with caution and follow manufacturer guidance.
- Prefer a stainless-steel inner pot if you do lots of searing; keep a nonstick for delicate tasks if you like. Replace nonstick liners when coating shows wear.
- Choose food-grade silicone molds (BPA-free) and avoid aggressive oven spray that degrades the silicone finish over time.
Quick accessory shopping list for keto Instant-Potters
- Stainless-steel steamer basket / multi-tier rack.
- 1–2 spare silicone sealing rings (label them).
- Long silicone oven mitts (heat-resistant).
- Air-fry/crisping lid (Duo Crisp / Pro Crisp / Ultimate Lid) if you want crispy finishes.
- Stainless-steel inner pot (if available for your model).
- Silicone egg-bites mold or muffin pan for portioned breakfasts/snacks.
Final tips (keep your keto kitchen efficient)
- Label & rotate seals: swap sealing rings by task (savory vs sweet) to avoid cross-flavor.
- One session, many results: use steam racks + pot-in-pot to produce broth, protein, and vegetables simultaneously.
- Safety first: if you use a crisping lid, follow the manufacturer’s safety notes and keep children clear when the element is exposed.
Care, Cleaning & Troubleshooting
Keeping your Instant Pot clean and well-maintained isn’t glamorous, but it’s the fastest route to reliable pressure cooks, neutral-smelling broths, and fewer “BURN” errors. Below, I’ll walk you through practical steps for ring care, fixing burn/stuck-food problems, and knowing when to replace parts — all written so readers can follow along and get back to cooking.
Ring care to avoid flavor transfer
Why it matters: The silicone sealing ring is porous and soaks up odors from garlic, curry, and bone broth. That flavor transfer can make desserts taste savory and vice-versa — annoying, but avoidable.
Daily / after-each-use habits
Remove the ring from the lid and wash it with warm, soapy water (or place it on the top rack of the dishwasher if your manual allows). Let it air-dry completely. Storing the lid upside-down on the pot helps the pot ring air out between uses. (62)
Deep-deodorize (when it smells)
- Vinegar soak: Soak the ring in a 1:1 or 1:2 mix of white vinegar + water for 30–60 minutes, scrub with soap, rinse, and air-dry in sunlight if possible. This removes stubborn odors without damaging the silicone. (63)
- Steam-clean trick: Put 2 cups of water + a lemon rind or 1/2 cup white vinegar in the inner pot, lock the lid, and run a short steam cycle. That steam helps deodorize the lid and ring.
Pro tip for multi-recipe cooks
Keep two rings: one for savory (soups/broths/curries) and one for neutral/sweet (desserts). Label them by color or tag so you never mix them up. Instant Pot recommends considering replacement or rotation to avoid odors.
Dealing with burn warnings and stuck food
What the “BURN” message means (brief): The cooker detects that the inner pot is getting too hot (usually because food is stuck on the bottom or there’s insufficient liquid). When that happens, the unit protects itself by stopping heating, which looks alarming but is often easily fixable. (64, 65)
Step-by-step fix when “BURN” appears
- Turn the cooker off and do a quick release if any pressure is present (follow your model’s safe-release instructions).
- Open the lid carefully (hot steam!). Remove the inner pot using silicone mitts. Inspect the bottom. If you see stuck or charred bits, proceed to step 3.
- Deglaze: remove large scorched bits, then add 1/2–1 cup water or broth and use a wooden or silicone spatula to scrape the bottom thoroughly (deglazing releases browned bits that trigger the sensor). If the bottom is dry or has thick sauce, thinning helps the heat sensor read normally.
- If lots of stuck food remains, transfer salvageable food to another pot, soak the inner pot with hot soapy water or a baking soda paste, then scrub. Re-seat a clean inner pot, ensure the sealing ring is properly installed, add the minimum required liquid, and restart the program.
Prevention tips (avoid getting the BURN):
- Deglaze after sautéing. Always deglaze the bottom with a splash of liquid if you browned meat or aromatics before pressure cooking. That prevents those tasty brown bits from sticking and tripping the sensor.
- Use enough liquid. Electric pressure cookers require a minimum amount of liquid to build steam — check your manual, and add at least 1 cup for most models/recipes. Thick sauces (tomato paste, condensed soups) may need to be diluted.
- Layer smartly. Put liquids in first, then proteins/vegetables. Avoid starchy ingredients (thickening agents) on the bottom unless the recipe specifically instructs it.
If the error persists after deglazing and re-seating, check the underside of the lid (float valve, anti-block shield) for food debris and clean it — sometimes debris prevents proper sealing or venting, which leads to errors. If problems continue, contact the manufacturer’s support.
When to replace parts
Knowing when to replace consumable parts keeps performance steady and prevents safety or sealing issues. Here’s what to watch and reasonable replacement timelines.
Sealing ring (gasket)
Replace every 12–18 months as a guideline (more often if you use the pot daily, or sooner if the ring is cracked or permanently odor-stained). Instant Pot’s guidance recommends replacement within this window for best performance. Keep spares on hand.
Inner pot (stainless steel)
Replace if warped, deeply scratched, or if the base is damaged (uneven heat). Minor surface stains can be removed with vinegar or baking-soda paste; replace if structural damage appears.
Steam-release valve, float valve, anti-block shield
Inspect these parts monthly. Replace or deep-clean if they stick, feel loose, or show damage — a sticky float or clogged release valve can prevent proper pressurization or venting. Many of these are removable for cleaning; check your manual for disassembly.
Condensation collector & accessories
Replace the condensation collector if cracked or leaking. Replace silicone mitts, trivets, or silicone molds if they tear or degrade. These aren’t safety-critical but affect ease-of-use and hygiene.
Signs you need replacement (quick checklist)
- Gasket is cracked, deformed, sticky, or permanently odorous → replace.
- Unit repeatedly fails to build pressure after standard troubleshooting → check valves/gasket; consider servicing or replacement.
- Inner pot shows warping or deep scratches that trap food → replace.
Quick Maintenance Schedule
- After every use: wash inner pot, wipe base (no water in base), remove & wash lid parts, wash sealing ring, dry ring & lid, store lid upside-down.
- Weekly: inspect steam-release/float valve; run a vinegar steam-clean (1 cup water + lemon rind) if odors build.
- Every 6–12 months: deep clean lid parts & consider rotating or replacing sealing rings.
- Replace parts: sealing ring ~12–18 months (or sooner if needed); valves/anti-block shields as soon as they show wear or fail to move freely.
Final troubleshooting cheat-sheet
- Burn error: Turn off → QR → open → deglaze bottom → check ring & valves → restart.
- Smelly ring: Vinegar soak or steam-clean and air-dry in the sun; keep a spare ring.
- Won’t seal: Check gasket seating, ensure float valve moves, and confirm lid is locked correctly. Clean and retry.
Nutrition & Safety Notes for Keto Instant Pot Cooking
Smart keto cooking with an Instant Pot is about more than tasty meals — it’s also about managing electrolytes and hydration while following food-safety best practices (temps, cooling, storage). Below, I’ll give clear, practical guidance you can use right away: what to watch for, how to replenish electrolytes safely, and the food-safety rules that keep your broths and proteins safe to eat.
Salt, electrolytes & hydration on keto
Why electrolytes matter on keto
When you drop carbs abruptly, your body loses water and sodium, and that shift commonly causes the “keto flu” — headaches, dizziness, muscle cramps, and low energy. Replenishing sodium, potassium, and magnesium is often the fastest way to ease those symptoms. (66, 67)
Practical, safe strategies to manage electrolytes and hydration
- Drink salty broth. Homemade bone broth or a salty cup of broth is an easy, whole-food way to add sodium and gentle minerals while you adapt. It also helps with hydration because the sodium helps your body hold fluid. (68, 69)
- Add salt mindfully. Season foods and water to taste (salt is a tool on keto), but if you have high blood pressure or heart/kidney conditions, talk to your clinician before raising salt intake. Research shows that sodium affects blood pressure and must be balanced with potassium. (70)
- Cover potassium & magnesium. Potassium-rich low-carb foods (leafy greens, avocado) and magnesium from nuts, seeds, or supplements often help with cramps and sleep. Many keto cooks use an electrolyte supplement (no sugar) if food sources are limited — but check interactions if you take meds.
- Watch for red flags. If you have dizziness, fainting, palpitations, severe weakness, or swelling after changing salt/electrolyte intake, stop and seek medical advice. Electrolyte imbalance can be dangerous, especially if you’re on blood-pressure drugs, diuretics, or have kidney disease. (71)
“Tip: a 1-cup mug of hot bone broth is the quickest keto-friendly pick-me-up — it replenishes sodium and helps hydration while keeping carbs near zero.”
Food safety (internal temps, broth acidity & storage)
Cook to safe internal temperatures.
Use a probe thermometer for meats. Follow these widely accepted minimum internal temps: poultry 165°F (74°C); ground meats 160°F (71°C); whole cuts of beef, pork, lamb — 145°F (63°C) with a 3-minute rest unless your recipe specifies otherwise. These temps are the baseline for safety and are published by USDA/FDA resources. (72)
Broth & stock — cool and store safely.
- Cool quickly: Large pots of hot broth must be cooled to refrigerator temperature quickly. Divide into shallow containers, or ice-bath cool, then refrigerate within 2 hours. This reduces bacterial growth. Refrigerated broth is typically safe for 3–4 days; freeze for longer storage. The USDA/FSIS guidance explains safe refrigeration timelines and rapid-cooling tips. (73, 74)
- Don’t use your countertop multi-cooker as a canner. If you think “I’ll pressure-can my broth in the Instant Pot,” stop: electric multi-cookers (standard Instant Pot models) are not approved for low-acid home pressure canning — the National Center for Home Food Preservation and university extension services warn that they weren’t tested for safe jar temperatures and consistent processing. Use a USDA-approved pressure canner for low-acid canning. (75, 76)
Storage quick rules:
- Refrigerate within 2 hours; use broth within 3–4 days.
- Freeze portions (flat bags or mason jars) for months; defrost safely (fridge overnight or cold-water method).
Practical safety checklist for keto Instant Pot cooks
- Thermometer first. Always verify roasts/chicken with an instant-read thermometer — don’t rely on time alone. (Poultry 165°F / 74°C; ground meats 160°F / 71°C; steaks/roasts 145°F + 3 min.)
- Cool broth fast. Portion hot stock into shallow containers and chill quickly before refrigerating.
- No pressure canning in the Instant Pot. If you preserve broths or low-acid foods for shelf storage, use a proper pressure canner and tested USDA recipes. Don’t substitute a multicooker. (77)
- If you’re on meds or have conditions, check first. Big changes in salt/fluid can interact with blood-pressure meds, diuretics, and kidney disease — ask your provider before upping sodium or taking electrolyte supplements. (78)
Quick “What to include in a keto Instant Pot health blurb”
“Stay hydrated and sip salty bone broth during the first 1–2 weeks of keto to prevent dizziness and cramps — but consult your doctor if you take BP meds or have kidney disease.”
Kitchen Economics: Is an Instant Pot a Good Investment?
Usually yes — especially if you meal-prep, cook often, or want to replace multiple single-purpose gadgets. Below, I walk through the money-and-energy math, give real-world cost-per-meal examples (step-by-step arithmetic), and show how appliance consolidation speeds ROI. I also include practical tips so you can decide whether an Instant Pot pays for itself in your kitchen.
Cost per meal — the quick formula (and examples)
First, the formula you’ll use for any appliance:
Cost per cook = (Power in kW) × (Run time in hours) × (Your electricity price per kWh)
Example assumptions (common near-term examples; replace with your local rate):
- Instant Pot assumed power during active heating ≈ at 1.0 kW (1000 W). (79)
- A typical mid-size electric oven powers ≈ 2.5 kW (2500 W).
- Example electricity prices: $0.15 / kWh (U.S. example) and £0.34 / kWh. (80)
Example A — one 1-hour pressure-cook (Instant Pot) at $0.15/kWh
- Power = 1.000 kW.
- Time = 1.000 hours.
- Energy used = 1.000 × 1.000 = 1.000 kWh.
- Cost = 1.000 kWh × $0.15/kWh = $0.15 per cook.
Example B — oven braise that takes 1.5 hours at 2.5 kW (same price)
- Power = 2.500 kW.
- Time = 1.500 hours.
- Energy used = 2.500 × 1.500 = 3.750 kWh.
- Cost = 3.750 kWh × $0.15/kWh = $0.5625 → $0.56 per cook.
Takeaway: that single meal cost in the Instant Pot (~$0.15) is roughly 3.7× cheaper in energy than the oven meal in this example ($0.56). This matches independent tests showing electric pressure cookers and air fryers usually consume far less energy than a full-size oven for equivalent meals. (81, 82)
Note: the Instant Pot needs a short “come-to-pressure” time and sometimes a natural-release wait; total wall-clock time may exceed the pressure-cook minutes. The cost calculation above uses the active heating period (i.e., energy actually consumed), which is what you pay for. (83)
Energy use — what the evidence says
Independent and manufacturer-commissioned tests repeatedly show electric multi-cookers (pressure cookers) use significantly less energy than conventional ovens for comparable recipes — often well under the oven’s kWh because the cooker is sealed and cooks faster. One Instant Pot energy report compared energy use for whole-meal scenarios and found the pressure-cooker approach much more efficient than oven cooking for the same dishes. (84)
Typical real-world range for Instant Pots: ~0.7 kW–1.2 kW during the active heating phase, depending on model and cycle; slow-cook modes run lower. Ovens and stovetops generally draw more power for longer, so total kWh stacks up quickly. Use a plug-in energy meter to measure your exact model if you want precise local numbers.
Appliance consolidation — the ROI story
One of the Instant Pot’s selling points is that it replaces several single-use devices: pressure cooker, slow cooker, rice cooker, steamer, yogurt maker, and, with the crisping lid, even some air-fryer tasks. Consumer Reports and other reviewers note this consolidation saves both shelf/cabinet space and the upfront cost of buying many appliances separately. (85)
Quick ROI example (approximate):
- Buy an Instant Pot: $120 (one-time).
- Alternatives bought separately: slow cooker $50 + rice cooker $40 + small air fryer $100 = $190.
- If you would otherwise buy two or three of those devices, the Instant Pot often pays for itself up front while saving counter space and reducing the number of devices to store/clean.
Combine that with lower per-meal energy cost (see examples above) and frequent home cooks quickly recoup the purchase price via energy savings + avoided appliance purchases. Exact ROI depends on your cooking frequency, what you’d otherwise use, and local electricity rates.
Other economic angles: food waste, time value, and environmental impact
- Less food waste: fast batch-cooking and portioning (bone broth, shredded meats) reduce spoilage and takeout spending.
- Time is money: Instant Pot’s speed—especially for tough cuts—saves time; if you value your time, the appliance often delivers outsized ROI.
- Lower carbon footprint: fewer kWh used per meal → lower household energy emissions compared with oven-centric cooking. Energy comparisons put pressure cookers and air fryers on the efficient end of the countertop appliance spectrum. (86)
Practical buying checklist — maximize your return
- Match size to habit. If you batch-cook for family, buy a 6–8 qt model; for singles, a 3–6 qt keeps energy per portion efficient.
- Look for strong sauté power if you want to brown without a separate skillet — that improves flavor without extra energy use.
- Consider a Duo Crisp/air-fryer lid only if you’ll use crisping often — otherwise, you’re paying for a feature you may rarely use.
- Do the math with your local rate. Use the formula above and your electricity price to estimate cost per dish; try it with a conservative run time (include come-to-pressure minutes if you want worst-case).
Bottom line: An Instant Pot is usually a smart economic choice for low-carb and keto cooks who batch-cook or use the pressure-cooker features often. Energy per meal is typically lower than oven or stovetop equivalents, and the appliance can replace several gadgets — reducing upfront buying, storage clutter, and the cumulative energy footprint of multiple devices. If you cook rarely or only want oven-style roasts and crisping regularly, the ROI is weaker. For frequent home cooks and meal-preppers, the Instant Pot often pays for itself in saved energy, time, and fewer appliances. (87)
Top 10 Instant Pot Recipes (Appendix) — Expandable
Below are 10 high-impact, keto-friendly Instant Pot recipes your readers will love. Each entry includes a short blurb, cook time, why it’s perfect for keto, and expansion notes so you (or a writer) can turn each blurb into a full recipe, step-by-step how-to, and printable card. With user-intent angles (meal prep, weeknight, freezer-friendly, party-ready).
1) Rich Beef Bone Broth (Collagen Boost)
- Blurb: A gelatinous, savory bone broth made from marrow and knuckle bones — sip as an electrolyte-rich mug or use as the base for soups and sauces.
- Pressure time: 120–240 minutes (beef bones); NPR.
- Why keto-friendly: High-collagen, low-carb, excellent source of electrolytes; adds fat when you mix back tallow.
2) Pulled Pork Carnitas (Meal-Prep Power)
- Blurb: Tender, shreddable pork shoulder turned into tangy carnitas — pressure-cook then crisp under an air-fry lid or broiler for authentic texture.
- Pressure time: 45–60 minutes; NPR, then crisp 5–8 minutes.
- Why keto-friendly: High-fat, low-carb protein perfect for bowls, lettuce wraps, and taco nights without tortillas.
3) Shredded Chicken Taco Meat (Fast Weeknight)
- Blurb: Juicy, shreddable chicken breasts or thighs seasoned with taco spices — a 20–30 minute miracle for bowls and salads.
- Pressure time: 8–12 minutes; NPR 8–10 minutes.
- Why keto-friendly: Lean protein with flavor; pairs with avocado/cheese for keto macros.
4) Cauliflower “Risotto” (Creamy Low-Carb Side)
- Blurb: A silky, cheesy cauliflower risotto that mimics the comfort of arborio rice — creamy, low-carb, and ready in minutes.
- Pressure time: 2–4 minutes on high; QR for best texture.
- Why keto-friendly: Substitutes high-carb risotto with nutrient-dense cauliflower and plenty of healthy fats.
5) One-Pot Keto Casserole (Comfort in a Pot)
- Blurb: A customizable, pressure-cooked casserole — protein, vegetable, and creamy binder — that reheats beautifully and freezes well.
- Pressure time: 8–15 minutes, depending on protein and casserole depth; short NPR.
- Why keto-friendly: All-in-one meal with protein + fats and controlled carbs; easy for meal prep.
6) Instant Pot Beef Stew (Hearty Low-Carb)
- Blurb: A slow-cooker classic turbocharged by pressure — fork-tender beef, low-carb vegetable (turnips, rutabaga), and a rich, reduced gravy.
- Pressure time: 30–45 minutes; NPR 10 min.
- Why keto-friendly: Uses low-carb root vegetables, focusing on fatty beef for satiety.
7) Creamy Cauliflower & Bacon Soup (Spoonable Fat Bomb)
- Blurb: Rich, velvety cauliflower blended with bacon, cream cheese, and chicken broth — finished with cheddar and chives.
- Pressure time: 4–6 minutes on high; QR.
- Why keto-friendly: High-fat, low-carb soup that’s an easy lunch or starter.
8) Instant Pot Keto Meatballs in Marinara
- Blurb: Juicy, herby meatballs cooked in a sugar-free marinara — serve over spaghetti squash or cauliflower rice.
- Pressure time: 8–12 minutes; QR or short NPR.
- Why keto-friendly: Controlled carb sauce and protein-packed meatballs for family dinners.
9) Egg Bites / Mini Frittatas (Portable Breakfasts)
- Blurb: Protein-rich egg bites packed with cheese, bacon, and spinach — perfect for grab-and-go keto breakfasts.
- Pressure time: 8–12 minutes; NPR 10 min (in silicone molds).
- Why keto-friendly: Portable, portionable protein + fat; great for tracking macros.
10) Instant Pot Cheesecake (Keto Dessert Option)
- Blurb: A dense, creamy low-carb cheesecake (almond-flour crust or crustless) made in the Instant Pot — indulgence without the carbs.
- Pressure time: 30–40 minutes; NPR 10–20 minutes + overnight chill.
- Why keto-friendly: Uses low-carb sweeteners and almond crust to recreate classic desserts while staying low-carb.
The Bottom Line
If you’re on a keto or low-carb plan, an Instant Pot (especially a mid-range 6-quart model with strong sauté capability) is one of the best kitchen investments you can make. It saves time, extracts deep flavor for broths and stews, and helps you batch-cook nutrient-dense proteins. Pair your chosen model with a few spare sealing rings, a steam basket, and a batch-cooking routine — and you’ll have weeknight keto dinners handled.
FAQs
Can I do keto recipes in an Instant Pot?
Absolutely — Instant Pots excel at making broths, stews, shredded meats, and low-carb vegetable sides quickly and with minimal fuss.
How do I make a gelatinous bone broth for keto in an Instant Pot?
Use joints and knuckles plus some acid (apple cider vinegar), pressure-cook longer (2–4 hours), then cool and refrigerate — the gelatin will set as it cools.
Is an Instant Pot better than a slow cooker for keto meals?
It depends. For speed and weekday batch-cooking, the Instant Pot is better; for hands-off, all-day simmered flavor, the slow cooker still shines. Use both depending on the meal.
Which Instant Pot model is best for a keto beginner?
A 6-quart Instant Pot Duo or Duo Nova is versatile, affordable, and covers nearly all ketogenic needs (bone broth, meat, vegetables, yogurt).
Do Instant Pot meals retain nutrients?
Pressure cooking often preserves more vitamins and minerals than long boiling because of shorter cook times and less water loss, but results vary by food type. Steam and pressure methods generally perform well for nutrient retention.
We may earn a commission when you buy using our links


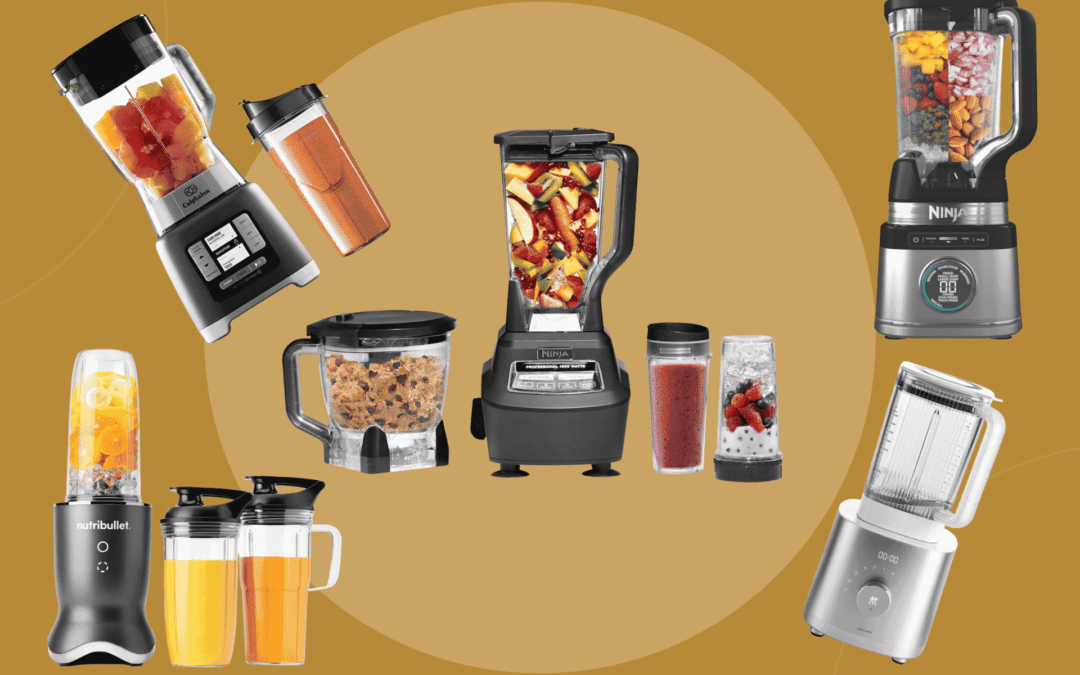
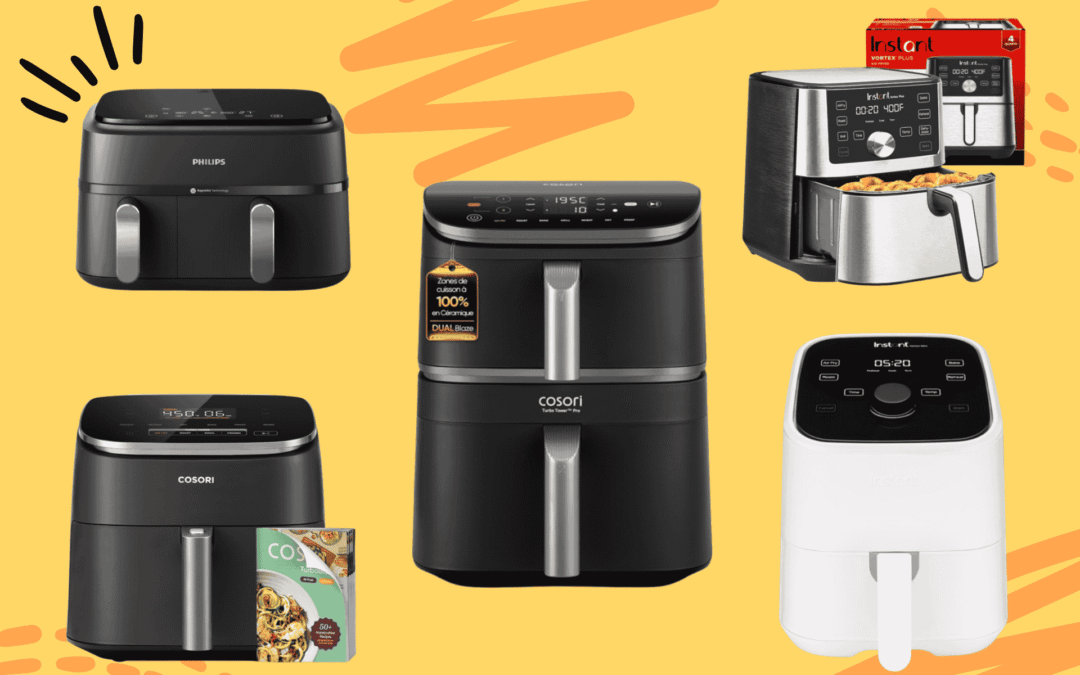
After I originally commented I clicked the -Notify me when new comments are added- checkbox and now each time a remark is added I get four emails with the same comment. Is there any approach you possibly can remove me from that service? Thanks!
Thank you so much — I’m really glad you enjoyed the read! 💛 I appreciate you taking the time to leave such a lovely comment and for bookmarking the site. If there’s a topic you’d like me to cover next, tell me and I’ll add it to the list. Thanks again for the support!
I have been reading out some of your stories and i can state pretty nice stuff. I will surely bookmark your website.
Thanks so much — I’m really glad you’ve enjoyed the stories! 💛 I appreciate you bookmarking the site. If there’s a topic or post you’d like to see more of, let me know and I’ll add it to the queue. Thanks for reading and for the support!