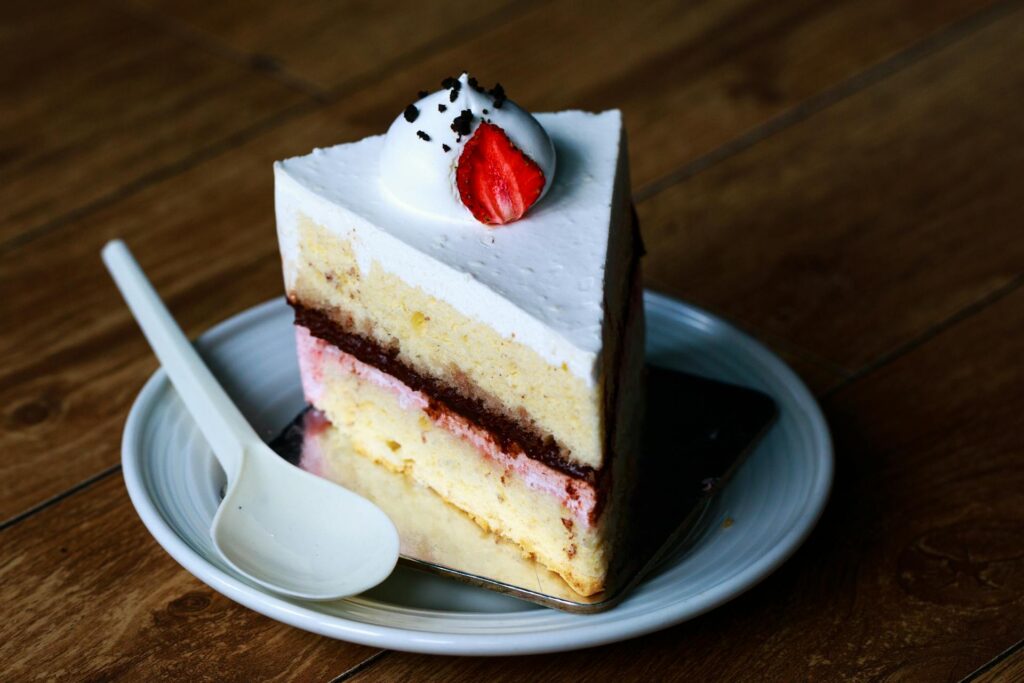
If you love cheesecake but want to keep carbs low (or follow keto), you don’t need to miss out. This guide gives classic baked and no-bake low-carb cheesecake recipes, plus almond flour and coconut flour crusts, sugar-free topping ideas, troubleshooting tips, and storage advice. You’ll get recipes for full-sized and mini cheesecakes, clear substitutions, and safe sweetener guidance so your dessert tastes like the real thing without the sugar spike. The step-by-step sections below mix practical cooking technique with low-carb know-how so you can make a picture-perfect cheesecake at home.
Classic vs No-Bake Low-Carb Cheesecake — Pros & Cons
If you bake or make keto desserts often, this is the single decision that determines texture, timing, and even which sweeteners behave best. Below, I break it down so you can pick the right method for the event, your equipment, and your taste buds.
Texture & flavor differences
Short version: baked = dense, custardy, more “baked” flavor; no-bake = light, mousse-like, ultra-creamy.
Why that happens: baked cheesecakes are a custard — eggs coagulate during gentle baking and create a dense, velvety structure that slices cleanly. That slow protein set also concentrates flavors (a slightly richer, “cooked” cream-cheese taste). No-bake cheesecakes usually rely on whipped cream and/or gelatin to set, so they stay lighter, airier, and more like a mousse. Expect a softer mouthfeel and a brighter, fresher cream-cheese flavor from no-bake versions. These differences are consistent across culinary tests and recipe guides. (1)
Practical tasting notes for low-carb/keto bakers:
- Baked: best when you want a showstopper with slices that hold up on a dessert table; it benefits from long chilling to develop that dense texture.
- No-bake: ideal for hot weather, quick make-aheads, and when you want a lighter dessert that’s easier to whip together—excellent for mini cheesecakes and parfaits. (2)
Time, equipment, and planning (water bath, chill time)
Time & plan at a glance:
- Baked cheesecake: hands-on bake time ~60–75 minutes, then slow cool + 6–24 hours refrigeration to finish setting.
- No-bake cheesecake: active time 15–30 minutes (plus whipping), chill time 2–6 hours (or longer for very firm gelled versions). Mini no-bakes set faster. (3, 4)
Equipment that matters:
- Springform pan (8–9 inch) — highly recommended for baked cheesecakes.
- Roasting pan for the water bath (bain-marie). Wrap the springform in foil to prevent leaks.
- Mixer (hand or stand) for smoothing the filling; for no-bake, you’ll also want a whisk for whipped cream or an immersion blender for ultra-smooth fillings.
- Thermometer (optional but helpful) — target ~150–155°F (65–68°C) for a perfectly set baked cheesecake without overcooking.
Why use a water bath?
A water bath surrounds the cake with moist, evenly heated air; it moderates the oven temperature and greatly reduces cracking and curdled texture by delivering gentle, uniform heat. Wrap the pan thoroughly to avoid seepage, place it in a roasting pan, and add hot water to reach about halfway up the outside of the springform before sliding it into the oven. This is the pro tip chefs use when they want glossy, crack-free tops. (5, 6)
Cooling & chilling strategy (best practice):
- Finish baking when edges are set and the center still has a slight jiggle.
- Turn the oven off and crack the door for ~30 minutes — this reduces thermal shock and helps prevent cracks.
- Remove the water bath, let the cake cool to room temp, then refrigerate uncovered (or loosely covered) at least 6–8 hours — overnight / 12 hours is better for slicing cleanly. No-bake cheesecakes generally firm up in less time, but still benefit from several hours or overnight chilling.
Quick troubleshooting tips:
- If you’re short on time, make mini cheesecakes — their small mass chills and sets much faster.
- If you’re worried about leaks, bake crumb crusts in individual ramekins or silicone pans.
- If you skip the water bath, reduce the oven temperature, and accept a slightly different texture and a higher risk of tiny cracks.
When to choose each for keto/low-carb goals
Choose baked when:
- You want a traditional texture for holidays or photo-worthy slices.
- You’re using egg-based coagulation for stability (extra important when you want a firm slice without gelatin).
- You’re comfortable with a longer timeline and have an oven-safe setup for a water bath.
Choose no-bake when:
- You need a fast, reliable dessert (make-ahead for parties, hot kitchens).
- You prefer the lighter mousse texture and don’t want to worry about oven mishaps like cracks.
- If you want an egg-free option (use gelatin or agar to set).
- You’re scaling to mini cheesecakes or portable single-serves for carb counting and portion control. (7)
Keto/sweetener considerations:
- Baked cheesecakes expose sweeteners to heat; some low-carb sweeteners (like erythritol) can crystallize or give a cooling effect if used alone. Allulose behaves most like sugar under heat and often produces the closest texture to sugar in baked cheesecakes, while erythritol blends work well in crusts. (8, 9)
- No-bake cheesecakes are forgiving with sweeteners because there’s no heat-induced crystallization; they’re great when you want to minimize tinkering with sweetener conversions.
Final decision checklist (quick):
- Want density and old-school cheesecake? → Bake.
- Need speed, less fuss, or heat avoidance? → No-bake.
- Serving for strict keto macros and texture is critical? → test allulose in baked filling or use a reliable erythritol/allulose blend and note conversions.
Crust Options (Almond Flour Crust, Coconut Flour Crust, No-Crust)
Your crust choice affects texture, carbs, prep time, and presentation — and it’s one of the easiest places to save (or spend) carbs on a low-carb cheesecake. Below, I provide practical, copy-ready recipes, binding tips, baking instructions, and realistic macro notes, so you can select the perfect base for you.
Almond flour crust — measurements, binders & baking tips (press-in vs blind-bake) — recipe + macros
Why almond flour?
Almond flour (finely ground blanched almonds) is the most popular low-carb baking flour: it’s flavorful, forgiving, and gives a buttery crumb that resembles classic graham-crust texture without the carbs. Use it for press-in, pre-baked (blind bake) or mixed crusts (with egg/protein for structure). (10, 11)
Basic almond-flour cheesecake crust (8-inch springform)
- 1½ cups (150–160 g) almond flour
- 3 tbsp (42 g) unsalted melted butter (or coconut oil for dairy-free)
- 2 tbsp powdered erythritol or monk-fruit blend (optional, for sweet)
- ¼ tsp fine salt
- ½ tsp cinnamon (optional)
Method (press-in):
- Mix almond flour + sweetener + salt. Add melted butter and stir until the mixture holds together when pressed.
- Press firmly into the bottom (and slightly up the sides if you like) of an 8-inch springform. Use the bottom of a measuring cup for an even, compact base.
- Bake at 350°F (175°C) for 10–12 minutes until lightly golden. Cool before adding filling.
Method (blind bake for very wet fillings / extra crisp):
- Line crust with foil and fill with pie weights; bake 12–15 minutes at 350°F (175°C), remove weights and return 5–7 minutes until set.
Baker’s tips:
- Press hard: compacting prevents crumbling when sliced.
- Toast briefly to intensify nuttiness and prevent sogginess.
- Use melted chocolate brushed on prebaked crust (thin seal) if you want a wetter topping (e.g., berry compote) without a soggy base.
- For extra crunch, pulse 2–3 tbsp chopped pecans into the almond flour mix.
Macro estimate (approximate; use your own label checking for precise numbers):
- Whole crust (recipe above): ~900–1,000 kcal total; ~10–12 g total carbs; ~6–8 g net carbs (after fiber/erythritol) for the whole crust.
- Per slice (12 slices): roughly 0.5–0.7 g net carbs added by crust alone (very low) — actual numbers vary by almond flour brand and sweetener choice. For an authoritative per-slice net carb estimate in similar crusts, see tested keto recipes.
Coconut flour crust — when to use, conversion notes (not 1:1 with almond) — recipe + macros
When to choose coconut flour:
Coconut flour is high in fiber and very absorbent. It’s a strong choice if you need a nut-free, grain-free crust or want a drier, firmer base. But it is not a 1:1 substitute for almond flour — you’ll need much less coconut flour and usually more liquid/eggs to bind. Guides and conversion tests recommend reducing coconut flour to a small fraction and increasing eggs or liquid to compensate. (12, 13)
Conversion rule of thumb:
Start with ~1:4 (coconut: almond) by volume as a starting point (i.e., ¼ cup coconut flour to replace 1 cup almond flour) and increase liquids/eggs. Many bakers find a 3:1 to 4:1 disparity works when testing. Always test a small batch before scaling.
Coconut-flour crust recipe (8-inch, nut-free)
- ½ cup (56 g) unsweetened shredded coconut (or ½ cup coconut flour + adjustments, see notes)
- 3 tbsp coconut oil, melted
- 2 large eggs (or 1 egg + 1 egg yolk if you want a richer binder)
- 1–2 tbsp powdered erythritol/allulose (optional)
- pinch salt
Method (shredded coconut base — easier and more forgiving):
- Pulse shredded coconut in a food processor until fine (optional). Mix with melted coconut oil, eggs, and sweetener until it sticks.
- Press into pan and prebake 12–15 minutes at 350°F (175°C) until edges are golden.
Method (coconut flour base — denser):
- Use 2–3 tbsp coconut flour with 2–3 eggs and 2–4 tbsp melted fat; press and bake 10–12 minutes. Coconut flour soaks up moisture quickly — more eggs/liquid = less crumbly. (14, 15)
Baker’s tips:
- If using straight coconut flour (not worked into a seed/nut mix), err on the side of more eggs; the crust can be dry otherwise.
- Consider adding a tablespoon of almond butter or sunflower-seed butter for mouthfeel (if nut-free is not required).
- For a softer, chewier nut-free crust, use a date + coconut oil base (raw crust style), but note dates add carbs. (16)
Macro estimate (approximate):
Coconut-shredded crust (date-free): whole crust ~600–800 kcal; total carbs are higher in shredded coconut than almond flour, but much of the coconut fiber reduces net carbs. If using dates, carbs will jump substantially. If using mostly coconut flour and eggs, expect low net carbs but denser calories from fat. Use a nutrition calculator to get accurate per-slice macros because coconut products vary widely.
No-crust and crumbless keto options — pros/cons and presentation
Why go crustless?
- Lowest carb: eliminates any crust carbs.
- Fast & simple: saves prep time and prevents soggy-crust worries.
- Elegant presentation: smooth, glassy tops are easy to glaze or decorate.
Pros:
- Simplest keto math (fewer ingredients = fewer carbs to track).
- Ideal for diabetics/strict keto followers who want minimal carbs per slice.
- Less chance of structural failure (no soggy bottom or crumb fallout).
Cons:
- Less textural contrast — a crust adds crunch and balances a creamy filling.
- Slicing and serving may be stickier; use a hot, dry knife for clean slices.
- Some audiences expect crust — watch expectations if you write “classic cheesecake.” (17)
Presentation ideas (“best crustless keto cheesecake presentation”):
- Top with a thin layer of sugar-free chocolate ganache for a glossy finish.
- Add a spoonful of chilled sugar-free berry compote per slice for color contrast.
- Plate with crushed toasted almond garnish for crunch (if not avoiding nuts).
- Serve as parfaits: crumble an almond cookie on the bottom of glasses, spoon filling, and top with berries (gives crust illusion but controlled carbs).
Quick crustless baked method (8-inch):
Prepare filling as for a baked cheesecake and pour directly into a well-buttered and parchment-lined pan. Bake as usual, cool slowly, chill — same times as crusted version.
Macro advantage:
Removing the crust can cut carbs and calories per slice by ~5–50% depending on crust type. This is a fast win for searchers looking for low-carb mini cheesecake recipes or crustless keto cheesecake.
Nut-free, egg-free, and paleo variants
Nut-free / seed-based crusts
Sunflower-seed crust (sunflower seeds + melted coconut oil + sweetener) is an excellent nut-free substitute, but be aware: sunflower seeds may react with baking soda or alkaline ingredients and change color (greenish/grey) because of chlorogenic acids — purely aesthetic and safe to eat, but surprising if unexpected. If using sunflower seed flours with baking soda, test on a small batch or omit alkaline leaveners. (18)
Egg-free crusts
Pressed date + coconut + seed crusts bind well without eggs: pulse 1 cup Medjool dates + 1½ cups shredded coconut + ¼ cup sunflower seeds until sticky; press and chill. Dates add carbs, so use them sparingly when keeping it low-carb. For truly low-carb egg-free crusts, combine almond flour with melted butter/coconut oil and a little psyllium husk to bind (psyllium helps hold moisture without eggs).
Paleo-friendly crusts
Paleo crusts typically allow natural sweeteners (dates, maple) and unrefined fats. Popular paleo crust: Medjool date + pecan + coconut oil pressed and chilled — delicious, but note: dates raise carbs significantly, so this is paleo but not keto. If you need paleo + lower carbs, use smaller amounts of dates balanced with more coconut flakes and added fat.
Allergy & sensitivity notes:
- Label nut/seed crusts clearly — sunflower and sesame seeds can trigger allergies.
- For nut-free and egg-free commercial products, consider testing for cross-contamination if you serve guests with severe allergies.
- For dairy-free paleo cheesecakes, use soaked cashew “cheesecake” fillings or coconut cream + agar gel as the setting agent; texture will be different from dairy cream-cheese versions. (19)
Step-by-Step Recipe (Filling, Bake & No-Bake Directions, Toppings)
Below is a practical, step-by-step masterclass you can drop straight into a recipe post. It covers ingredient sourcing and cream-cheese tips, the equipment you need, a full baked cheesecake method (with water-bath technique), no-bake (gelatin and whipped-cream) options, times + cooling + crack prevention, and mini-cheesecake timing for muffin tins.
Ingredient sourcing & best cream cheese advice (full-fat vs low-fat)
What to buy (short list):
- Cream cheese (blocks, full-fat) — look for full-fat, brick-style cream cheese in blocks (Philadelphia, generic supermarket blocks, or artisanal cream cheeses). Full-fat blocks give the best texture and mouthfeel for both baked and no-bake cheesecakes. Low-fat/light cream cheeses often include stabilizers (xanthan/guar) and extra water, which changes the texture and can make your filling looser or grainier. For a showstopper cheesecake, use full-fat block cream cheese. (20)
- Sour cream / heavy cream — full-fat sour cream or crème fraîche smooths the filling and prevents dryness; heavy cream is used in no-bake whipped-set recipes.
- Sweetener — choose based on flavor and behavior: allulose mimics sugar’s mouthfeel (excellent in baked fillings); erythritol blends work well in crusts; monk fruit is fine in mixes.
- Almond flour or coconut flour — for crust options; buy finely milled blanched almond flour (not almond meal with skins) for the lightest crumb.
- Unflavored gelatin (Knox or similar) — if you plan to make a gelatin-set no-bake cheesecake. (21)
Softening & handling cream cheese (pro chef tips):
- Room temp is key. Cut blocks into 1-inch cubes and leave on a plate 20–30 minutes for even softening — Serious Eats testing shows that cubing and short room rest softens cream cheese quickly and uniformly, reducing lumps when you beat it. Avoid microwaving unless you’re very careful. (22)
- Don’t overbeat. Over-aeration adds air bubbles that expand and cause cracks during baking — beat just until smooth and scrape the bowl frequently. Use a paddle attachment on low/medium settings; finish by hand-folding if necessary. (23)
Equipment checklist (springform pan, water bath, mixer, chill time)
Essential equipment (must-have):
- 8-inch or 9-inch springform pan — easiest for removal and classic presentations.
- Roasting pan (large enough for a water bath) — for bain-marie. Use foil to wrap the springform so water can’t leak in. (24)
- Stand mixer or hand mixer (paddle attachment preferred) — gives the smoothest batter without overheating.
- Instant-read thermometer — optional but valuable; target internal temp ~150–155°F (65–68°C) for a baked cheesecake that’s set but not dry. (25)
- Parchment — cut a circle for the pan base for easy release.
- Offset spatula & rubber scraper — for smoothing and scraping.
Nice-to-have:
- Springform pan collar protector (or extra foil) to avoid water leaks; silicone liners for mini cheesecakes; muffin liners for minis.
- Immersion blender (for ultra-silky no-bake fillings) — blitzes any small lumps out.
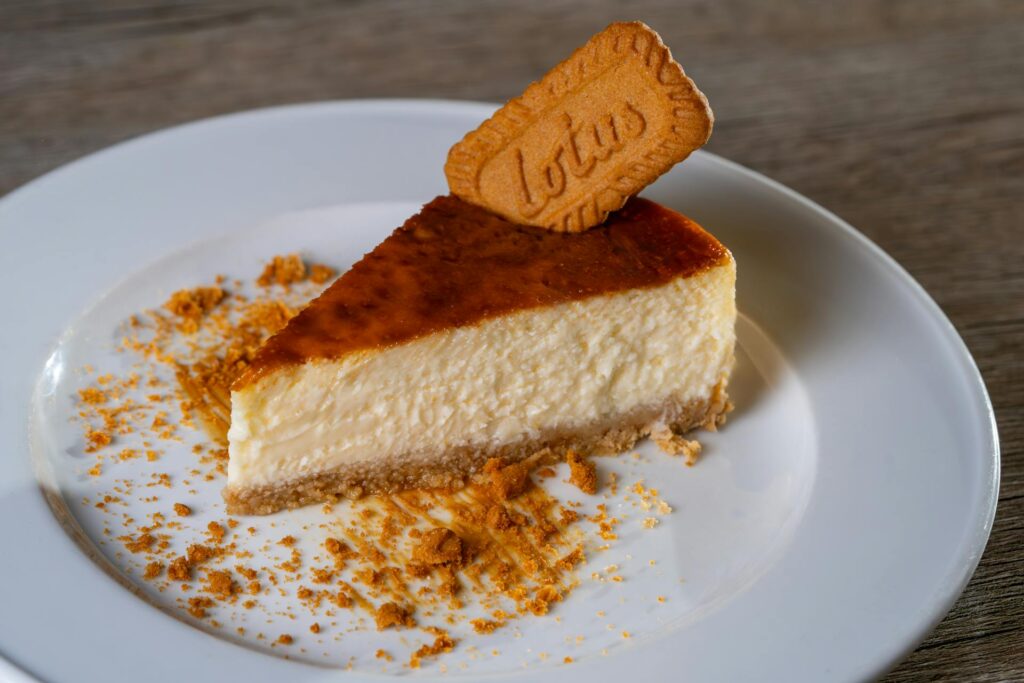
Classic baked low-carb cheesecake — full ingredient list, metric/US measures, step-by-step bake method (including water bath technique) — chef tips
Recipe — Classic Baked Low-Carb Cheesecake (8-inch springform)
Yields: 10–12 slices
Crust (almond flour)
- 1½ cups (150–160 g) blanched almond flour
- 3 Tbsp (42 g) unsalted butter, melted (or coconut oil)
- 2 Tbsp powdered erythritol or monk-fruit blend (optional)
- Pinch fine salt
Filling
- 24 oz (680 g) full-fat cream cheese, cut into cubes, room temperature
- ¾ cup (150 g) granulated allulose (or ¾ cup erythritol blend — see sweetener notes)
- 1 tsp pure vanilla extract
- 3 large eggs, room temperature
- ⅔ cup (150 g) sour cream (optional but recommended for creaminess)
- 1 Tbsp lemon juice (optional, brightens flavor)
Method — crust
- Preheat oven to 325°F (163°C). Grease and line the base of an 8-inch springform pan with parchment.
- Mix almond flour, sweetener, and salt. Stir in melted butter until the mixture holds when pinched. Press evenly into the bottom (and ¼ inch up the sides if desired). Bake 10–12 minutes until lightly golden. Cool while you make the filling.
Method — filling & water bath
- Reduce oven to 325°F (163°C) (or maintain if already set). Lower temperature reduces the risk of overcooking. (26)
- In a stand mixer on low, beat the room-temperature cream cheese until smooth (avoid whipping air). Add sweetener and vanilla; mix until combined. Scrape the bowl.
- Add eggs one at a time, mixing just until incorporated. Fold in sour cream and lemon juice by hand; finish with a gentle scrape — you want a silky, de-aerated batter. Overbeating = air = cracks.
- Pour filling into prebaked crust; smooth top. Wrap the outside of the springform pan with two layers of heavy-duty foil (to prevent leaks). Place the springform into a larger roasting pan. Transfer both to the oven and carefully pour hot (not boiling) water into the roasting pan until it reaches about halfway up the sides of the springform. This is your water bath/bain-marie.
- Bake 50–70 minutes depending on your oven; target is edges set with the center slightly jiggly — an instant-read thermometer should read around 150–155°F (65–68°C) in the center when done. Pulling earlier avoids overcooking (overcooking leads to cracks).
- Turn the oven off, crack the door, and let the cheesecake sit inside 30–60 minutes (this slow cool helps prevent cracks). Remove from oven, lift from water bath, and let cool on a rack to room temperature. Finish by chilling 6–12 hours (overnight is ideal) before unmolding and slicing. (27)
Chef tips & troubleshooting callouts:
- Beat low & slow. Use a paddle and low speed; stop when just combined.
- Room-temperature eggs & cheese. Cold ingredients lead to lumps and overmixing.
- Foil wrap = no wet bottom. Two layers and press tightly around the rim.
- Don’t overbake. Look for a slight wobble — residual heat continues to set the custard. If it’s starting to brown, reduce the temperature next bake.
No-bake low-carb cheesecake — gelatin or whipped-cream set options, 3-ingredient fridge-set method
Two reliable no-bake set methods: gelatin set (firmer) and whipped-cream fold (mousse-like).
Gelatin-set no-bake cheesecake (8-inch)
- 16 oz (450 g) full-fat cream cheese, room temp
- ¾ cup (180 ml) heavy cream, whipped to soft peaks
- ½ cup (100 g) powdered allulose or erythritol blend
- 2½ tsp unflavored gelatin (≈1 envelope Knox), bloom in 3 Tbsp cold water, then dissolve over low heat and cool slightly
- 1 tsp vanilla extract
Method (gelatin):
- Beat cream cheese and sweetener until smooth. Fold in vanilla.
- Whip cream to soft peaks. Temper a small spoon of whipped cream into the warm gelatin, then fold gelatin mixture into the whipped cream, and then gently fold the whipped cream into the cream cheese. Pour into crust and chill 4+ hours (overnight for best set). This yields a firmer, sliceable no-bake cheesecake similar to a baked texture. (28, 29)
Whipped-cream-set (mousse) — 3-ingredient fridge set (super quick)
- 16 oz cream cheese, softened
- 1 cup (240 ml) heavy cream, whipped to stiff peaks
- ½ cup powdered sweetener (to taste)
Method (3-ingredient):
Beat cream cheese and sweetener until smooth. Fold in whipped cream gently. Press into crust and chill 2–4 hours until chilled and spoonable. This is lighter and more mousse-like, excellent for mini cheesecakes and parfaits. (30)
No-bake tips:
- Bloom gelatin correctly. If gelatin isn’t dissolved fully, you’ll get gummy bits.
- Chill time matters. No-bakes still need hours to firm — mini sizes set faster.
Baking times, cooling, crack prevention, slice-perfect methods
Baking times (guide):
- 8-inch baked cheesecake: 50–70 minutes at 325°F (163°C), edges set, center slightly jiggly.
- 9–10-inch pans will take slightly less time per depth (45–60 minutes) because of surface area differences.
Cooling & crack-prevention protocol (follow this stepwise):
- Know when to stop baking: pull it when the edges are set and the center has a slight wobble — residual heat will finish the set. Overbaking = dryness = cracks.
- Slow cool: turn the oven off, crack the door, and let the cake rest in the oven 30–60 minutes. This gradual cooldown reduces thermal shock and stops the custard from shrinking suddenly (which causes cracks).
- Remove to a wire rack and cool to room temperature before refrigerating. Refrigerate 6–12 hours (overnight recommended) for the best texture and clean slices.
Fixes if a crack appears:
- Hide it: spread a thin sour-cream glaze, fruit compote, or ganache over the top for an attractive fix.
- Patch and chill: small cracks can be filled with a bit of whipped cream piped into fissures, then chilled.
Slice-perfect methods:
- Use a hot, dry knife: dip your knife in hot water, wipe dry, slice, then re-heat between slices for clean edges.
- Chill sufficiently: slicing a warm cheesecake causes smearing. A fully chilled cake gives clean, photogenic slices.
- Wipe the knife between cuts to remove residue and reheat as needed.
Mini cheesecake & muffin-tin approach with adjusted bake/no-bake times
Why make minis? They’re faster, portable, great for portion control, and chill faster — perfect for recipe posts targeting low-carb mini cheesecake recipes.
Baked minis (standard muffin pan) — method from Sally’s Baking Addiction:
Prebake crust in lined muffin cups 3–4 minutes at 350°F (177°C), fill with batter, and bake 10–12 minutes for small muffins (adjust to 12–18 for larger cupcake-sized minis). Let cool in the pan and refrigerate 1–2 hours. Individual minis will be set faster due to their small mass. (31)
No-bake minis (muffin liners or silicone cups) — method:
Press 1–2 tsp crust into each liner, fill with no-bake filling, and chill 2–4 hours (mini no-bakes often set in about 3 hours). Sally’s notes mini no-bakes set quicker but recommends avoiding the freezer to rush set because it can freeze the crust unevenly.
Pro tips for minis:
- Use liners for easy removal.
- For party service, pipe filling with a pastry bag for uniform tops.
- Garnish individually—single berries or a small dollop of sugar-free compote look elegant.
Troubleshooting (Cracks, Runny Center, Soggy Crust)
Even the best bakers hit problems — the difference is knowing why it happened and having a short, practical fix. Below are the most common cheesecake failures, why they occur, step-by-step immediate fixes you can try right now, and prevention tips to stop the problem the next time.
Common causes & fixes (overmixing, oven temp, water bath leaks)
What causes cracks, and how to fix/prevent them
Common causes
- Overmixing / over-aerating the batter: whipped-in air expands during baking and collapses during cooling → cracks.
- Too-hot oven or uneven heating: high heat cooks the edges too fast vs. the center.
- Rapid cooling / thermal shock: moving cheesecake from a hot oven to cool air causes shrinkage/cracking.
- Too much leavening or incorrect pan size: eggs + baking powder or using a too-large/too-small pan alters the set.
- Water bath leaks: wet edges, soggy filling, and uneven set from water seeping into the pan.
Immediate fixes (if you’ve just removed the cake and notice a crack)
- Don’t panic. Close the oven door (if it’s safe) or return the pan to the switched-off oven with the door cracked — slow cooling reduces crack widening. Let it rest 30–60 minutes.
- Cool gradually. If you already removed it, place it on a wire rack and let it come to room temperature slowly; then refrigerate uncovered for 6–12 hours. Slow temp change lets proteins settle without collapsing further.
- Cosmetic repair: cover cracks with a sour-cream glaze, berry compote, chocolate ganache, or piped whipped cream — delicious and hides imperfections.
Prevention checklist:
- Beat cream cheese just until smooth — no high-speed whipping.
- Use room-temp ingredients (eggs & cream cheese).
- Bake at low & slow (e.g., 325°F / 160–165°C) and use a water bath.
- Wrap the springform in two layers of foil to prevent leaks.
- Cool in the oven with the door cracked for 30–60 minutes before moving to the counter.
Fixing a slightly runny center (rest & fridge strategies)
Why it happens
A runny center usually means the custard didn’t fully set during baking — common with underbaking, inaccurate oven temps, or an unusually deep pan. No-bake fillings can be runny if gelatin wasn’t bloomed/dissolved correctly or the cheesecake didn’t chill long enough.
Immediate troubleshooting steps (do these in order):
If the cheesecake is warm and underbaked:
- Return to the oven (gentle finish): Preheat to 275°F (135°C). Remove foil, place the cake back into its roasting pan, add a shallow water bath if not present, and bake in 10–15 minute increments. Check every 5–10 minutes — you’re aiming for the center to read ~150–155°F (65–68°C) or be only slightly jiggly. Don’t overbake.
- Slow cool & chill: Once the center is nearly set, turn off the oven and leave the cake inside with the door cracked for 20–30 minutes. Then cool at room temperature and refrigerate overnight.
If the cheesecake is cooled but still slightly runny:
- Overnight chill: Put the cake in the fridge for 12–24 hours — many cheesecakes finish setting with extended chilling as proteins and starches firm up.
- Short freeze trick: If you need a quick fix, place the cheesecake (uncovered) in the freezer for 45–90 minutes — this firms the center enough to slice cleanly. Transfer back to the fridge to thaw slightly before serving. (This will change mouthfeel slightly, but is great for salvaging.)
- Re-bake carefully (if applicable): For baked cheesecakes that are very underbaked after chilling, you can tent loosely with foil and bake at 300°F (150°C) for 10–20 minutes until set — then follow the slow-cool routine. Warning: re-baking may alter texture and increase risk of cracks; weigh pros/cons.
If it’s a no-bake runny issue:
Check gelatin: If you used gelatin and it’s runny, likely the gelatin wasn’t properly bloomed or dissolved. Reheat a small amount of dissolved gelatin, temper it into whipped cream, fold it into the chilled filling, and refrigerate. If you didn’t use gelatin, consider adding a bloomed gelatin slurry (melted and cooled slightly) and folding it in, or serving it as a parfait instead.
Serving salvage ideas:
- Serve as cheesecake parfaits: spoon the filling into glasses layered with crust crumbs and chilled fruit — fixed and tasty.
- Make no-bake spoonable dessert cups: top with whipped cream and berries; call it a “cheesecake mousse.”
Repairing soggy crust and reheating/crisping tips
Why crusts go soggy
- Wet toppers (compote, juicy fruit) sitting on the crust for hours.
- Not prebaking a press-in crust.
- Filling too wet (no-bake with too much cream) or crust not compacted firmly.
- The water bath leak is causing moisture to soak the base.
Prevention (best practices)
- Prebake crust 8–12 minutes for press-in almond crusts.
- Seal crust: brush prebaked crust with a thin layer of melted dark chocolate or tempered butter; allow to set—this creates a moisture barrier.
- Press firmly: compact crust with the bottom of a measuring cup or flat glass before baking.
- Cool toppings separately: only add wet fruit compote immediately before serving, or spoon small amounts on each slice rather than letting fruit sit on the whole cake.
Fixes if the crust is soggy (depending on how far along the cake is):
If the cake is not yet sliced and the crust is soggy:
- Remove wet topping immediately (spoon off compote or berries). Pat the crust surface lightly with a paper towel to remove surface moisture.
- Crisp in the oven: Preheat to 350°F (175°C). Place the whole cheesecake on a rimmed baking sheet and bake 8–12 minutes — this will evaporate some moisture and firm the crust. Caveat: this will warm the filling, so use short intervals and then follow with the cool-slow fridge routine. If you’re nervous about the filling softening, try step 3 instead (below).
If the cheesecake is sliced and individual pieces have soggy bottoms:
- Skillet crisp: Heat a nonstick skillet on medium-low, add a small pat of butter, and very briefly sear the crust side of each slice for 20–45 seconds until crisp. This adds texture and looks great plated with a dollop of whipped cream. (Be gentle — you’re warming the slice.)
- Toaster-oven re-crisp: Place slices on foil or parchment and toast 4–6 minutes at 350°F, checking often.
If you prefer not to reheat the cake:
- Mask with crunchy topping: scatter toasted nuts, toasted coconut flakes, or a crumbly nut-based streusel over slices to add back the crunch.
- Serve deconstructed: crumble the (now soft) crust, layer with chilled filling and a crunchy element on top (granola alternative or toasted nuts) — serves well in jars.
Repairing a crust after a heavy water bath leakage
If the water bath leaked and much moisture soaked the base, it can be difficult to fully revive the crisp. Consider removing the filling into a bowl, drying and rebaking the crust separately until crisp, then piping the filling back into the crisp shell once both are cooled. This is more work but yields the best texture rescue.
Short “What to do right now” cheat-sheet
- Cracks: slow-cool in oven, then cover with topping (sour cream or ganache).
- Runny center (warm): return to oven at 275–300°F in 10-minute bursts until nearly set; then cool slowly.
- Runny center (cold): chill overnight or quick-freeze 45–90 minutes; serve as a parfait if still soft.
- Soggy crust (unsliced): remove wet topping, pat dry, then crisp briefly in oven.
- Soggy crust (sliced): pan-sear crust side 20–45 seconds or add a crunchy topping.
Keto Variations & Sweetener Guide (Erythritol, Allulose, Monk Fruit, Stevia)
Choosing the right sweetener is one of the single biggest decisions you’ll make when writing or testing a low-carb/keto cheesecake recipe. Sweeteners differ in sweetness, bulk, browning, mouthfeel, and how they behave under heat — and some (most notably erythritol). Below you’ll find a practical conversion table, recipe-level guidance (what I use for crust vs. filling vs. toppings).
Which sweeteners measure/behave like sugar (bulk and browning) — conversion table
Use this table as a copy-and-paste asset for recipe posts. It lists practical cook-friendly substitutions, sweetness vs. sugar, and notes about browning, bulk, and best uses in cheesecakes.
| Sweetener | Relative sweetness vs sucrose | Practical swap for sugar | Browning & caramelization | Bulk & texture notes | Best uses in cheesecake |
|---|---|---|---|---|---|
| Allulose | ~70% as sweet. | Start 1:1 by volume, taste & add a small extra 10–30% if you want sugar-level sweetness. Many bakers use 1:1 and adjust to preference. | Browns & caramelizes like sugar but can brown faster — reduce oven temp 10–25°F or tent top to prevent overbrowning. Great for crust tops and glazes. | Provides bulk & mouthfeel (closest to sugar). Minimal aftertaste. Use alone or with a little high-intensity sweetener to boost sweetness. | Filling (baked), toppings, glazes, cookies/crust — top pick for authentic texture. |
| Erythritol | ~60–70% as sweet (varies). | 1:1 (many blends marketed 1:1); pure erythritol can taste less sweet — blends are more reliable. | Does not brown well; can crystallize causing grainy texture. Cooling can cause ‘hardening’ in frozen desserts. | Provides bulk but can crystallize and gives a cooling sensation in the mouth. Use in crusts or where only a little sweetener is needed; best in blends. | Crusts (blends), some frostings — avoid as sole sweetener in silky fillings or ice-cream style toppings. |
| Monk fruit (pure extract) | 100–300× sweeter (very concentrated) — commercial monk-fruit blends are often formulated 1:1 with sugar. | Use commercial blends 1:1; pure extract must be used in tiny amounts and needs bulking agents. | No browning on its own (unless blended with a bulking sugar/allulose that browns). | No bulk unless blended (most commercial products combine monk fruit extract with allulose or erythritol to provide 1:1 bulk). | Good for crust blends & fillings when paired with allulose or erythritol — great label-friendly option. |
| Stevia (pure) | 200–400× sweeter. | Use in tiny amounts or buy stevia blends (bulked with erythritol) made for 1:1 swaps. | No browning; will not caramelize — not suitable for glazes alone. | No bulk — lacks mass & texture; needs bulking agent (allulose, erythritol, or in recipes use added moisture/binder). Can leave bitterness if overused. | Use in small amounts in fillings or combined with bulkers; avoid as only sweetener for baked cheesecakes. |
Practical recipe takeaways (short):
- For a baked cheesecake filling that requires authentic texture and some browning, allulose (1:1) or a monk-fruit + allulose blend is the best single choice. (32, 33)
- For crusts that require structure and less sweetness, a monk-fruit/erythritol blend or erythritol alone works; press hard and pre-bake. (34)
- For no-bake fillings, you can more safely use erythritol blends (no heat to trigger crystallization) or allulose for a smoother mouthfeel. (35)
Safety notes and recent erythritol findings — moderation & alternatives
Summary first: most regulatory bodies still list erythritol as Generally Recognized As Safe (GRAS), but several recent studies have raised associations between circulating erythritol and increased markers of platelet activation/thrombosis and cardiovascular events. These are important signals — they do not yet prove that eating erythritol causes heart attacks — but they do argue for moderation, especially in people with existing cardiovascular risk. Below are the key findings and practical guidance you can include in your article.
What the science found (concise, sourced):
- A 2023 study in Nature Medicine reported that higher circulating erythritol levels were associated with increased risk of major adverse cardiovascular events and that erythritol ingestion in a small pilot study increased platelet reactivity — suggesting a potential mechanistic link. The authors called for further study. (36)
- The NIH and Cleveland Clinic summarized or followed up on these concerns and highlighted that more research is needed; they noted limitations (observational associations, potential confounders, and that erythritol is also produced endogenously). Regulators like the FDA reviewed these studies and reiterated that the current GRAS status stands, but that the findings merit further investigation. (37, 38)
- Additionally, more recent lab and human studies (2024–2025) continued to flag possible vascular or clotting effects at higher exposures — these are evolving lines of evidence, and experts have emphasized that association ≠ causation and study designs vary. (39, 40)
What to tell your readers (clear, balanced copy you can paste into posts):
- Be transparent: mention that erythritol has been widely used and is GRAS, but add a short note about recent studies linking it to markers of clotting and that research is ongoing. Cite a reputable evaluation (e.g., FDA or NIH summary) so readers can read more.
- Suggest moderation: for people using a lot of packaged keto foods daily (which can contain concentrated erythritol), advise rotating sweeteners and limiting high-dose erythritol use. A sensible guidance line: “If you eat keto products often, consider alternating sweeteners or favoring allulose/monk fruit blends.”
- Call out specific groups: people with existing cardiovascular disease or clotting disorders should talk with their clinician before making high-erythritol diets a regular habit. This is prudent and defensible medically. (41)
Practical alternatives & cookbook-level swaps (recipe guidance):
- Prefer allulose in baked cheesecake fillings and glazes when you want sugar-like browning and mouthfeel. It’s close to sugar in behavior and provides bulk, and current evidence doesn’t flag the same cardiovascular concerns as erythritol. Still, allulose can cause digestive upset in large amounts, so we recommend moderate portions. (42, 43)
- Use monk-fruit + allulose blends for a 1:1 sugar replacement without the cooling/crystal problems. These blends give browning, bulk, and label-friendly messaging (no sugar added).
- Rotate sweeteners across recipes: use erythritol blends in crusts, allulose in fillings/toppings, and monk fruit or stevia for small adjustments. This reduces dependence on any single sweetener and minimizes over-consumption risk. (44)
Short note on GI effects & sugar-alcohols:
Erythritol is generally well tolerated compared with other sugar alcohols, but in larger doses can cause bloating or laxative effects in some people. Allulose can also cause GI upset in high amounts. Always add a short “digestive effects” warning for sensitive readers. (45)
Quick: “What to recommend in your recipe copy?”
- Recipe line for baked cheesecake: “I use allulose (or a monk-fruit + allulose blend) in the filling for the best texture and browning — use 1:1 and reduce oven temp slightly to avoid overbrowning.” (46)
- Recipe line for crusts: “Almond-flour crusts take a monk-fruit/erythritol blend well — these provide bulk and a 1:1 swap for sugar in most crust recipes.”
- Health & safety blurb (short): “Erythritol is widely used and considered GRAS by the FDA, but some recent studies have reported associations between high erythritol exposure and markers of blood-clotting; if you have heart disease or regularly consume lots of erythritol-sweetened products, consider alternatives like allulose or monk-fruit blends and talk with your doctor.”
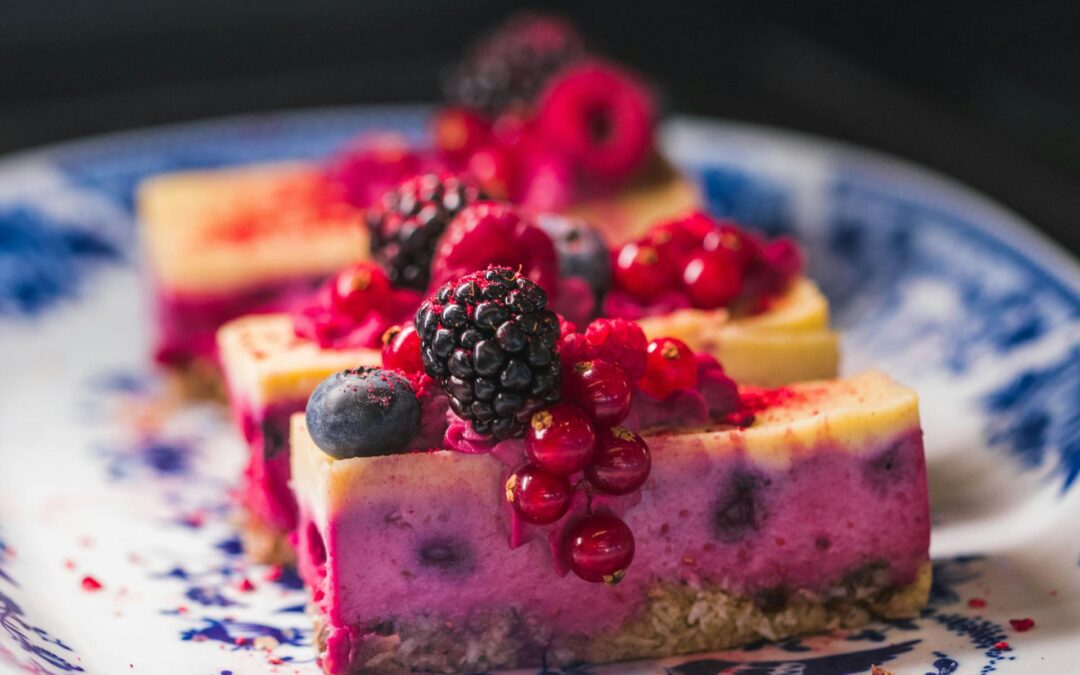
Toppings & Serving Ideas (Sugar-Free Sauces, Fresh Berries, Candied Nuts)
Toppings are where a low-carb cheesecake goes from “nice” to “knockout.” The right sauce, a bright compote, or a glossy ganache gives contrast to the dense filling; whipped cream and crunchy nuts add texture. Below are chef-tested recipes and variations, plus storage, plating.
Quick sugar-free berry compote (stovetop) — 10–15 minutes
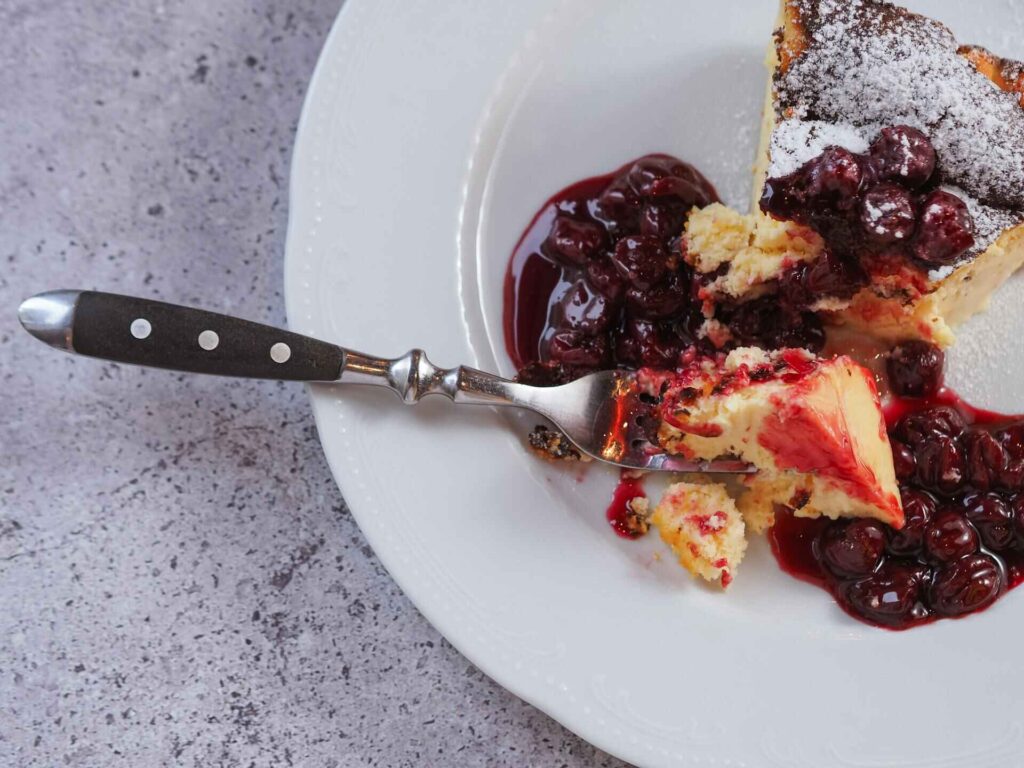
Why it works: Berries release natural pectin and flavor when heated. A little lemon and a low-carb sweetener (allulose or monk-fruit blend) give brightness without sugar. This is perfect on chilled cheesecakes because the warm/acid counterpoints the creamy filling. (47, 48)
Ingredients (makes ~1¼ cups)
- 2 cups mixed berries (fresh or frozen — strawberries, raspberries, blueberries)
- 2–3 tbsp allulose (or 2 tbsp monk-fruit/erythritol blend) — adjust to taste
- 1 tbsp lemon juice (fresh)
- 1 tsp vanilla extract (optional)
- 1–2 tbsp water (if using frozen or to loosen)
Method
- Place berries, sweetener, and lemon juice in a small saucepan over medium heat. Add 1–2 tbsp water only if needed.
- Stir and bring to a simmer. Mash berries gently with a fork or potato masher for a saucier compote, or leave some whole for texture.
- Simmer 6–10 minutes until syrupy. If you want it thicker without added sugar, stir in 1 tsp chia seeds (let sit 5–10 minutes) or ¼ tsp xanthan gum whisked into a little water and added slowly. (Chia gives a slightly “jammy” texture and is great for spooning.) (49, 50)
- Cool to room temp, then chill. Spoon over slices just before serving.
Variations
- Quick no-sweetener compote: cook berries with 1 tbsp lemon and a pinch of salt — the fruit’s natural sweetness is often enough (great “no added sugar” angle).
- Spiced compote: add a cinnamon stick or a pinch of grated ginger while simmering.
- Make-ahead / storage: store in an airtight jar in the fridge 7–14 days (recipes using allulose/monk fruit often recommend similar fridge times; test before long storage). (51)
Chocolate ganache without sugar (keto ganache) — glossy & pourable

Why it’s great: a sugar-free ganache gives dramatic shine and chocolate intensity without raising carbs. Use high-cocoa unsweetened chocolate or very-dark 85% chocolate and sweeten with liquid allulose or an allulose syrup to maintain smooth texture and prevent graininess. (52, 53)
Ingredients (pourable ganache, ~1 cup)
- 6 oz (170 g) 70–85% chopped dark chocolate (or unsweetened chocolate + cocoa, see notes)
- ¾ cup (180 ml) heavy cream
- 1–2 tbsp liquid allulose (or 2 tbsp powdered allulose dissolved in 1–2 tbsp warm cream) — adjust to taste
- 1 tsp vanilla extract (optional)
- Pinch sea salt
Method (classic stovetop)
- Heat the heavy cream in a small saucepan until it just begins to simmer (do not boil). Remove from heat.
- Pour hot cream over chopped chocolate in a heatproof bowl. Let it sit for 1–2 minutes to soften the chocolate.
- Whisk gently until smooth and glossy. Whisk in liquid allulose and vanilla to taste. If using powdered sweetener, dissolve it into the hot crin first to avoid grit. Add a pinch of salt to deepen flavor.
- For a thicker ganache (for piping or truffle coating), chill until it reaches the desired consistency; for a pourable glaze, use warm and pour over the chilled cheesecake so it sets to a glossy finish.
Tips & swaps
- No-dairy / paleo option: use coconut cream and use liquid allulose or a small amount of maple syrup (paleo) — coconut will add flavor and set a bit differently.
- Avoid carbohydrate surprises: using powdered allulose or dissolving it into warm cream prevents ga ritty texture. Erythritol alone can recrystallize and feel grainy — blends or allulose are smoother for ganache.
Serving idea: pour a thin layer just before serving for a restaurant-style finish, or pipe thicker ganache rosettes around the edge for decoration.
Whipped cream variations — classic, stabilized, & coconut (dairy-free)
Whipped cream is the fastest finishing touch. Use it plain, stabilized for make-ahead, or try coconut whipped cream for dairy-free/paleo audiences. (54, 55)
Classic keto whipped cream (quick)
- 1 cup (240 ml) heavy whipping cream, icy
- 2 tbsp powdered allulose or powdered monk-fruit blend (adjust to taste)
- ½ tsp vanilla extract
Method: whip cream to soft/medium peaks, add powdered sweetener and vanilla, then whip to medium/stiff peaks. Use immediately for the best texture.
The Stabilized whipped cream (holds shape 1–2 days) — great for make-ahead and piping.
- 1 cup heavy cream
- 2 tbsp powdered sweetener
- 1 tsp unflavored gelatin (bloom in 2 tbsp cold water, melt & cool slightly) OR 1 tbsp instant powdered cream cheese (for flavor + stability)
Method: whip cream to soft peaks, slowly stream in dissolved gelatin while whipping to stiff peaks. Chill until set. Stabilized cream keeps rosettes tidy on cheesecakes for parties.
Coconut whipped cream (dairy-free)
- 1 can full-fat coconut milk or coconut cream, chilled overnight (chill can upright to separate)
- 1–2 tbsp powdered sweetener (to taste)
- ½ tsp vanilla
Method: scoop chilled solid coconut cream into a bowl (discard watery liquid or save for smoothies). Whip until fluffy and add sweetener & vanilla. Bon Appétit’s notes on thorough chilling and brands give the best results (coconut brands differ). Coconut whipped cream can be less stable, but it is a top dairy-free substitute.
Flavor & texture add-ons (micro-ideas):
- Fold a spoonful of cocoa for mocha whipped cream.
- Add a pinch of citrus zest for brightness (lemon or orange) — fantastic with berry compote.
- For extra body, fold in a small spoon of mascarpone for richer hold anda mouthfeel.
Storage: fresh whipped cream is best day-of; stabilized versions keep 24–48 hours. Coconut whipped cream stores up to 2–3 days but may separate — rewhip briefly if needed.
Serving, Plating
- Pairings: a thin pour of warm or room-temperature berry compote over chilled slices, with a side of ganache drizzle and a small rosette of stabilized whipped cream. Add toasted sliced almonds or candied pecans for crunch (see nut section).
- “Serve 1 slice (1/12 cake) with 1–2 tbsp compote — adds ~1–3 g net carbs depending on sweetener.”
Quick storage cheat sheet
- Berry compote: fridge 7–14 days in an airtight jar (allulose/monk fruit versions); freeze in small portions up to 3 months. (56)
- Ganache: fridge 1–2 weeks covered; rewarm gently to pour.
- Whipped cream: fresh 0–8 hours (classic), stabilized 24–48 hours, coconut cream 1–3 days (rewhip if separation).
Mini & Portion Control: Low-Carb Mini Cheesecakes
Mini cheesecakes are a winner for portion control, party trays, and keto-friendly serving sizes. Below you’ll get practical single-serve size targets, realistic calorie & carb estimates (with clear assumptions), and oven vs fridge-set timing so you can pick the right method and portion size every time.
Quick summary: A standard 1/12 slice of the 8-inch low-carb cheesecake recipe (almond-crust baked version used earlier) is roughly ~340 kcal & ~4.5 g total carbs. If you make 24 minis from the same batter, each mini is roughly ~170 kcal & ~2.3 g carbs. Crustless versions drop those numbers further (~240 kcal / ~2.2 g carbs per 1/12 slice; ~120 kcal / ~1.1 g carbs per mini). (57, 58, 59)
Perfect single-serve sizes (visual & weight targets)
Pick a serving size that fits the occasion:
- “Party mini” (very small): 1–1.5 inch diameter, ~25–40 g each — great for grazing and tasting platters.
- “Standard mini” (recommended): 2–2.5 inch diameter, ~45–70 g each — one or two satisfy most guests.
- “Full mini” / single-serve (substantial): 3-inch or muffin-tin cupcake size, ~75–100 g — the most satisfying portion, close to a small slice.
Calorie & carb estimates (practical, sourced ranges)
How I estimated these numbers (so you can reproduce or tweak): I used the classic baked low-carb cheesecake formula we developed previously (≈680 g cream cheese + 150 g sour cream + 3 eggs in the filling; almond-flour crust ≈150 g almond flour + 42 g butter). Nutrition values were taken from public nutrition tables (USDA / food databases) for cream cheese, almond flour, sour cream, and eggs, then summed and divided by portion counts. These are estimates — brand choice (full-fat vs low-fat, almond flour brand, exact sweetener used) will change values.
Representative estimates (based on that full 8-inch recipe):
- Whole cake (crusted) ≈ 4,080 kcal total; ~54.6 g total carbs (all values rounded; totals include crust & filling).
- Per 1/12 slice (classic plate slice) ≈ 340 kcal • ~4.5 g total carbs.
- Per 1/24 mini (small standard mini) ≈ 170 kcal • ~2.3 g total carbs.
- Crustless version (same filling, no crust) ≈ 2,886 kcal total; ~26.1 g carbs total.
- Per 1/12 crustless slice ≈ 240 kcal • ~2.2 g carbs.
- Per 1/24 crustless mini ≈ 120 kcal • ~1.1 g carbs.
Notes & caveats:
- The sweetener (allulose, erythritol, monk fruit) used in the recipes typically contributes negligible net carbs when using non-nutritive sweeteners or allulose (allulose often not counted as net carbs on many labels). Check the product label — some pre-blended sweeteners contain dextrose/maltodextrin, which add carbs.
- Almond flour brands vary in fiber vs total carbs — I used an approximate 19 g total carbs / 100 g value (net carbs lower after subtracting fiber, depending on the label). Always tell readers: “Use your brand’s nutrition info to calculate exact per-serving carbs.”
Oven (baked minis) vs fridge (no-bake minis) — timing & technique
Baked minis (muffin tin/liner method)
- Prebake crust (if used): 3–4 minutes in muffin liners at 350°F/175°C.
- Fill muffin wells ¾ full with cheesecake batter.
- Bake time: ~10–12 minutes for small minis (Sally’s Baking Addiction tests ~10–11 minutes for very small minis); larger cupcake-size minis need 12–18 minutes. Look for edges set and a slightly wobbly center. Cool in the pan, then refrigerate.
- Chill: 1–3 hours for minis (smaller mass chills much faster than a whole cake). Overnight chilling makes slicing and texture best.
No-bake / fridge-set minis (gelatin or whipped-cream set)
- Fill crusted or crustless mini cups.
- Set time: ~2–4 hours for standard minis (gelatin methods firm quicker and slice cleaner; whipped-cream folds need longer chilling for density). Allrecipes and recent popular recipe tests show many no-bake minis set solid in 3–4 hours; overnight for best texture. (60)
Which to choose for minis?
- Use baked minis when you want a traditional, dense cheesecake flavor in a tiny package. They hold up well on a plate and for display.
- Use fridge-set/no-bake minis if you need speed, want to avoid ovens in summer, or prefer a lighter mousse-like texture. They’re ideal for make-ahead parties.
Pro tips (mini-specific):
- Silicone liners or nonstick muffin pans make removal easy. Chill minis thoroughly in the pan before unmolding.
- Portion control: weigh a test mini on a kitchen scale (e.g., 60 g) and use that as a scoop size for uniform macros & presentation. Small scoops = many servings with lower per-piece calories.
- Label servings on your post (e.g., “Each 2-inch mini ≈ 2.3 g carbs / 170 kcal — approximate”) — this helps searchers who want macros quickly.
Storage & make-ahead for minis (short & practical)
- Fridge: minis keep 3–5 days covered. No-bake minis are best eaten within 3 days for texture.
- Freeze: freeze un-topped minis on a tray, then bag for up to 2–3 months. Thaw in the fridge overnight; add fresh toppings after thawing to avoid sogginess.
Storage, Freezing & Make-Ahead (How to Store Low-Carb Cheesecake)
Storing your low-carb cheesecake correctly keeps it safe and tasting its best. Below are practical, chef-tested rules (fridge temp & timing), step-by-step freezing and thawing instructions, plus pro tips for packaging, removing toppings, and make-ahead planning.
Refrigeration: best temp and timings
Quick bottom line:
Refrigerate cheesecakes at 40°F (4°C) or below and consume within 3–4 days for food-safety best practice; if in doubt, toss it. Refrigerate within 2 hours of baking/serving to stay out of the “danger zone.” (61, 62)
Why these rules matter
Cheesecake is a dairy- and often egg-based product; those ingredients support bacterial growth if left too warm. Food-safety agencies recommend keeping refrigerators at or below 40°F (4°C) and avoiding leaving perishable foods at room temperature for more than 2 hours (1 hour if ambient temp >90°F). Following that keeps your dessert safe and slows quality loss. (63)
How long in the fridge? — Practical guidance
- Food-safety window: Aim to eat homemade baked or no-bake cheesecake within 3–4 days of refrigeration. Many culinary sources recommend up to 5–7 days for quality, but 3–4 days is the safer, conservative guidance for dairy/egg desserts. If you run a blog, use the shorter range for liability and safety. (64)
- Storage style: Keep the cake covered and airtight (plastic wrap tightly, or place in an airtight cake container) to prevent drying and flavor pickup from other foods. For slices, use airtight containers or wrap each slice in plastic wrap, then foil. (65, 66)
Refrigerator placement & thermometer tip
Store cheesecake on a middle shelf (not in the door) where the temperature is more stable. Use an appliance thermometer to confirm your fridge sits at ≤40°F (4°C). Many food-safety sites recommend this simple check.
Make-ahead scheduling
For best texture and flavor, bake or make your cheesecake 1–3 days before serving (overnight chill improves texture). If you need longer storage, freeze (see next section). Many pros recommend chilling at least 6–12 hours (overnight) before serving for clean slices.
Freezing & thawing for quality — professional tips (wrap, remove fruit toppers)
Why freeze?
Freezing is great for making-ahead desserts, saving leftovers, or shipping slices. But freezing affects texture and toppings — do it properly, and your cheesecake will survive with minimal quality loss.
How long can you freeze cheesecake?
Quality window: For best flavor/texture, keep cheesecake frozen 1–2 months; it can be frozen up to ~3 months, but quality (especially toppings and crust texture) declines after that. Label with date. (67)
Prep steps before freezing (pro method)
- Fully chill first. Cool baked cheesecakes completely and refrigerate overnight so the filling is very firm — this makes handling easier and reduces condensation later. Don’t freeze a warm cake.
- Remove wet toppings. Do not freeze cheesecakes with fresh berry compotes, whipped cream, or other “wet” toppers — these become watery and break down. Remove or reserve toppings and add them after thawing. (If you must freeze some toppings, freeze them separately in a jar or bag.) (68)
- Portion or whole? Decide whether to freeze whole or slice: freeze individual slices for easier thawing and portion control; freeze whole cakes if you need the presentation intact. For slices, place them on a tray first, freeze until firm, then wrap.
Wrapping & packaging (airtight is everything)
- Layer 1 — flash freeze (optional but recommended): Place whole cake or slices on a tray and freeze until just firm (1–2 hours). This prevents pieces from sticking and preserves shape.
- Layer 2 — plastic wrap: Wrap tightly in at least two layers of plastic cling film so there’s no direct air contact.
- Layer 3 — heavy-duty foil or freezer bag: Overwrap with foil or put the wrapped cake/slices into a freezer-grade resealable bag. Remove as much air as possible. For extra protection, place the wrapped cake in a labeled box or cake carrier.
Freeze-thaw strategy (best results)
- Thaw in the refrigerator: Move the wrapped cake or slices to the fridge and thaw overnight (8–12 hours). Thawing slowly in the fridge preserves texture and reduces sogginess. Do not leave whole cheesecakes at room temp for hours — follow the 2-hour room-temperature rule.
- Unwrap only after mostly thawed: Keep it wrapped while thawing to limit condensation on the surface. Once mostly thawed, unwrap and let stand for 15–30 minutes before serving if desired.
If you’re in a hurry
Counter thaw for slices only: For individual slices, you can set them on the counter for up to 1–2 hours (per USDA 2-hour rule) to come to serving temp — but monitor carefully. Whole cakes should not be thawed at room temperature for long.
Re-freezing?
If the cheesecake stayed at safe temperatures (≤40°F) and still contains ice crystals, refreezing is possible, but quality will degrade. If it got above 40°F for >2 hours, discard it. FoodSafety.gov provides guidance on refreezing and “when in doubt, throw it out.” (69)
Pro chef tips & troubleshooting
- Label everything. Mark freeze date and contents — “Baked almond-crust cheesecake — frozen 2025-09-08.”
- Keep toppings separate. Freeze plain cake; add berry compote or ganache after thaw for best texture.
- Avoid the door. Store wrapped cheesecake in the main body of the fridge/freezer to avoid temp swings.
- Prevent soggy crusts: For wet toppings, either add them right before serving or brush prebaked crust with a thin layer of melted chocolate as a moisture barrier before adding wet toppings (or freezing).
- Freeze slices flat. Flash-freeze slices on a tray, then wrap individually for quick single-serve thawing.
Nutrition, Allergen Swaps & Macros (Per Slice Estimates)
Below you’ll get a clear, nutrition breakdown (totals + per-slice + mini), plus practical allergen swap options (dairy-free, paleo) and low-histamine alternatives.
Important: these are estimates based on representative ingredient values (brands vary). I used publicly available USDA / nutrition database figures for the main ingredients — I’ve listed sources after each section so you can link or quote them directly.
Sample macro breakdown (almond vs coconut crust)
Recipe assumptions (the base used for calculations)
This is the same recipe we used earlier in the article (8-inch springform full cake):
Filling
- 680 g full-fat cream cheese (blocks), room temp.
- 150 g full-fat sour cream. (70)
- 3 large eggs (~50 g each).
Crust options (choose one):
- Almond crust: 150 g blanched almond flour + 42 g butter (melted). (71)
- Coconut crust (alternative): comparable crust made from coconut flour/shredded coconut — coconut flour is much more absorbent (see notes below).
Sweeteners (allulose/erythritol/monk-fruit) were treated as negligible net carbs (many recipe sweeteners have near-zero digestible carbs; check labels). If you use sugar, add those carbs accordingly.
Calculated nutrition (estimates) — Almond-crust version
(Totals are for entire 8″ cake; per-slice assumes 12 equal slices; per-mini assumes 24 minis.)
| Metric | Whole cake | Per 1/12 slice | Per 1/24 mini |
|---|---|---|---|
| Calories (kcal) | ≈ 4,126 kcal | ≈ 344 kcal | ≈ 172 kcal |
| Net carbs (g) | ≈ 35.8 g | ≈ 3.0 g | ≈ 1.5 g |
| Protein (g) | ≈ 105 g | ≈ 8.8 g | ≈ 4.4 g |
| Fat (g) | ≈ 394 g | ≈ 32.8 g | ≈ 16.4 g |
Key sources for the numbers above: cream cheese nutrition (per 100 g) and behavior used to calculate the filling; almond flour and butter values used to build the crust. (Data from USDA/Nutrition databases and public nutrition tables.) (72, 73)
“Estimated macros: 1 slice (1/12) of this almond-crust low-carb cheesecake ≈ 344 kcal, ~3 g net carbs, 8.8 g protein (brand variance applies — always check your labels).”
Why almond vs coconut crust matters (net-carb comparison)
- Almond flour is relatively low in net carbs because it’s higher in fat and fiber (typical net carbs ~7 g per 100 g after subtracting fiber in many brands). That’s why almond-flour crusts add only a small amount of net carbs to each slice.
- Coconut flour looks scarier at first: it has more total carbs per 100 g, but very high fiber (so net carbs depend on how you use it). Raw coconut flour’s net carb profile is higher than almond flour’s on a weight-for-weight basis — but you use far less coconut flour because it soaks up liquid (it’s not a 1:1 substitute). That’s why a properly formulated coconut-flour crust can still be low-carb, but you must follow tested ratios. (74)
“Almond crust = lowest net carbs per slice; coconut crust can be low-carb if made with small amounts of coconut flour plus extra binder — but it’s not a 1:1 swap for almond flour.”
Dairy-free & low-histamine alternatives
Dairy-free / vegan cheesecake options (best substitutes + macro notes)
If you need a dairy-free version (vegan, allergy, paleo), the most successful approaches mimic the richness of cream cheese:
- Soaked cashew “cream” — blend soaked raw cashews with a little lemon, coconut cream, or plant milk and a thickener (agar, tapioca) until ultra-smooth; sweeten with allulose or maple/nectar (paleo). Cashew cheesecakes are the most similar in texture to classic cheesecake and are widely used in tested vegan recipes. Expect higher carbs if you add sweeteners like maple or dates — but if you use monk fruit/allulose and limit added sweeteners, cashew bases can be fairly low in carbs. (75, 76)
- Coconut cream + agar — full-fat coconut cream whipped and set with agar or gelatin substitute works well for mousse-style no-bake cheesecakes (paleo & dairy-free). Coconut adds a discernible flavor (good with tropical or chocolate toppings). Watch carbs if you use sweetened coconut products.
- Silken tofu (not always low-histamine) — some vegan recipes use silken tofu blended with thickeners; this is lower fat and lower calorie but has a different mouthfeel (and is not suitable if you’re avoiding soy).
“Vegan low-carb cheesecake idea: cashew + coconut cream base, set with agar — swap sweetener to allulose or monk fruit to keep carbs keto-friendly.”
Low-histamine considerations and safer swaps
If you follow a low-histamine approach, callouts are important because histamine intolerance is different from classic food allergy, and some fermented or aged dairy/cheeses are high in histamine. The Cleveland Clinic (and other clinical resources) explains the condition, and that some people react to aged/fermented dairy and leftovers. (77, 78)
Practical low-histamine tips for cheesecake:
- Avoid aged & fermented dairy products for sensitive people (aged cheeses); full-fat fresh cream cheese tends to be lower in histamine than aged cheeses, but individual tolerance varies. Cite a clinician if unsure.
- Prefer freshly made — histamine levels can rise in foods stored for a long time or reheated repeatedly. Make and chill, then consume within the recommended fridge windows.
- Dairy-free options: cashew or coconut-cream bases are often tolerated better by people sensitive to histamine, but test individually (some nuts and processed plant milks can be triggers for some people). Work with a clinician or dietitian when in doubt.
Advanced Tips, Serving & Presentation (Plating, Slicing, Garnishing)
This section teaches the finishing moves — how to slice a cheesecake like a pro, plate it for photo-ready appeal, and choose garnishes that add texture/contrast (without adding carbs).
Slice-perfect technique — tools, temperature & step-by-step
Why it matters: a clean slice = more clicks. Photos of ragged edges don’t convert as well, and users look for “how to slice cheesecake” tips.
Step-by-step slicing method:
- Chill well. Refrigerate the cheesecake at least 6–12 hours (overnight is ideal). A well-chilled cake slices cleanly.
- Use the right knife. A long, thin-bladed chef’s knife or slicing knife works best. Alternatives: a metal spatula or unflavored dental floss (wrap around base and pull).
- Hot water technique: Heat a tall glass of hot water. Dip the knife blade in the hot water for 2–3 seconds, wipe it dry with a clean towel, then slice in one smooth stroke. Re-heat the blade between slices. This melts any tacky edge and gives glossy, clean cuts.
- Single stroke per cut. Don’t saw back-and-forth — one confident pull produces the cleanest edge.
- Wipe between cuts. Wipe the blade completely dry to remove residue; otherwise, it smears.
- Serve on chilled plates (optional). Cold plates keep the slice neat when plated for service.
Pro tips:
- For mini cheesecakes, use a small offset spatula to lift the whole mini from the pan. Chill minis in their liners to avoid damage.
- If the cake is slightly soft, freeze for 20–45 minutes to firm, then slice. This salvages texture without changing flavor much.
Plating & composition — color, texture, and the rule of thirds
A plate should tell a story: contrast creamy, glossy, crunchy, bright.
Plating formula (simple & repeatable):
- Base / negative space: Use a plain white or matte plate for strong visual contrast. Leave at least 30–40% of the plate empty (“negative space”) to frame the dessert.
- Anchor with sauce: Spoon a crescent or 2–3 dots of compote/ganache on one side (use a squeeze bottle or spoon), then place the cheesecake slice so the sauce appears to flow from it.
- Add a height element: A quenelle of whipped cream, a shard of chocolate, or a stack of candied nuts adds vertical interest.
- Texture scatter: Sprinkle toasted sliced almonds, crushed keto cookie crumbs, or toasted coconut to add crunch. Don’t over-scatter — a small cluster looks intentional.
- Finish with bright micro-garnish: micro mint leaves, a few fresh raspberries, or lemon zest threads add color, pop, and freshness.
- Rule of thirds: Position primary elements (slice, sauce, garnish) on imaginary grid points — avoids centered, static plating.
Low-carb garnish ideas: toasted almond slivers, sugar-free berry compote smear, powdered allulose dust lightly on whipped cream, toasted coconut flakes, and a chocolate tuile made with keto chocolate.
Garnishing that adds contrast — flavor + texture combos
Build three contrasts: temperature, texture, and acidity.
Starter garnish combos:
- Creamy + Bright + Crunch: whipped cream rosette + lemon zest + toasted almond slivers.
- Chocolate + Acid + Crunch: thin keto ganache drip + fresh raspberry + crushed pecan praline (use allulose to candy nuts).
- Tropical twist: toasted coconut, lime zest, and a small mango-style coconut compote (use low-carb substitutes).
- Winter/holiday: cinnamon-spiked compote, toasted walnuts, and a dollop of mascarpone-sweetened cream.
Garnish dos & don’ts:
- Do keep garnishes proportional—tiny slivers, not mountains.
- Don’t add wet fruit too early—add just before serving to avoid a soggy crust.
- Do label garnish carbs for keto readers (e.g., “2 raspberries ≈ 0.5 g net carbs”).
Serving temperature & pairing suggestions
Serving temp matters to flavor release and mouthfeel.
Serving temps:
- Baked classic: serve slightly chilled, 50–55°F (10–13°C) — take from fridge 20–30 minutes before serving so flavors bloom while texture stays sliceable.
- No-bake mousse style: serve colder, 40–45°F (4–7°C) — these are lighter and taste best chilled.
- Mini cheesecakes: serve straight from the fridge; they chill faster and don’t need tempering.
Pairings that sell:
- Coffee/espresso — bitterness cuts the fat and highlights chocolate/berry notes.
- Black tea / Earl Grey — citrusy bergamot brings out lemon or citrus garnishes.
- Dessert wine alternative (keto): a small serving of decaf espresso or sugar-free flavored syrup drizzle for guests on a strict carb diet.
Make-ahead plating & transport for events
If you cater or sell, these tips keep the presentation intact.
Make-ahead plating timeline:
- T−24 to T−8 hours: Bake and chill cake; prep garnishes (toast nuts, make compote) and refrigerate separately.
- T−2 hours: Apply ganache or glaze if it needs to set; keep chilled.
- T−20 minutes before service: Plate slices, add wet garnishes (compote, whipped cream), finish with fresh herbs/zest.
Transport tips:
- Use a flat, non-slip tray; place a parchment or non-slip mat beneath plates.
- Chill plated desserts briefly in a short-burst freezer (5–10 min) to set toppings before transport.
- For boxed desserts, brace slices with cardboard separators and include a small tub of compote to add before serving.
FAQs
How to make a low-carb cheesecake crust?
Use almond meal + butter + a keto sweetener pressed into a pan and prebaked 8–12 min. For nut-free, use coconut flour with extra binder or sunflower seed flour (watch for color change).
Is cream cheese low carb?
Yes — typical full-fat cream cheese has very low carbs (often <1 g per tablespoon), making it a staple for low-carb cheesecakes.
How to thicken cheesecake without cornstarch?
Use eggs (baked version), gelatin or agar (no-bake), or xanthan gum in tiny amounts. Adding sour cream and chilling overnight also helps set the texture.
Can you make cheesecake without sugar?
Yes — use sugar substitutes (allulose, erythritol blends, monk fruit). Allulose often gives the best texture; erythritol blends work well in crusts. Monitor any health considerations and personal tolerance.
How to store low-carb cheesecake?
Refrigerate 3–5 days covered; freeze slices wrapped tightly for 1–3 months and thaw in the fridge. Remove fresh fruit before freezing.
The Bottom Line
There’s no single “best” low-carb cheesecake — it depends on whether you want classic density (baked) or quick creaminess (no-bake), nut-based crust or nut-free coconut crust, and which sweetener fits your taste and health comfort. Try the almond-crust baked version first to learn the technique, then adapt to mini forms, no-bake set methods, or nut-free crusts. Experiment with allulose or blended sweeteners for the most authentic mouthfeel, and always chill thoroughly before slicing for the best results.


Good day! I could have sworn I’ve been to this website before but after checking through some of the post I realized it’s new to me. Anyhow, I’m definitely glad I found it and I’ll be book-marking and checking back frequently!
Hi — welcome and thanks for stopping by! I’m glad you found the site — I really appreciate you bookmarking it and checking back. If there’s a topic you’d like me to cover, tell me and I’ll add it to the queue. Hope you enjoy the future posts!
Valuable info. Lucky me I found your website by accident, and I am shocked why this accident did not happened earlier! I bookmarked it.
Thanks so much — I’m really glad you found the site! 😊 Happy it was a lucky find for you. I appreciate the bookmark — if there’s a topic you’d like me to cover next, tell me and I’ll add it to the queue. Welcome aboard!