Looking for the best blenders for keto smoothies that actually make your fat bombs, bulletproof coffee, and cauliflower sauces taste like a treat — not a chore? You’re in the right place. Whether you want single-serve morning magic or a countertop workhorse that turns nuts into buttery spreads, this guide cuts the noise and shows you what works, why it works, and exactly how to get café-smooth results at home.
I’ll walk you through the real differences that matter for keto cooking — motor grit (not just watts), jar shape, tamper tricks, and the models that punch above their price. You’ll get practical recipes (avocado-coconut smoothies, pesto, cauliflower Alfredo), step-by-step nut-butter how-tos, maintenance tips that prolong your blender’s life, and money-saving buying strategies so you don’t overpay for features you won’t use.
Ready for silky smoothies, velvety sauces, and nut butters that beat the jarred stuff? Keep reading — you’ll have a clear, confident buying plan and kitchen-tested recipes to match your new blender.
Why a High-Power Blender is Keto-Essential for the Best Blenders for Keto Smoothies
If you’re serious about keto cooking, your blender does a lot more than whirl up a smoothie — it’s the machine that turns fatty, fibrous ingredients into silky drinks, sauces, and spreads that actually feel indulgent. Keto recipes lean heavily on fats (avocado, coconut oil, MCTs, butter) and on dense vegetables (cauliflower, cooked greens) and nuts/seeds — all of which need sustained force and good blade geometry to become smooth instead of chunky or gritty. For those reasons, a high-power blender (think 1000–1800 watts or equivalent torque/HP in real-world use) is often recommended for regular keto cooks. (1)
Smooths Fat-Based Shakes & “Fat Bomb” Blends
Fats don’t mix with water on their own — they need mechanical shear to form a stable emulsion. That’s why your “bulletproof” coffee or fat-bomb smoothie will be a thin oil slick if you stir it, but a creamy latte-like drink if you blitz it in a powerful blender. High speeds break the oil into tiny droplets and suspend them in the aqueous phase (coffee, milk, or water), creating a velvety mouthfeel and preventing quick separation. Clinical and practical write-ups on MCT/fat-heavy drinks also use blending as the go-to method for consistent texture. If you want café-style, frothy keto coffees or trouble-free fat-bomb smoothies, blending (not whisking) is the trick. (2, 3)
Practical tip: Start on low and ramp up — this reduces splatter and helps the blender form a proper vortex so the blades pick up all the fat instead of leaving floating pools.
Makes Nut Butters & Seed Butters Possible at Home
Turning whole nuts or seeds into a spreadable butter is a workload: you must break cell walls, release oils, and keep the mixture hot enough to liquefy those oils but not so hot that it scorches. That takes sustained torque more than short bursts of RPM. High-power blenders with robust motors and good blade geometry will get you from gritty crumbs to creamy butter without burning out the motor. Many manufacturers and reviewers recommend machines in the ~1,000-watt+ class (or equivalent high-torque models) for consistent, homemade nut butters. If you try to do the same job in a low-wattage personal blender, you’ll often end up with coarse paste, long run times, or a motor that overheats. (4, 5)
Pro tip: Pulse first to break down to a coarse meal, then run longer with short pauses. Add a teaspoon of neutral oil only if it’s struggling to come together.
Reduces Chunkiness in Veggie Purees & Cauliflower Rice
Cauliflower, cooked greens, and roasted veg are keto staples when you want a low-carb ‘rice’ or a silky sauce. Blenders excel at reducing cell walls and producing emulsions (veg + cheese/cream + oil) that mimic higher-carb textures like mashed potatoes or alfredo. That said, blenders and food processors behave differently: food processors are typically better for achieving grainy “cauliflower rice,” whereas blenders can make very smooth purées — great for sauces, soups, and mash-style dishes. If your goal is fluffy cauliflower rice, use short pulses in a food processor or pulse very carefully in a blender (small batches) to avoid turning the veg into a mush. (6, 7)
Quick workflow: Break cauliflower into small florets, work in small batches (don’t overfill), pulse to the desired size, and drain/pat dry for frying to avoid sogginess.
Torque, RPM, and Why Wattage Alone Isn’t Everything
“Wattage” is the spec everyone sees, but it’s only part of the story. Watts measure electrical power consumption; what the blender actually does depends on torque (the twisting force blades deliver) and RPM (how fast they spin). A machine can have high RPM but low torque, so it spins fast under light loads but bogs down when grinding nuts or thick purees. Conversely, a high-torque motor may spin slower but deliver more grinding force under load, which is exactly what you want for nut butters and dense veggie purées.
The practical takeaway: prioritize real-world performance (tests/reviews that show how the blender handles nuts, ice, and thick blends) rather than just watt numbers. Technical breakdowns and hands-on testing often reveal that jar shape, blade design, and motor cooling are as influential as listed wattage. (8, 9)
How to read specs: If a brand publishes torque or measured horsepower under load, that’s gold. If not, rely on independent tests (nut butter and puree benchmarks) and user feedback for heavy-use tasks.
What To Look For When Buying a Keto Blender
Buying a blender for keto cooking is less about flashy bells and more about performance. You want a machine that reliably emulsifies fats, pulverizes fibrous vegetables, and grinds nuts without overheating or producing excessive noise. Below, I break down the practical specs and features to prioritize — explained in plain language so you can shop with confidence.
Motor Power (watts vs horsepower) & Torque
Don’t get hypnotized by a single watt number. Watts tell you how much electrical power a motor consumes, but real-world blending comes down to torque (the twisting force) and how that torque holds up under load. A blender with high RPM but low torque will spin fast with an easy mix, then bog down when you ask it to make nut butter or a thick cauliflower purée. Conversely, a high-torque motor may spin a bit slower but grind through dense ingredients without stalling.
Practical rule: For regular nut butters, frozen ingredients, and heavy keto soups or sauces, target machines in the ~1,000W+ class (or models with documented horsepower/torque specs). Beyond numbers, rely on hands-on reviews and tests that actually try nut butters, ice, and cauliflower — those are the real-world tasks that separate a blender that “sort-of” works from one that excels.
Quick buyer tip: if a manufacturer publishes measured horsepower under load or mentions sustained torque, that’s a better sign than marketing-peak-watts. Independent test labs (RTINGS, Serious Eats, Cooking for Engineers) are gold for real performance checks.
Jar Material (glass vs BPA-free plastic vs Tritan)
Jar choice affects taste, durability, weight, and heat-handling:
- Glass — inert (won’t leach flavors), resists staining and scratching, and handles hot liquids well.
- Downside: heavier and can break if dropped.
- BPA-free plastics / Tritan — lightweight, shatter-resistant, and common in modern blenders. High-quality Tritan is marketed as BPA-free and food-safe, but plastic can scratch and sometimes retain odors or stains over the years of heavy use. If you’re sensitive to plastic taste or heat plastics often, glass or high-end Tritan are safer bets. (10, 11)
Practical pick: For daily heavy-duty keto work (hot soups, fatty emulsions), glass or high-grade Tritan jars are preferable. For portability or if you fear breakage, choose Tritan—but inspect seals and avoid storing acidic, oily blends in plastic long-term.
Blade Design & Tamper Compatibility
Blades are more than “metal whirling” — shape, length, and mounting determine how ingredients circulate. Tall, narrow jars plus four-prong blades (common on some Vitamix models) create a strong vortex that pulls ingredients down into the blades for faster emulsification. Short, blunt blades (seen on some Blendtec jars) rely on a different shear pattern and can be easier to clean.
A tamper is hugely useful on thick, sticky keto blends (nut butters, frozen desserts, thick pesto). It lets you push dense ingredients into the blade without opening the lid or risking splash — and it reduces the need to stop and scrape. If you plan to make nut butters or thick fat bombs often, buy a blender whose jar accepts a tamper (or includes one). Vitamix-style tampers are some of the most practical and widely recommended. (12)
Pro tip: If a model doesn’t include a tamper, check for compatible third-party tampers or look for an alternate jar geometry that creates a reliable vortex.
Capacity & Personal vs Full-Size
Think about how you cook:
- Personal / single-serve (20–32 oz): great for morning keto smoothies or coffee, compact and fast.
- Limitation: usually poor at nut butter, big soups, and large-batch sauces.
- Full-size (48–64+ oz): ideal for batch cooking — cream soups, sauces, nut butters, and family smoothies. Taller jars usually help emulsify better (they create better vortex dynamics).
If you meal-prep or make sauces for multiple people, a full-size jar (or a blender that offers multiple jar options) will save time and stress. If it’s only single smoothies, a personal unit may be fine — but accept its limits.
Pre-programmed Settings vs Manual Control
Pre-programmed settings (smoothie, soup, ice crush) are a convenience: they automate speed changes and timing so you don’t have to babysit the dial. That’s handy for beginners or repeatable recipes. Manual controls (variable dial, pulse) let you fine-tune texture — crucial when you want to move from “chunky cauliflower rice” to “silky cauliflower purée” without overshooting.
Useful presets + manual override = best of both worlds. If the model only offers presets, check whether the presets can be interrupted or adjusted — many users prefer a simple manual dial for nut butter and troubleshooting. (13)
Warranty & Service — what to expect
A blender is an appliance investment. Warranties vary widely: top-tier brands often offer 7–10 year warranties (Vitamix commonly 7–10 years depending on model), Blendtec advertises long warranties (commonly 8 years), while many mainstream brands (Ninja, others) offer 1–2 year limited warranties. Longer warranties reflect confidence in durability and also reduce long-term cost-per-use for frequent cooks. (14, 15)
Buying checklist: register your product, keep receipts, and read warranty exclusions (commercial use, wear-and-tear parts). For heavy keto use, prioritize models with multi-year warranties and accessible customer service/parts support.
The Top Blender Models for Low-Carb Cooking (Quick Comparison)
If you want silky keto smoothies, reliable nut butters, and lump-free cauliflower sauces, go for a high-power countertop blender (Vitamix, Blendtec, or a premium Ninja). If you mainly make single-serve smoothies or keto coffees, a high-end personal blender can work. Below, I break down the real strengths and caveats of the main contenders so you can pick the right tool for your low-carb kitchen.
Vitamix: Ascent / A3500 / 5200 — strengths & caveats
Vitamix is the brand most people think of when they want industrial-grade reliability and consistent texture. The Ascent A3500 (and similar Ascent/Explorian models) combine powerful motors, variable speed control, tamper compatibility, and long warranties—making them excellent for:
- Emulsifying fat-heavy drinks (bulletproof coffee, fat-bomb shakes),
- turning nuts into smooth, spreadable butter, and
- Making silky hot soups and vegetable purées.
Strengths: proven motor endurance, tamper support for thick mixes, and feature sets (digital timers/presets on higher-end Ascent models) that make repeatable keto recipes easy.
Drawbacks: premium price and large footprint; some older classic models (like the 5200) have simpler controls but still excel at heavy tasks. Independent tests and buyer guides consistently rank Vitamix near the top for heavy-duty cooking tasks.
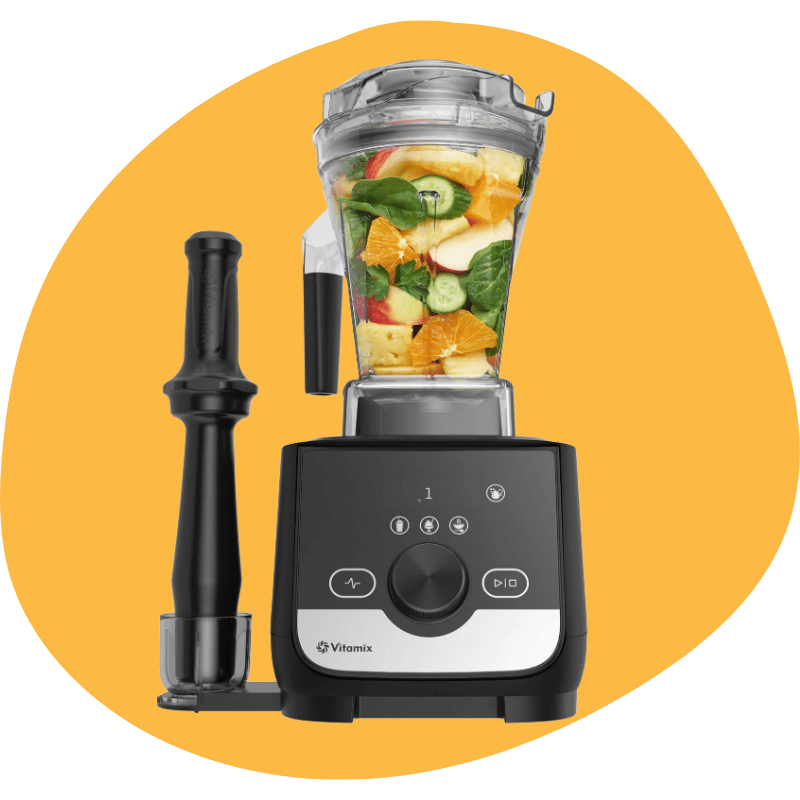
Vitamix Ascent X3 — pro-grade blending in a compact 48-oz format for café-quality smoothies, soups, and frozen desserts.
Three one-touch programs plus an automatic self-clean cycle deliver consistent texture without guesswork.
Smart container recognition auto-adjusts program settings, and stainless-steel blades ensure long-lasting performance.
Compact footprint with intuitive touch controls and dishwasher-safe components for fast cleanup.
Backed by Vitamix’s industry-leading 10-year limited warranty for dependable, years-long use.

Blendtec: Designer / Professional models
Blendtec takes a slightly different design route—shorter, wider jars with blunt, ultra-strong blades and powerful motors. The Designer and Professional lines pack the torque and blunt-blade geometry that pulverizes frozen and fibrous ingredients quickly; they also frequently include touchscreen cycles and long warranties (Designer models often have multi-year warranties). Blendtec’s wild-side jar options improve blending efficiency for frozen bits, which helps with frozen keto shakes and tougher purees.
Strengths: raw blending power, easy cleaning with self-clean cycles, and preprogrammed cycles that simplify repeatable recipes.
Caveats: Some people prefer Vitamix’s tamper system and jar shape for very thick nut butters; Blendtec’s blunt blade design is safe and effective, but behaves differently in texture tests. For many keto cooks, Blendtec is equal to Vitamix in performance but varies in mouthfeel and cleanup preferences.
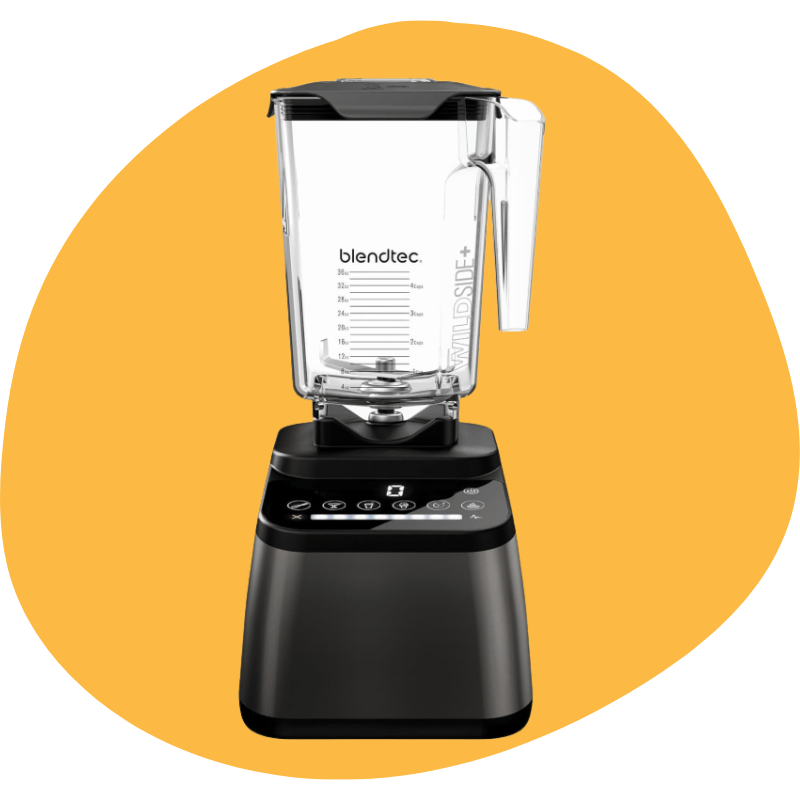
Blendtec Original Designer Series + 90-oz WildSide+ — pro-grade countertop blender with a powerful 1,560W motor for café-quality smoothies, hot soups, and nut butters.
Includes the WildSide+ 90-ounce jar (patented fifth side) and blunt wingtip blade to speed up blending and handle large or frozen batches with up to ~25% greater efficiency.
Easy, consistent results from intuitive pre-programmed cycles, variable speed control, and a self-clean function that simplifies cleanup.
Built for durability — stainless-steel wingtip blade and impact-resistant, BPA-free jar material for long-lasting, safe performance.
Sleek gunmetal finish and a compact footprint make it kitchen-ready, backed by Blendtec’s limited warranty for added peace of mind.
Ninja (Detect / Foodi / Beast) — performance vs price
Ninja models have shaken up the market by offering very strong peak power and smart features at friendlier price points. Recent Ninja lines (Detect, Foodi cold & hot blenders, and the Beast family) perform well for smoothies, crushed-ice drinks, and many veggie purées — and some Foodi models even offer hot-blend cooking capabilities. The biggest value win is price vs performance: you can get close to premium results for smoothies and many sauces without Vitamix/Blendtec pricing.
Strengths: great value, useful presets, and models that now handle hot blending.
Caveats: while high-end Ninjas are impressive, they can struggle more than Vitamix/Blendtec on extended nut-butter runs or ultra-large batches; warranties and long-term service may also be less generous on some Ninja models. Trusted reviewers and updated 2025 tests show Ninja near the top for mid-range performance.

Ninja TB201 Detect Power Blender Pro — 1800-peak-watt power with 72-oz pitcher for family-sized batches.
BlendSense™ smart dial senses ingredients and automatically adjusts speed and run time for consistently smooth smoothies, frozen drinks, and sauces.
Total Crushing® & Chopping blades plus one-touch presets make ice-crushing, salsa prep, and pulsing effortless — 10 speeds give fine control for every texture.
Large, dishwasher-safe pitcher handles big batches and family meals while the powerful motor tackles tough ingredients with ease.
Top mid-range pick: delivers near-premium blending performance at a much friendlier price — excellent value for smoothies and most sauces.
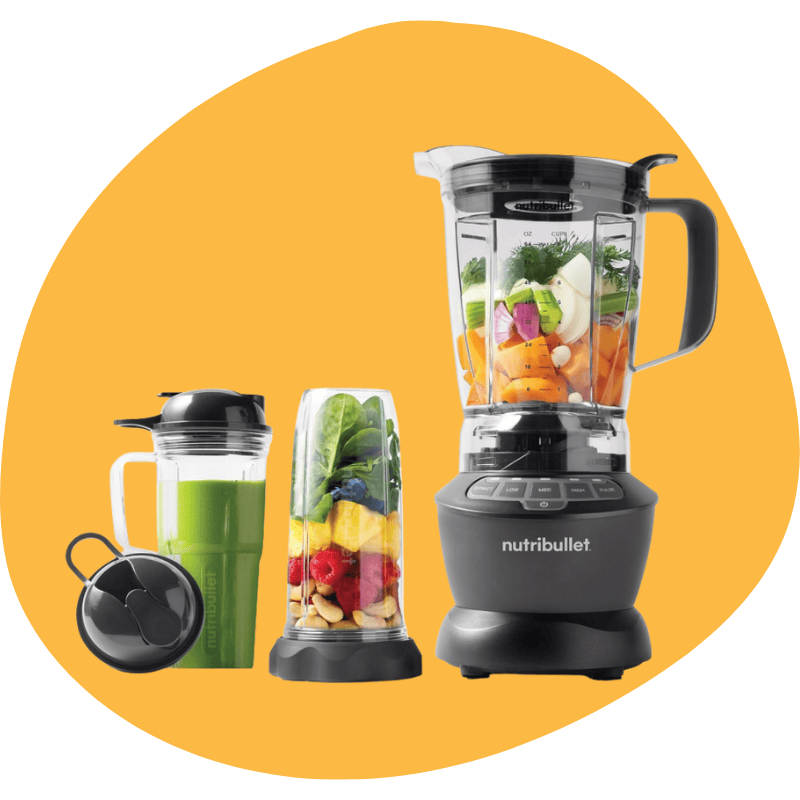
NutriBullet & Personal Blenders — when they’re good (and not)
Personal blenders (NutriBullet, Beast personal models, compact offerings from Ninja and others) are ideal for what they were built for: single-serve smoothies, quick salad dressings, and keto coffees. Modern high-power personal units (some exceed 1,000–1,200W peak) can handle leafy greens and soft fruits very well and are extremely convenient.
When they’re good: you want speed, portability, and an inexpensive way to make single keto smoothies or small sauces.
When they’re not: making nut butters, large batches, or thick purees—these machines either overheat, take excessively long, or produce grainy results compared to full-size high-torque blenders. Reviews note that top personal blenders (e.g., NutriBullet Ultra) bridge the gap but still can’t fully replace full-size high-torque machines for heavy keto tasks.
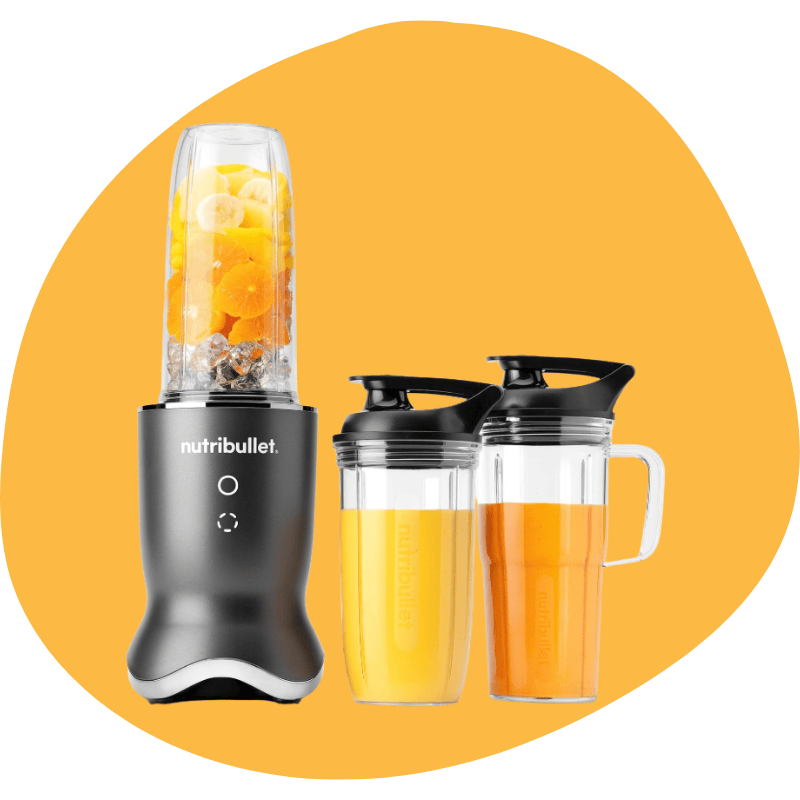
NutriBullet Ultra Personal Blender (NB50500) — 32 oz, Gray
Powerful, quiet single-serve blender built for fast smoothies, keto coffees, and small sauces — a 1,200-watt motor and upgraded Rapid Extractor blade (titanium-coated) deliver smoother results and shorter blend times.
Compact 32-oz Tritan Renew cup plus a 24-oz cup and to-go lids make it easy to blend, take, and clean — components are top-rack dishwasher safe for quick cleanup.
Designed to be quieter than previous NutriBullet models while keeping the extraction power you expect — backed by a 5-year limited warranty for peace of mind.
Key benefits:
- Fast extraction: 1200 W peak power rips through greens and frozen fruit for silky smoothies.
- Durable blade: Titanium-coated Rapid Extractor blade improves longevity and reduces blending time.
- Everyday convenience: Large 32-oz capacity, included travel lids, and dishwasher-safe parts make it ideal for busy mornings.
Quick safety note: do not blend hot liquids; follow the user guide for safe operation and care.
Budget powerhouses & mid-range picks (e.g., Breville, Ninja)
If you want good enough for most keto cooking without the premium price, mid-range blenders from Breville, Ninja, and select models from other brands deliver excellent performance for smoothies, green purees, and many sauces. Breville models (tested by several outlets) surprised reviewers with strong 1,000–1,200W performance and smooth results for green smoothies and blended soups, representing a solid middle ground between cheap personal blenders and the high-end pros.
Strengths: balanced cost, competent motors for everyday keto use, and useful presets.
Caveats: nut butters and extremely dense sauces remain a stretch for many mid-range machines; warranty lengths are shorter than Vitamix/Blendtec. For budget-minded keto cooks who don’t make nut butter daily, these models often offer the best ROI.
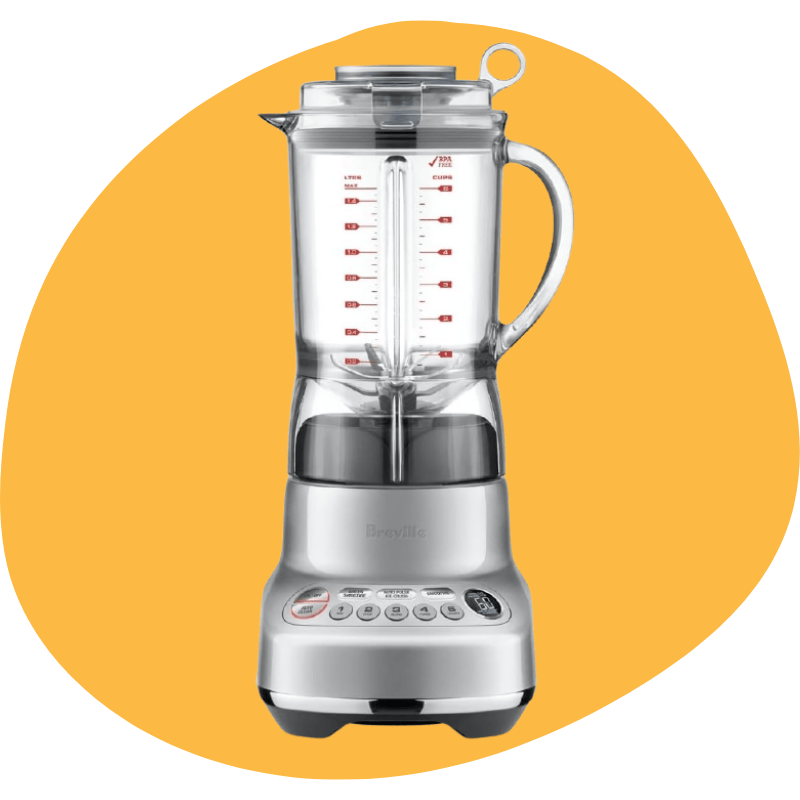
Breville BBL620SIL Fresh & Furious Blender
A crowd-pleasing countertop blender that pairs strong, reliable blending power with user-friendly controls — built to turn smoothies, soups, frozen treats, and sauces into silky, consistent results.
Five one-touch programs plus variable speed and pulse control remove the guesswork so you get the right texture every time, while the precision blade and pitcher geometry promote smooth extraction with less splatter.
Sleek stainless-look finish, compact footprint, and dishwasher-safe components make it as practical as it is attractive on the counter.
Ideal for home cooks who want near-professional performance and everyday convenience without a complicated learning curve.
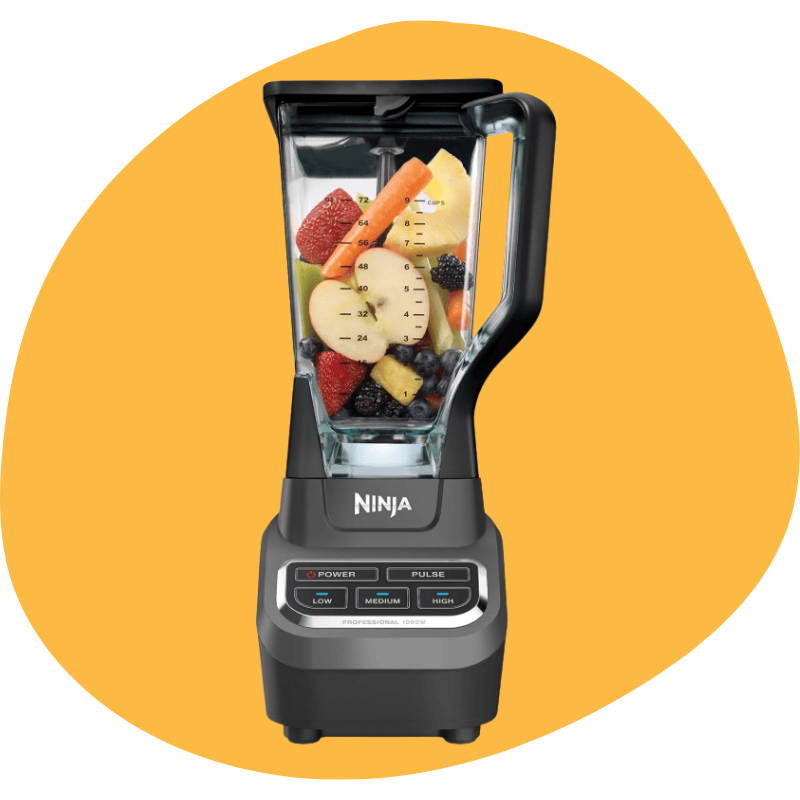
Ninja Professional Blender 1000W (BL610) — 72-oz Total Crushing Pitcher, Black & Gray
Powerful 1,000-watt countertop blender with Ninja’s Total Crushing® blades — crushes ice, frozen fruit, and whole ingredients fast for thick smoothies and frozen drinks.
Extra-large 72-oz pitcher (64-oz max fill) handles family-size batches while the simple 3-speed + pulse controls make it easy to get the texture you want.
Durable stainless-steel blades and dishwasher-safe pitcher simplify cleanup, while the compact footprint fits most countertops.
Great value for fast, everyday blending—heavy on ice-crushing and smoothies at a price point that consistently earns top shopper ratings.
Quick selection checklist (one-minute decision)
- Want daily nut butters, large soups, or pro reliability → Vitamix or Blendtec.
- Want top value with strong performance for smoothies & sauces → Ninja Foodi / Detect / Beast lines.
- Need compact, single-serve convenience → NutriBullet / personal blenders (best for singles, not heavy batters).
- Want mid-range quality at a lower price → Breville / higher-end Ninja models.
Deep Dive: Vitamix or Blendtec — Which is Best for Keto?
When it comes to heavy-duty keto tasks — think nut butters, bulletproof coffees, and ultra-smooth cauliflower purées — two brands keep coming up: Vitamix and Blendtec. Both have pedigree, both are built for the long haul, but they achieve silky results in different ways. Below, I unpack motor specs, jar geometry, warranties, real-world test results, price vs performance, and finish with concrete buy recs so you can pick the right machine for your keto kitchen.
Motor specs, jar geometry, warranty
Motor specs: Vitamix commonly publishes peak-horsepower numbers (many Ascent/Classic models list ~2.0–2.2 peak HP), while Blendtec often advertises wattage (many Designer/Professional models feature motors around 1,500–1,600 W). Both represent serious power; Vitamix emphasizes sustained horsepower with tamper-assisted blending, and Blendtec emphasizes raw torque and blade strength to crush quickly. For example, Vitamix’s A3500 lists a 2.2-peak HP motor and Blendtec’s Designer 650 lists a 1560 W motor.
Jar geometry & blade style: Jar shape affects how ingredients circulate. Vitamix uses taller, narrower jars that encourage a strong vortex so ingredients are pulled down into its laser-cut stainless blades — great when you use a tamper to push thick mixes into the blades. Blendtec uses wider, blunt-edged jars (WildSide/WildSide+) and a blunt safety blade that’s thicker and designed to pulverize without needing a tamper; the extra “fifth side” in WildSide+ jars is designed to improve blending efficiency for frozen and fibrous ingredients. The result: Vitamix gives you more manual control for ultra-thick tasks; Blendtec delivers fast, blunt-force processing that’s easy to clean.
Warranty & support: Warranty length matters for appliances you’ll use hard. Blendtec commonly offers an 8-year warranty on Designer models, while Vitamix typically ships with 7–10 years, depending on the model (some Vitamix containers/steel models offer 10-year coverage). Longer warranties reduce ownership cost and reflect manufacturer confidence. Compare exact warranty terms (what counts as wear-and-tear, commercial exclusions) before you buy.
Real-world tests: smoothies, nut butter, soup
Independent testing tells the story that spec sheets can’t fully show. RTINGS — which runs standardized performance labs — consistently ranks high-end Vitamix models (e.g., A3500) at the top for smoothies and fibrous blends, and notes Vitamix’s easier nut-butter workflow (though with a required scrape/pass step). Their 2025 nut-butter tests show the A3500 is among the best for smoothness after a short scrape-and-resume process. (16)
Blendtec shines in brute-force pulverization and speed. RTINGS and other reviewers note Blendtec often matches or beats Vitamix on pulverizing frozen fruit and making fast purees, thanks to its jar design and thick blades — and Blendtec’s self-cleaning is very convenient after sticky blends. In direct A/B comparisons, reviewers often find Vitamix produces slightly smoother results for some fibrous greens and is easier for long nut-butter runs because of the tamper and jar shape; Blendtec tends to win for rapid, low-effort pulverization and easier cleanup.
Soup & hot blends: Both brands can handle hot soups by friction heating, but Vitamix’s tamping plus manual control gives more predictable texture when you want a velvety, consistent puree. Blendtec’s preprogrammed hot cycles and powerful motor make single-button soup easier for many cooks. Practical note: always follow manufacturer guidance for hot liquids and venting.
Price vs performance: pros/cons for keto cooks
Let’s be blunt: both brands are investments. Here’s a quick pros/cons list for keto-focused buyers.
Vitamix — Pros
- Exceptional at sustained, thick blends (nut butters, thick purees) thanks to jar geometry + tamper.
- Proven longevity and strong user-service networks; high-end models offer long warranties (7–10 years).
- Very fine texture for fibrous greens and creamy hot soups.
Vitamix — Cons
- Price premium on flagship models.
- Slightly more user involvement for some tasks (scraping required in nut-butter runs).
Blendtec — Pros
- Fast, brute-force pulverization — excellent for frozen keto shakes, crushed ice, and many purees.
- Blunt blade design is easier to clean and often faster for single-button cycles; long warranty (often 8 years).
Blendtec — Cons
- Jar geometry and blade design can produce a different mouthfeel (some prefer Vitamix on certain textures).
- Less manual tamper control (though WildSide+ jars mitigate that).
Cost-effectiveness: If you primarily make smoothies and occasional sauces, mid-range Blendtec or high-end Ninja can give nearly-Vitamix performance for less money. If you regularly make nut butters, thick cauliflower-based sauces, or hot soups by friction heat, Vitamix’s workflow is often worth the extra spend long-term. RTINGS and other labs show that on texture metrics, the top Vitamix models often edge out Blendtec for fibrous blends and nut butters — but not by such a margin that Blendtec isn’t a superb choice for many users.
Final recommendation scenarios (who should buy which)
- Buy Vitamix if: you make nut butters or seed butters regularly, cook hot soups in the blender, rely on extremely smooth fibrous green smoothies, or want the tamper + tall-jar workflow and longer warranty options. Vitamix is the safer long-term investment for heavy, frequent keto use.
- Buy Blendtec if: you want fast pulverization, easy cleanup, excellent frozen-drink performance, and strong warranty protection at slightly lower price thresholds. Blendtec is ideal if you value speed and convenience for frozen keto shakes and general-purpose blending.
- Consider alternatives (Ninja/Breville) if: your budget is limited but you still want strong performance for smoothies, sauces, and occasional puree work — modern mid-range models narrow the gap and can be excellent value-for-money solutions. (17)
Best Personal Blenders for Keto on the Go (Top Picks for Best Blenders for Keto Smoothies When Traveling)
Want creamy keto smoothies on your commute? Personal blenders are the pocket rocket of the blender world — small, fast, and perfect for single-serve fat-forward drinks, dressings, and tiny sauces. They won’t replace a full countertop workhorse for heavy nut butters or gallons of cauliflower purée, but for one-person mornings and fast, low-carb drinks, they’re brilliant. Below, I’ll explain what these little machines do best, their limits, and the top models worth your attention in 2025.
What personal blenders can do well?
Personal blenders shine when the job is small and liquid-forward:
- Single-serve keto smoothies & fat coffees: Blend your MCT or butter into coffee, or whip avocado + cream into a creamy cup-size smoothie without a huge cleanup. Many personal units now feature enough peak power to fully emulsify fats for a café-style texture.
- Quick shakes and protein drinks: Toss in protein powder, liquid, and a few ice cubes — you’ll have a lump-free drink in under a minute.
- Small dressings & pestos: When you need a tablespoon or two of sauce (think herb pesto or oil-based vinaigrette), personal blenders make short work of emulsifying and chopping.
- Portable convenience: Many personal blenders double as travel cups — blend, snap on a lid, walk out the door. New portable models also add rechargeable batteries for real on-the-go blending. (18)
If your keto blending is mostly single-serve, liquid-forward, or travel-friendly, a personal blender is the most convenient, affordable solution.
Limitations: nut butters, heavy purees, batch size
Here’s the catch: these compact champs are limited by physics.
- Not ideal for nut butters: Grinding whole nuts into smooth butter requires sustained torque and active scraping — tasks most personal blenders struggle with (they either take ages, produce a grainy texture, or overheat). If you plan to make nut butter frequently, a high-torque countertop model is the safer bet.
- Heavy purees and large batches: Want to make cauliflower mash for the family or a big batch of alfredo-style sauce? Personal jars are too small and will overwork the motor. They’re built for 12–24 oz jobs, not big pots.
- Thermal limits: Many personal blenders are not designed for hot blending (friction-heated soups); hot liquids can create pressure and safety risks unless the model explicitly supports it. Always check the manual.
- Durability & longevity: Because they’re compact, personal blender motors can show wear sooner with heavy, repeated use—so expect to replace them sooner if you abuse them for tasks they weren’t designed for.
Treat personal blenders as the quick-daily weapon in your keto kitchen — great for single servings, not for heavy lifting.
Best personal model picks & why
Here are the standout personal blenders that keto cooks actually use and recommend — chosen for power, reliability, and portability.
- Nutribullet Pro / Nutribullet Pro 900 (or Nutribullet Ultra series) — A long-running favorite for single-serve smoothies with fibrous greens and frozen fruit; the Pro 900 hits a sweet spot of power vs price and makes surprisingly smooth, creamy blends for its size. If you want a reliable daily single-serve blender, this is the classic pick.
- Ninja Foodi Personal / Ninja Fit / Nutri Blender Plus — Ninja’s personal lines frequently top tests for smoothness and durability. They’re practical, often include travel lids, and handle ice and fibrous greens well for their jar size. Allrecipes and RTINGS often rank small Ninja models highly in 2024–2025 testing.
- Ninja BlendBoss / Blast Max (new portable models) — Ninja’s latest portable/personal entries (the BlendBoss/Blast Max) bring rechargeable, travel-first designs with enough peak watts (~1200 peak in some models) to crush ice and handle fat-forward drinks — perfect if you want on-the-go blending without a plug. Tom’s Guide and recent hands-on reviews highlight these as modern, stylish, and genuinely useful.
- Vitamix S30 (and similar compact Vitamix personal options — note: some models discontinued but used heavily in review pools) — If you want the Vitamix brand’s build quality in a small package, legacy models like the S30 (when available refurbished or from clearance) offered better motor endurance and a higher-quality jar system than many rivals — a good pick if you find one new or refurbished. Consumer Reports reviewed S30-style units favorably for personal use.
- Value & niche winners (La Reveuse, Thyme & Table, Zwilling personal blenders) — Smaller manufacturers and “budget boutique” brands keep surprising testers with excellent single-serve performance at lower price points; choose these if you want a cheap, no-frills daily blender for light keto use and are willing to trade long-term warranty for lower cost.
How to choose between them:
- Want the most reliable single-serve smoothing? Nutribullet Pro 900 or Ninja personal lines.
- Want true portability (battery + travel cup)? Check Ninja BlendBoss / Blast Max.
- Want brand longevity & better parts support? Hunt for refurbished Vitamix S30 or newer compact Vitamix offerings.
Quick practical tips for keto users
- Always add liquids first (coffee, milk, or water) when emulsifying fats.
- Use short pulses for fibrous bits, then finish on full speed.
- If you want nut butter occasionally, try small batches of warmed, roasted nuts and accept longer run-times — but don’t rely on a personal blender for regular nut-butter production.
High-Power Blenders Under $300 — Value Picks
Want pro-style blending without selling a kidney? Good news: the market will have several true value options that punch above their price — especially for keto smoothies, sauces, and most veggie purees. Expect compromises (usually in long-run nut-butter duty or ultra-heavy daily commercial use), but for most home keto cooks, these machines deliver creamy results, solid ice-crush, and reliable everyday performance.
What to expect in this price bracket
When you shop for blenders under $300, here’s the realistic checklist:
- Strong smoothie performance: Many sub-$300 models crush ice, blend frozen fruit, and make green smoothies with few visible bits. They’ll give you café-style keto drinks most mornings.
- Reasonable torque for everyday purees: Expect to handle cauliflower purées, alfredo-style sauces, and most soups comfortably — but very dense nut butters may take longer or require small batches.
- Good features without premium polish: You’ll see preset programs, variable speed dials, and sometimes self-clean cycles. Don’t expect the longest warranties (7–10 years are rare here), though some brands do offer solid coverage.
- Better value during sales: Seasonal deals (Prime Day, Black Friday) often push high-quality models below the $300 mark — a great time to snag a near-pro unit at a midrange price.
Think of the under-$300 bracket as the “sweet spot” for serious home cooks who want near-pro results without the professional sticker shock. You’ll get reliability, good blending physics, and a lot of bang for the buck — just temper expectations on continuous, commercial-style heavy-duty workloads.
Best sub-$300 options and short pros/cons
Below are standouts from reviewer labs and trusted publications — selected for performance, value, and real-world keto usefulness.
Zwilling / Enfinigy Power Blender — Often recommended under $300
- Why it’s good: Sleek design, strong motor for smoothies, and tested as a solid Vitamix alternative by outlets that reviewed it under the $300 threshold. Great for green smoothies and everyday purees.
- Pros: Smooth smoothie texture, attractive design, good warranty for the price.
- Cons: Still not a true high-torque pro model for frequent nut-butter production.
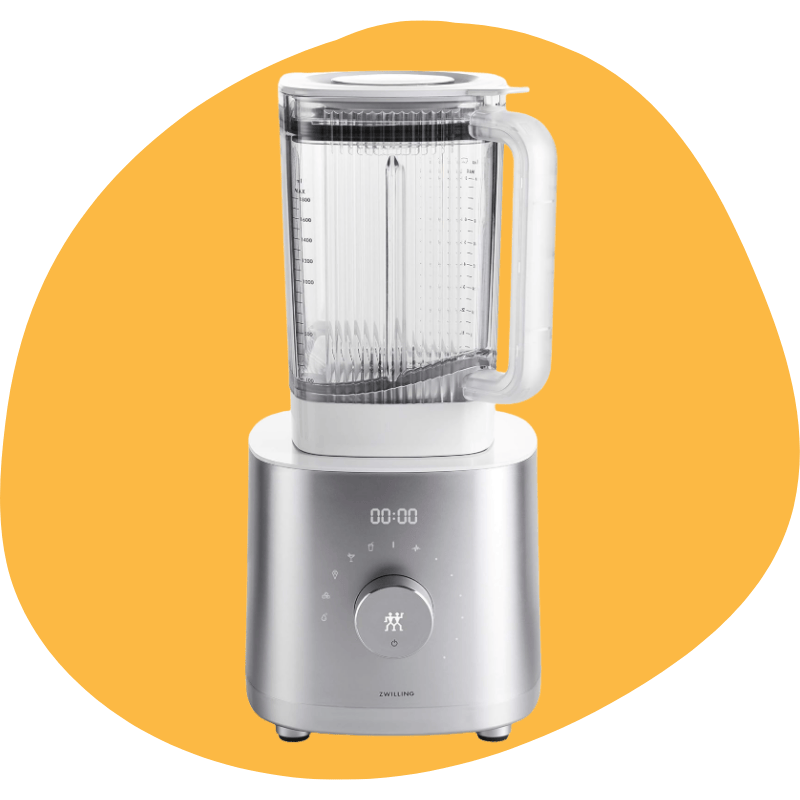
ZWILLING Enfinigy Power Blender — 64 oz | 12-Speed | Sleek Silver
Powerful, stylish, and kitchen-ready — the ZWILLING Enfinigy Power Blender pairs a high-efficiency motor with a 64-ounce pitcher and a patented winglet blade to deliver smooth green smoothies, soups, and everyday purees.
Twelve-speed control plus intuitive presets make it easy to dial in textures from silky to chunky, while the smart pitcher geometry reduces splatter and improves extraction for consistently even results.
Thoughtful design meets durability: quiet operation, an attractive brushed finish that looks great on the counter, and a solid warranty that adds real value at its mid-range price.
Perfect for families and health-minded cooks who want near-pro blending for smoothies, hot soups (check model specs), and sauces — without the premium Vitamix/Blendtec price tag.
Calphalon ActiveSense (Budget Winner) — Best budget multi-purpose
- Why it’s good: RTINGS named Calphalon their best budget blender — strong value near ~$150 with surprising capability on fibrous blends and hot blending. Excellent for keto soups and daily smoothies.
- Pros: Very good performance for the price, large jar, hot-blend capable.
- Cons: The build and warranty aren’t as robust as those of premium brands.
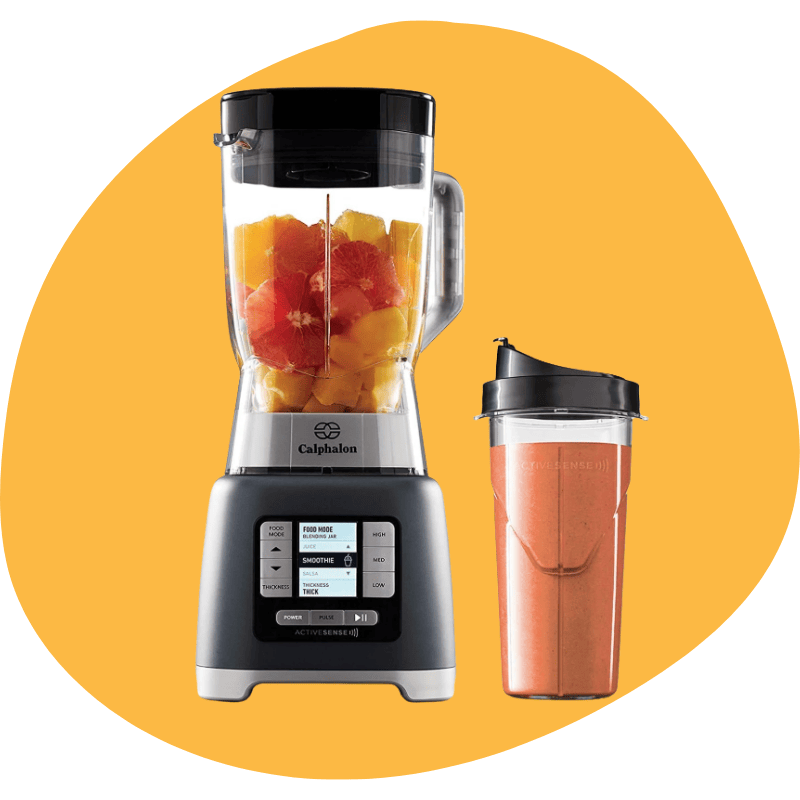
Calphalon ActiveSense Blend-N-Go — 24-oz Portable Smoothie Cup | 1200W | Dark Stainless Steel
Powerful yet compact: a 1,200-watt motor and ActiveSense technology automatically adjust speed and timing so smoothies, frozen drinks, and sauces come out smooth without babysitting. The included 24-oz Tritan Blend-N-Go cup lets you blend and take your drink on the run, while one-touch presets (Smoothie, Salsa, Milkshake, Frozen Drink, Juice) and a consistency selector make everyday blending simple. Designed for convenience—reversible motor tech for even extraction, an “add liquid” indicator to prevent stalling, and dishwasher-safe parts for fast cleanup.
— Great for busy mornings, single-serve keto smoothies, and quick sauces; powerful enough for leafy greens and frozen fruit but compact for countertop storage.
Key features: 1,200W motor; 24-oz Blend-N-Go cup with to-go lid; 5 food presets + consistency control; reversible blade/motor action; dishwasher-safe components.
Ready to use and easy to clean—ideal if you want café-style single-serve blends without a big countertop blender.
Breville Fresh & Furious / Breville models (compact picks)
- Why it’s good: Breville’s compact models (Fresh & Furious, Fresh & Furious 50 oz) deliver thoughtful controls, solid blending for smoothies and frozen fruit, and user-friendly presets — a favorite in midrange reviews. Great countertop fit if you want a balance of power and compactness.
- Pros: Quiet for the power, smart controls, good jar design.
- Cons: Texture may not match high-end models on the densest tasks.
Breville BBL620SIL Fresh & Furious Blender
A crowd-pleasing countertop blender that pairs strong, reliable blending power with user-friendly controls — built to turn smoothies, soups, frozen treats, and sauces into silky, consistent results.
Five one-touch programs plus variable speed and pulse control remove the guesswork so you get the right texture every time, while the precision blade and pitcher geometry promote smooth extraction with less splatter.
Sleek stainless-look finish, compact footprint, and dishwasher-safe components make it as practical as it is attractive on the counter.
Ideal for home cooks who want near-professional performance and everyday convenience without a complicated learning curve.
Ninja (selected models like Foodi / Twisti / Beast variants) — Value + features
- Why it’s good: Ninja’s Foodi and Beast lines give strong peak performance for frozen drinks and sauces, with excellent value and useful accessories (personal cups, processing bowls). Recent Ninja launches (and refreshes) have closed the gap to higher-priced competitors.
- Pros: High peak watts for the price, versatile, and good presets.
- Cons: Long nut-butter runs can stress smaller Ninja units; warranty lengths vary.
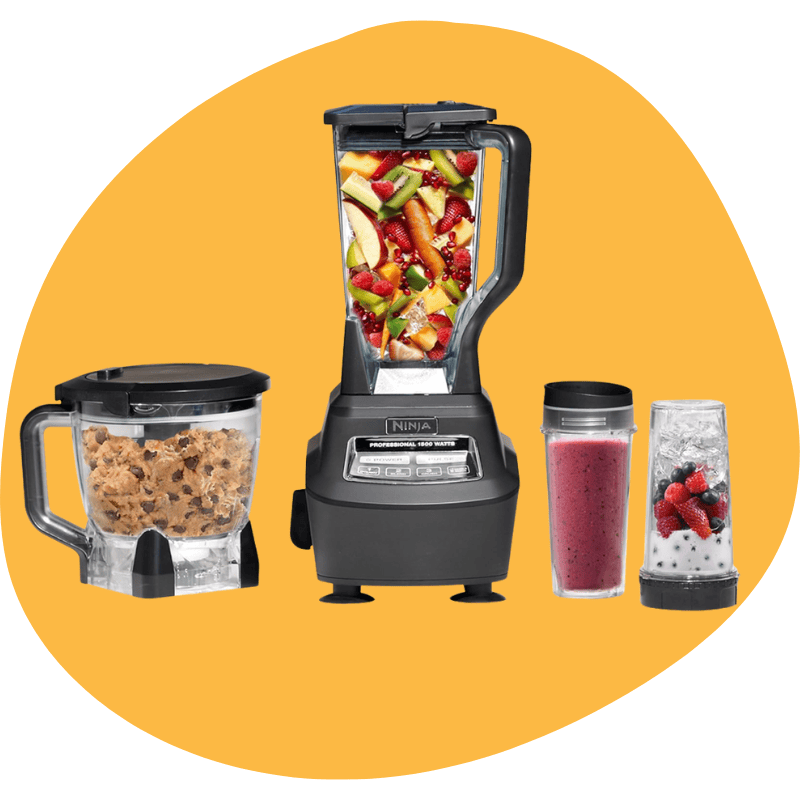
Ninja Mega Kitchen System (BL770) — the best, closest match to your “Foodi / TWISTi / Beast — value + features” brief.
Why this one
Ninja Mega Kitchen System BL770 — 1,500W powerhouse with a 72-oz Total Crushing pitcher, 8-cup food-processor bowl, and two 16-oz to-go cups. Crushes ice and frozen fruit, chops and kneads dough, and swaps between family batches and single-serve drinks with one base — exceptional value and real kitchen versatility.
Quick pros & cons
Pros
- Powerful 1,500 W motor for smoothies, crushed-ice drinks, and hearty purees.
- Includes food-processor bowl + to-go cups — replaces multiple appliances and adds real value.
- Large 72-oz pitcher handles family batches; simple controls make it user-friendly.
Cons
- Not a true high-torque pro blender for extended nut-butter marathons or very large industrial batches.
- Build/warranty and ultimate texture for ultra-dense tasks won’t match Vitamix/Blendtec.
If you want the best practical mix of power + accessories + price, the BL770 is an excellent pick — it’s the Mega Kitchen System reviewers and shoppers frequently recommend when you want blender + processor versatility without buying two appliances.
Nutribullet Full-Size / Personal full-size combos — Budget-friendly everyday
- Why it’s good: If your focus is single-serve keto smoothies and occasional full-jar blends, Nutribullet combos deliver reliable results at very low prices — great crash-course blenders for beginners. Bon Appétit and other outlets list them as top budget choices.
- Pros: Super affordable, compact, easy to use.
- Cons: Limited torque for dense purees and regular nut-butter work.
NutriBullet Full-Size Blender Combo — 1200W, 64-oz Pitcher + 24/32-oz To-Go Cups
1200W motor and cyclonic Easy-Twist Extractor blade give fast, smooth extraction for smoothies, frozen fruit, and sauces. Includes tamper, vented lid, and two travel lids—blend, seal, and go. Great value for everyday keto users who want both personal convenience and occasional family batches.
Key specs
- Motor: 1200 W peak.
- Capacity: 64 oz (1.9 L) pitcher + 32 oz & 24 oz personal cups.
- Controls: multiple speeds + pulse + Extract program; tamper included.
- Accessories: extractor blade (easy-twist), vented lid, to-go lids, recipe book.
- Use cases: single-serve smoothies, keto coffees, frozen blends, soups, sauces, and occasional nut-butter.
Pros / Cons (honest)
Pros
- Excellent price-to-performance for smoothies and mixed-use kitchen tasks.
- Combines personal cup convenience with a true pitcher for family batches.
- Easy cleanup and straightforward controls — beginner friendly.
Cons
- Not a high-torque pro blender for very long nut-butter marathons or massive industrial batches.
Better Homes & Gardens - Build and long-term warranty/service may be less robust than premium brands.
Who this is best for
Busy keto or low-carb users who want a single appliance that handles fast single-serve smoothies every morning and the occasional multi-serving pitcher blend—without spending pro-blender money.
Quick buying tip:
If you plan to make nut butters a few times a month, favor units closer to the $250–300 mark with higher sustained power and stronger warranties (Zwilling Enfinigy and higher-end Ninja/Breville picks often fit this bill). If your focus is single-serve smoothies and day-to-day sauces, the ~$100–$180 models give excellent ROI.
Keto Smoothie and Sauce Recipes (Practical Builds)
Here are five kitchen-ready, keto-focused blender recipes you can make today. Each recipe includes ingredient lists, step-by-step blender instructions, texture tips, and troubleshooting notes so your blender (whether a high-power countertop or a solid personal unit) gives you silky results every time.
Creamy Avocado-Coconut Smoothie (recipe + blender tips)
Why it works: avocado + coconut fat = creamy body and satiety without sugary carbs. Great for mornings or as a fat-heavy snack.
Ingredients (1 serving, ~12–14 oz)
- ½ medium ripe avocado
- 1 cup unsweetened full-fat coconut milk (carton or canned, shaken)
- 1 tbsp MCT oil or 1 tsp coconut oil (optional for extra kick)
- 2 tbsp heavy cream or 2 tbsp plain full-fat Greek yogurt (optional)
- 4–6 ice cubes (optional — omit for thicker, richer texture)
- Pinch of sea salt, ½ tsp vanilla extract, and sweetener to taste (erythritol/stevia, optional)
- Optional: small handful of spinach (adds color & nutrients; won’t change fat profile much)
Method & blender settings
- Add liquids first (coconut milk, heavy cream). Liquids-first prevents cavitation and helps form a vortex.
- Add avocado, oil, vanilla, salt, and sweetener. Add ice last.
- Start the blender on low for 5–7 seconds, then ramp to high for 20–30 seconds, or until smooth and glossy. Use a tamper if your blender gets a thick ring.
- Taste and adjust the sweetness or salt. If it’s too thick, add 1–2 tbsp water or almond milk and reblend.
Texture tips & troubleshooting
- Oily separation: If fats separate after sitting, reblend briefly. Emulsifiers (a small spoon of yogurt or an egg yolk in non-food-safety-sensitive recipes) help, but usually re-blending is enough.
- Grainy texture: Not ripe avocado or low-speed blending—blend a bit longer or pre-mash the avocado.
- Blender note: For personal blenders, pulse first, then blend at full speed to avoid motor strain.
Serving & storage
Best served immediately for the creamiest mouthfeel. If storing, keep in an airtight jar and reblend briefly before drinking.
Bulletproof-style Keto Coffee (whipping fat into coffee)
Why it works: emulsifying butter/MCT into coffee gives a creamy, sustained-energy beverage that’s signature to many keto routines.
Ingredients (1 serving)
- 8–10 oz hot brewed coffee (cooled slightly from boiling — see safety notes)
- 1 tbsp unsalted grass-fed butter or ghee
- 1 tbsp MCT oil or 1 tbsp coconut oil
- 1–2 tbsp heavy cream (optional)
- Pinch of cinnamon or collagen powder (optional)
Method & blender settings
- Let coffee cool for ~30 seconds after brewing — very hot liquids can cause pressure build-up. (See safety note below.)
- Combine coffee and fats in the blender jar. Start on low, then increase to high for 20–30 seconds until frothy and emulsified.
- Pour and enjoy.
Safety & tips
- Hot liquid caution: Use a blender model rated for hot liquids or vent the lid per manufacturer instructions. Start low to avoid splashes and lid blow-off. If unsure, blend cooled coffee and reheat gently.
- Frothiness: A high-speed blender yields café-style froth. If you want less froth, blend shorter or stir vigorously instead.
- Flavor tweak: Add 1 tsp cocoa powder or a dash of vanilla extract for a mocha vibe.
Green Herb Pesto with Parmesan (leafy greens + oil)
Why it works: pesto is a versatile, low-carb sauce for zoodles, grilled meats, or a spoonful over roasted veg. Blenders make a silkier pesto than a mortar and pestle when you want a smooth finish.
Ingredients (yields ~1 cup)
- 2 packed cups basil leaves (or mixed herbs: basil + parsley + arugula)
- ½ cup grated Parmesan (or Pecorino)
- ⅓ cup extra-virgin olive oil (plus more if needed)
- ¼ cup pine nuts, walnuts, or almonds (toasted for flavor)
- 1 small garlic clove (or ½ large)
- Salt & black pepper to taste
- Optional: lemon zest or ½ tsp lemon juice (brightens)
Method & blender settings
- Add herbs, cheese, nuts, and garlic into the jar first (dry ingredients on the bottom helps even chopping).
- Pulse 3–6 times to roughly chop.
- With the blender running on low-medium, stream in the olive oil through the lid hole or a small pour until the pesto comes together. Stop and scrape sides as needed.
- Finish with a 3–5 second high blend for silkiness.
Serving & storage
Keeps 4–5 days in the fridge — press a thin layer of olive oil on top to reduce oxidation and preserve color. Freeze in ice cube trays for single-serve pesto cubes.
Texture & troubleshooting
- Too oily: You added oil too fast — pulse more and add slowly.
- Too dry/grainy: Add a tablespoon or two of oil or a splash of warm water and reblend.
- Blender tip: Use short pulses to avoid bruising delicate herbs and keep the bright green color.
Cauliflower Alfredo Sauce (silky veg-based sauce)
Why it works: Cauliflower makes a fantastic low-carb base that takes on cheesy, creamy flavors without the carbs of flour-based sauces. Blending creates the silky texture of classic Alfredo.
Ingredients (makes ~2 cups)
- 3 cups cauliflower florets, steamed until very tender
- ½–¾ cup heavy cream or ½ cup cream cheese + ¼ cup water (for a thicker finish)
- ½ cup grated Parmesan (freshly grated is best)
- 1 small garlic clove, sautéed briefly in butter or olive oil (or roast for deeper flavor)
- 1 tbsp butter or olive oil
- Salt, pepper, and nutmeg (tiny pinch) to taste
Method & blender settings
- Cool the hot cauliflower slightly if your blender isn’t rated for very hot liquids. Add cauliflower, cream (or cream cheese + water), cheese, garlic, and butter to the jar.
- Start on low, then increase to high for 30–45 seconds until completely smooth and velvety. Use the tamper to keep things moving for thicker batches.
- Reheat gently in a saucepan if needed; don’t boil (cheese can split).
Serving suggestions
Toss with zoodles, roasted chicken, or stir into cauliflower rice for ultra-creamy results.
Troubleshooting
- Grainy texture: Cauliflower wasn’t soft enough — steam a little longer and reblend.
- Too thin: Add more cheese or reduce by simmering gently in a saucepan.
- Burn risk: If you used a hot blender method and it spits, cover with a towel and blend in short bursts to vent.
Chocolate Fat-Bomb Shake (low-carb dessert drink)
Why it works: a dessert-style keto shake that feels indulgent but stays low on carbs — great as an occasional treat or post-workout high-fat snack.
Ingredients (1 serving)
- 1 cup unsweetened almond milk or coconut milk
- 2 tbsp heavy cream or 2 tbsp coconut cream
- 1 tbsp cocoa powder (unsweetened)
- 1–2 tbsp powdered erythritol or sweetener of choice (adjust to taste)
- 1 tbsp nut butter (almond or peanut — brown with caution on carbs)
- 4–6 ice cubes for a thicker shake
- Optional: 1 scoop low-carb chocolate protein powder or 1 tbsp unsweetened chocolate chips (for richer flavor)
Method & blender settings
- Add liquids first, then cocoa, sweetener, and nut butter. Add ice last.
- Start low for 5 seconds, ramp to high for 20–30 seconds until smooth and frothy.
- Taste; thin with a splash of milk if needed.
Texture & tweaks
- Extra velvet: add 1 tsp MCT oil or 1 tbsp butter for a “bulletproof” texture.
- Thicker mousse: add one tablespoon of softened cream cheese and blend until smooth.
Serving & storage
Best fresh. If refrigerated, shake or reblend before serving, as fat may firm up (especially coconut oil).
Final blender tips across all recipes
- Liquids first: Always add liquids before solids to create a vortex and avoid air pockets.
- Slow start, then ramp: Prevents splatter and helps emulsify fats cleanly.
- Tamper = friend: Use it for thick nut butters and dense purees to keep ingredients moving.
- Pulse smartly: Use pulse to break down hard or frozen chunks before full-power blending.
- Respect your machine: If making multiple heavy batches (nut butters, thick sauces), let the motor cool between runs to preserve longevity.
How to Make Perfect Nut Butters & Seed Butters
Want smooth, spreadable almond butter or a creamy tahini that beats store brands? It’s totally doable at home — and more satisfying than you’d think. The secret isn’t magic, it’s a repeatable process: right prep → right milling cycles → texture control → resting to protect your motor. Below, I’ll walk you through practical timing, roasting notes, oils, troubleshooting, and storage so your homemade butters come out silky every time.
Prep, roast, oil, resting cycles
1) Choose your nut/seed and batch size
Start small for your first few attempts: 1–3 cups of nuts/seeds is ideal for most home blenders or food processors. (Smaller batches help form a good vortex and reduce motor strain.)
2) Roast (optional but recommended)
Roasting releases oils and amps flavor. Use this guideline:
- Spread nuts in a single layer on a baking sheet.
- Roast at 350°F (175°C):
- Peanuts/sunflower seeds: 6–8 minutes
- Almonds/cashews/pumpkin seeds: 8–12 minutes
- Watch closely the last 2 minutes — you want golden, not burnt. Cool fully before processing (hot nuts will steam and taste off).
3) Skin removal (optional)
For ultra-smooth almond butter, blanch almonds: pour boiling water over them, sit 60–90 seconds, drain, cool, then slip skins off. This reduces bitterness and grain. (Skip this step if texture isn’t a huge concern.)
4) Initial milling (breakdown)
Add nuts/seeds to the blender/processor. Pulse in 10–15 short bursts to reduce to a coarse meal. This prevents clumping and helps even blending.
5) Grinding & resting cycles (protect your motor)
- Run in short bursts: 20–45 seconds on, then rest 30–90 seconds. Repeat. This lets oils release while avoiding motor overheating.
- Scrape down the bowl/pitcher between cycles so dry bits touch the blades. A tamper helps keep things moving in tall jars.
6) Add oils only if needed
As the mixture becomes paste-like, add oil sparingly (1 teaspoon at a time). Good choices for neutral flavor and stability: refined avocado oil, light olive oil, or refined coconut oil (for coconut flavor, use unrefined). For classic taste, a little peanut oil or macadamia oil works too. Often, you won’t need any oil for creamy results if you roast well and use a high-torque machine.
7) Final smoothing & seasoning
When the texture’s nearly right, run 10–20 seconds more to polish. Add ¼ tsp salt per cup of nuts (adjust to taste). Optionally add ½–1 tsp sweetener or a tablespoon of honey (if not strict keto).
Avoiding overheating & blade wear
Motor care rules
- Short bursts > long runs. Repeated 30–45s cycles with cooling intervals prevent burnout. If the motor gets hot to the touch or the unit emits a chemical smell, stop and let it cool for 10–20 minutes.
- Don’t overload. If your blender stalls or slows dramatically, reduce the batch size. Better to run two smaller batches than stress the motor.
- Use appropriate equipment. Food processors often excel at nut butter because of bowl geometry; if you have one, try it. High-torque, high-wattage blenders (≈1,000W+) can also produce superb butters — they just need careful duty cycles.
- Blade care. Avoid running abrasive dry items for excessively long runs (e.g., extremely hard seeds) and inspect blades/seals regularly for nicks or leaks. Replace worn blades—sharpness matters for efficiency and lower motor strain.
Texture control & finishing (add oils, salt)
Texture dialing — from chunky to ultra-smooth
- Chunky butter: Stop earlier; you’ll have small nut bits suspended in oil. Great for sandwiches.
- Creamy butter: Continue milling until oils are released and the paste turns shiny. Expect 4–10 minutes of total active milling (including pulses), depending on nut type and equipment.
- Ultra-smooth (spreadable): Add 1–2 tbsp oil per 2 cups of nuts if needed, and run an extra 20–30 seconds. Warmer nuts release oils more easily — that’s why roasting helps.
Flavor finishing
- Salt to taste (¼ tsp per cup is a good start).
- Optional: a pinch of cinnamon, a teaspoon of vanilla, or a ½ tsp powdered erythritol for keto-friendly sweetness.
- For seed butters: sesame (tahini) can be ground almost to smoothness without oil; sunflower or pumpkin may need a touch of oil.
Emulsion note: If separation occurs in storage (oil rising), stir to recombine. Homemade nut butters may separate more than commercial stabilizer-containing jars; refrigeration slows separation.
Troubleshooting: grainy butter, burnt smell
Problem: Butter is grainy/gritty
- Cause: Nuts under-processed, not oily enough, or not roasted enough.
- Fixes: Continue processing in short bursts; add 1 tsp–1 tbsp neutral oil and blend again. Roast future batches a touch longer (but don’t burn). For almonds, try blanching the skins off.
Problem: Burnt smell or bitter flavor
- Cause: Overheating (motor or nuts burned), or nuts were scorched during roasting.
- Fixes: Stop immediately. Let the mixture and appliance cool. Smell the butter — if it tastes charred, it’s best to discard and start a new batch (burnt oils taste off and can be unpleasant). Ensure next time you roast at the correct temp and use shorter processing bursts.
Problem: The Motor smells like burning
- Cause: Motor overheating from long continuous runs or stalled blades.
- Fixes: Power off, unplug, let motor cool 30–60 minutes. Check the blade assembly for blockage. If the smell persists after cooling or the motor won’t restart normally, contact the manufacturer’s service—don’t keep using a stressed motor.
Problem: Too oily or runny butter
- Cause: Too much added oil or over-processed juices are released.
- Fixes: Fold in more ground nuts (if available) or chill the butter briefly — chilling firms it. Next time, add oil more conservatively.
Storage & shelf life quick guide
- Store in a clean jar with a tight lid. Refrigeration extends shelf life (recommended for homemade nut butters):
- Most nut butters: 4–8 weeks refrigerated (peanut often lasts longer).
- Seed butters (no preservatives): 3–6 weeks refrigerated.
- Always check smell and taste before use; discard if rancid or off.
Blender Maintenance & Care for Longevity
Treat your blender like a small kitchen athlete: a little daily care + occasional deep maintenance keeps it powerful, quiet, and drama-free for years. Below are practical, user-facing tips (cleaning, blade care, storage, and warranty guidance) you can drop directly into an article or use as a checklist.
Cleaning: self-clean, soak, disassemble
Daily quick-clean (the lowest-effort win)
- Rinse immediately after use to stop food from drying on the jar.
- Fill the jar halfway with warm water, add a few drops of dish soap, run the blender on high for 20–60 seconds, then rinse — fast, effective, and far gentler than scrubbing. This is the method recommended by major manufacturers. (19)
Deep-clean & stain/film removal
For stubborn film from greens, turmeric, or tomato stains, soak the jar upright in a warm vinegar + water mix (roughly 1 cup white vinegar + fill halfway with warm water) for several hours, then scrub gently and rinse. Manufacturer guidance and cleaning experts recommend vinegar soaks for mineral/film buildup. (20, 21)
Disassemble when needed (and be safe)
If your model allows, remove the blade assembly, gasket, and lid pieces for a proper hand-scrub. Be cautious — blades are sharp. Dry all parts fully before reassembly to avoid mold. Check the manufacturer’s care pages for model-specific disassembly steps to not voiding warranties. (22)
Dishwasher? (yes/no)
Many jars (especially high-grade Tritan or some glass pitchers) are dishwasher-safe on the top rack, but double-check your manual — heat and dishwasher detergents can warp lids or seals on older models. If in doubt, hand-wash the lid and seals.
Blade care & sharpening vs replacement
Blades are the workhorses. Treat them kindly.
Don’t try to sharpen blender blades at home. Blades are typically engineered and heat-treated for a specific use; sharpening risks changing their geometry and can unbalance the assembly. Instead, replace the blade assembly if it’s nicked, bent, or leaking. Manufacturer service pages and repair guides advise replacement over DIY sharpening. (23, 24)
Signs you should replace blades or seals
Visible nicks or rounded edges, leaks from the blade gasket, excessive wobble/noise, or decreased blending efficiency despite correct use are all red flags. Regular inspection (monthly if you use the blender frequently) prevents small problems from becoming motor issues.
Maintenance to extend blade life
- Avoid running abrasive, dry powders for long periods.
- Pulse hard bits first (ice, frozen fruit), then finish with liquids.
- Clean immediately after sticky jobs (nut butters) so residue can’t dry onto the blade hub.
Storage, jar care, and avoiding plastic smell
Prevent smells and staining with simple habits
Rinse right away after blending strongly flavored ingredients (garlic, turmeric, onion). For lingering odors, soak with a paste of baking soda + warm water or blend warm water with a tablespoon of baking soda, let stand, then rinse; aromatic blenders can respond well to an overnight baking-soda soak. Blending lemon and warm water is also an effective deodorizer. (25, 26)
Avoid long-term storage in plastic jars
Fatty or acidic foods stored in plastic jars can amplify plastic scents and staining. If you plan to store dressings or sauces for more than a few hours, transfer them to a glass or a sealed jar. High-quality Tritan jars resist staining much better than cheaper plastics, but they can still retain smells over time. (27)
Air-dry and store open
Let lids and jars air-dry upside down before storing to prevent trapped moisture and mildew. Store with the lid off or ajar when not used for long stretches.
Quick fix for stubborn plastic smell
Baking soda soak (overnight), followed by a vinegar rinse and sun-air-dry, normally neutralizes odors. If odor persists, try a paste rubbed onto the interior, let sit, then rinse thoroughly. (28)
When to call customer service/warranty tips
Know your coverage and keep paperwork tidy
Register your blender after purchase and keep your receipt — many brands require proof of purchase for warranty service and offer extended benefits when registered. Vitamix, Blendtec, and Ninja all have clear warranty procedures and phone/email contacts; check your model’s warranty length (some premium models offer 7–10 years). Registering simplifies future claims. (29, 30)
When to contact support
If the motor emits a burning electrical smell, won’t start, smokes, or trips breakers — stop using it and call customer service. Also call for persistent leaks under the blade assembly, unusual grinding noises, or if a replacement part is needed. Manufacturer service centers will advise whether a repair is covered under warranty or needs paid service. (31)
What to expect from warranty service
Many manufacturers offer mail-in repair with pre-paid labels while your product is under warranty; non-warranty repairs may be available for older models (some firms will service units up to decades old for a fee). Read exclusions carefully (commercial use, misuse, and wear-and-tear parts are frequently excluded). If you buy refurbished, check what warranty is included.
Quick checklist
- Rinse jar immediately; run a soap-high-speed cycle for 30–60s.
- Vinegar soak for film; baking soda for odors.
- Replace blades/seals — don’t sharpen.
- Don’t store acidic/fatty foods in plastic jars long-term.
- Register product + keep receipt; call support if motor smokes or leaks occur.
Safety Tips & Best Practices
Blending is amazing — it turns humble cauliflower into creamy “rice,” whips fat into silky coffees, and makes nut butters at home. But blenders can be dangerous if you rush them. Below are clear, practical safety rules and best practices that keep you (and your countertop) safe while getting pro-level keto results. Wherever useful, I note quick why-it-matters tips so you can follow the steps without guessing.
Lid safety, hot liquids, and blending techniques
Don’t overfill the jar.
When working with hot liquids or anything that expands/foams (soups, hot coffee, some fat-bomb blends), fill no more than half the jar — often a third is safer for very hot blends. Overfilling lets steam or blended material force its way out and can blow the lid off. This is simple, but the single most important habit to avoid scalds. (32, 33)
Vent the lid and start slow.
Hot liquids build steam. If your blender lid has a removable center cap, remove it or leave a small vent and drape a towel over the lid while you start on low. Ramp speed gradually — never start on high with hot liquids. This reduces internal pressure and stops sudden eruptions of scalding liquid. Hold the lid (or the towel) in place with one hand while the blender starts.
Let very hot liquids cool a bit first.
If a recipe calls for boiling or just-boiled stock/coffee, let it rest 2–5 minutes so it’s hot but not violently steaming. If you’re unsure whether your blender is hot-liquid rated, cool it first and reheat after blending. Many manufacturers explicitly warn about hot liquids; follow the manual.
Cover the lid with a towel for extra protection.
A heavy towel over the lid (held down while blending) is an old cook’s trick: it captures any accidental spray and gives you a safer handhold to stabilize the lid during initial pulses. If you feel pressure under the towel, stop and vent before restarting.
Open away from your face.
After blending hot liquids, turn the lid away from your face when opening so escaping steam won’t burn you. Let the contents settle for 30–60 seconds if pressure has built up. This small routine prevents most hot-liquid injuries. (34)
Consider an immersion blender for very hot or small-volume blends.
If you’re blending a small pot of hot soup, an immersion/stick blender eliminates many risks of transferring hot liquids to a jar. It’s a safer option for single-pot hot blending when you don’t need the jar’s high speed.
Portable / battery blenders: Be extra cautious.
Some rechargeable personal blenders have reported battery and charging safety issues (charging cord melting, rare fires). If you use portable models, read safety reports and follow charging/manufacturing guidance carefully — and avoid leaving them plugged in unattended. (35, 36)
Electrical safety, motor cooldowns, and load limits
Unplug before servicing or cleaning.
Always unplug the blender before you assemble, disassemble, clean around the blade, or touch moving parts. This basic step prevents accidental starts that can injure fingers or damage the unit. Manufacturer manuals and appliance safety groups emphasize this as a non-negotiable rule. (37)
Watch the motor — short bursts, then rest.
Continuous, long runs are the fastest way to overheat a blender motor. For heavy tasks (nut butters, long purees), use short cycles (20–45 seconds) with 30–90 second rests. That protects the motor and keeps performance consistent. If the motor housing feels hot or you smell electrical burning, stop immediately and let it cool before trying again. (38, 39)
Keep vents clear and allow airflow.
Make sure the blender’s air vents are not blocked by towels, cabinet sides, or crumbs. Motors need airflow to shed heat — blocked vents = faster overheating and shorter motor life. Place the blender on an open counter space when doing heavy work.
Respect load limits — don’t force the motor.
If the blender stalls under a heavy load (thick nut butter, frozen chunks), stop, reduce the batch, add a splash of liquid or oil, and then resume. Forcing the unit by running it continuously while stalled invites burnout. When in doubt, split the job into two smaller batches.
Avoid water near the base and cords.
Never immerse the motor base in water, and keep the power plug and cord dry. Water in the base risks electrical shock and motor damage. If your motor base gets wet, unplug it immediately and let it dry fully before reusing.
Unplug when not in use.
Leaving appliances plugged in increases the risk of accidental activation and contributes to phantom power draw; unplugging small kitchen appliances when not in use is a sensible safety habit. It’s especially prudent for devices with batteries or that are used intermittently. (40)
Use manufacturer-recommended parts and service.
If a blade, gasket, or motor shows unusual wear or damage, replace it with OEM parts or contact the manufacturer. Using incorrect parts or running a visibly damaged unit is a common cause of failure and safety issues. Many warranties are voided by unauthorized repairs—so consult the manufacturer for repairs. (41)
Quick Safety Checklist
- Fill hot blends ≤ 50% jar, start on low, vent lid if possible.
- Drape a towel and hold the lid during initial pulses; open the lid away from the face.
- Use short burst cycles for heavy tasks; rest 30–90s between runs.
- Keep vents clear; don’t submerge motor base; unplug before cleaning.
- For small hot blends, prefer an immersion blender to a jar blender.
Accessories & Add-Ons That Help Keto Cooks
Small accessories turn a great blender into a kitchen workhorse for keto: faster cleanup, smoother results, less waste, and more portability. Below are the must-have add-ons (why they matter, how to use them, and real-brand examples) that make blending keto smoothies, fat-bomb shakes, pestos, and nut butters easier and more reliable.
Personal cups, tampers, food-processing lids
Personal / travel cups (blend-and-go):
If you make single-serve keto smoothies or blended coffees, look for blend-in travel cups or personal jars that attach directly to the base. They save time, cut dishes, and reduce oxidation of fat-rich drinks (you can seal and go). Major brands sell compatible travel lids and handled cups so you can blend straight into a to-go vessel. Examples: Ninja and NutriBullet both offer manufacturer travel cups and lids. Use them for morning keto smoothies or bulletproof coffee to skip pouring and reduce post-blend cleanup.
Tamper (the secret weapon for thick keto blends):
A tamper lets you push thick ingredients toward the blades safely while the blender is running — essential for nut butters, thick avocado or frozen desserts, and dense pestos. Using the correct tamper (OEM or compatible) speeds blending, reduces the need for added liquid, and prevents the motor from stalling. If your blender doesn’t include one, check for brand-specific tampers or trusted third-party options (some aftermarket tampers exist for Blendtec and other jars). Always follow manufacturer guidance to avoid touching blades. (42)
Food-processing / lid attachments:
Several high-end blenders offer processing lids or food-processor style attachments that let you chop, grate, or make small batches of cauliflower rice without switching appliances. These are ideal for keto cooks who want one base that handles smoothies and chunkier prep work. Blendtec, Vitamix, and some Ninja systems provide accessory jars and specialty lids for added versatility.
Jars for small batches & travel lids
Small jars & mini pitchers for batch control:
If you meal-prep sauces (pesto, salad dressings, aiolis) or make small test batches (flavored nut butter, seed butter), small jars drastically improve efficiency. Smaller jars let the blades generate a proper vortex on tiny volumes, preventing air pockets and reducing blending time. Brands like Hamilton Beach and various personal blender lines ship with 20–24 oz jars with compatible lids for this exact purpose.
Travel lids & sealing caps:
Quality travel lids (screw caps, sip-seal lids) transform a jar into a portable container and stop spills from oily keto drinks. Official brand lids are best for fit and leak prevention — Ninja, NutriBullet, and other manufacturers sell replacement lids and travel mugs to match their jars. If you use aftermarket lids, verify compatibility to avoid leaks and lost warranty coverage.
Practical uses for keto cooks
- Blend once, drink all week (small jars): make single-serving dressings or pesto, refrigerate, and use across salads/proteins.
- Test flavors quickly: small jars are perfect for trialing sweeteners, salt levels, or oil types for nut butter.
- Less dilution: smaller volumes mean you don’t have to add extra liquid to get the vortex, so fat-heavy drinks stay rich and thick.
Extras that make life easier
- Spoonulas and scraping tools shaped for your jar model let you remove all the delicious pesto or nut butter without scratching the pitcher. Blendtec sells a long “spoonula” designed to reach jar corners.
- Spare gaskets/seals and replacement lids extend jar life and keep seals leak-free — keep spares if you use your blender daily. Brand parts pages make this easy.
Quick buying checklist
- Get a blend-and-go travel cup if you do single-serve keto smoothies or coffee. (Check NutriBullet/Ninja accessories for compatible lids.)
- Insist on a tamper or tamper-compatible jar if you make nut butters or dense purees regularly. Use the OEM tamper where possible.
- Buy small jars (20–24 oz) for dressings/test batches to avoid over-dilution and speed blending.
- Keep spare lids, gaskets, and a silicone scraper (spoonula) to maximize yield and minimize waste.
Money-Saving Tips: When to Buy, Refurb vs New
Smart shoppers get pro-level blending without paying full retail. Below, I’ll show the best times to buy, why certified refurbished is often a great move for blenders, how third-party warranties work, and how to think about resale value and cost-per-use so you can make a data-driven choice.
Seasonal sales, refurbished units, third-party warranties
1) Best seasonal sale windows (when to watch prices)
- Prime Day / Big Deal Days — Amazon and many retailers run deep kitchen-appliance deals (often including Vitamix, Ninja, Blendtec) around Prime Day. Keep a watchlist.
- Black Friday / Cyber Monday — historically the biggest discounts on blenders and accessories; also a prime time for bundle deals (extras like tampers, extra jars).
- Other opportunistic windows — end-of-season clearance, New Year’s sales, Mother’s Day and Father’s Day promos, and appliance-focused events (some retailers run March/June clearance). If you can wait, put the model on price-alert trackers. (See “how to monitor” tips below.)
2) Why is certified refurbished often the best value
Manufacturer-refurbished units are inspected, repaired, and tested by the maker (or authorized technicians) and usually come with a meaningful warranty—often the best balance of price + risk. For example, Vitamix’s certified reconditioned units are sold at lower prices and backed by 3–5 year warranties depending on the series. That means most reconditioned Vitamix units come with substantial coverage and two-way shipping for repairs.
Blendtec runs a certified-refurb program too; refurbished units are inspected and typically backed by a warranty (Blendtec’s certified refurb pages note a full 1-year warranty on many refurbished blenders, with options to buy extended coverage). Buying direct from the manufacturer’s refurb store gives you traceability and support.
3) Third-party/extended warranties — pros & cons
- Pros: You can often buy extended protection beyond the refurb warranty (manufacturer or third-party), which covers mechanical failure after the initial warranty expires. Blendtec, for example, sells extended warranties for refurbished units.
- Cons: Read the fine print. Many third-party warranties exclude “wear and tear” (blade seals, gaskets), require proof of regular maintenance, or have long wait times for service. The general guidance from appliance makers: certified refurbished + manufacturer warranty is typically safer than buying used + random third-party coverage. (KitchenAid’s refurbished guidance explains what to look for when buying reconditioned appliances and the importance of warranty coverage.)
Quick practical checklist when buying refurbished
- Buy certified reconditioned from the manufacturer where possible (Vitamix, Blendtec).
- Confirm the exact warranty length and whether return shipping is covered.
- Check the refurb process description — full inspection, replacement of worn parts, and testing are musts.
- Keep receipts and register the product (some warranties only activate on registration).
Resale value & long-term cost per use
1) Why resale value matters
High-end blenders (Vitamix, Blendtec) retain value better than most small appliances. That means if you change your mind later, you can resell and recoup a meaningful portion of the cost—especially if the unit is a well-supported model with OEM parts available. Used markets (e.g., eBay) show wide pricing for pre-owned Vitamix units—some older models sell for hundreds, others for much less, depending on condition and accessories. This liquidity reduces effective ownership cost.
2) How to calculate cost per use
Thinking in cost per use turns a sticker shock decision into math. Example (simple, realistic scenario):
- New price (example): $499
- Refurb price (example): $349
- Use frequency: once per day (365 uses/year) for 5 years → total uses = 365 × 5 = 1,825 uses.
Now compute cost per use:
- New: 499 ÷ 1,825 = $0.2734 → about $0.27 per use.
- Refurb: 349 ÷ 1,825 = $0.1912 → about $0.19 per use.
(That math shows the refurb example saves ~8¢ per use in this scenario—but if you use it many times daily or keep it longer than 5 years, the per-use cost drops dramatically.)
(Numbers computed from the example above for illustration — adjust for the actual model price, how often you blend, and expected ownership years.)
3) Resale tips to maximize return
- Keep original box, manuals, and receipts — buyers pay more for “complete” packages.
- Clean and include popular accessories (tamper, extra jar) — bundles sell faster.
- The sale time: used appliance demand spikes around holiday gift season and endorsement cycles (when a model goes on sale, buyers look for cheaper used units).
- Check comparable listings (eBay, Facebook Marketplace, Craigslist) to price competitively.
Practical decision guide — New vs Refurb vs Used vs Sale
- If you want maximum reliability + longest warranty: buy new from an authorized dealer (best for daily heavy use).
- If you want the best value with low risk: buy manufacturer-certified refurbished (sizable discount + multi-year warranty in many cases — Vitamix offers 3–5 years on reconditioned units; Blendtec offers refurbished units with warranty options).
- If on a tight budget and willing to accept risk: buy used from a reputable seller (inspect, ask about motor hours, get pictures of the serial, test before purchase). Budget buys are good for light users.
- If you time it right, snag a new or refurbished model on Prime Day / Black Friday / other major sales for the best effective price.
Extra money-saving hacks (quick list you can follow now)
- Sign up for manufacturer newsletters and refurb notifications (Vitamix & Blendtec both list certified reconditioned stock occasionally).
- Use price-tracking tools (CamelCamelCamel, Honey) and set alerts for the exact model you want.
- Consider older model years — they often perform identically for kitchen tasks but have larger discounts.
- Buy a refurbished unit, plus decide whether an extended warranty (if affordable) makes sense for your usage patterns. Blendtec explicitly sells extended warranties for refurbished units.
If you want pro performance on a budget, manufacturer-certified refurbished is the sweet spot: big savings, credible inspection/testing, and real warranty protection (often multiple years). If you can time it to a major sale, you can sometimes beat refurb prices for a new unit—so track prices and compare total coverage and return windows before clicking “buy.”
FAQs
How powerful should a blender be for keto?
Aim for ~1,000 watts or more for frequent nut butters and dense veg purees. Wattage gives an idea of power, but torque and blade design matter a lot, too. High-end models (Vitamix, Blendtec, some Ninja lines) reliably handle heavy keto tasks.
What can I blend on a keto diet?
Heavy-cream-based coffees, avocado and berry smoothies (berries sparingly), cauliflower purées, nut and seed butters, oil-based dressings, and herb pestos. Avoid large amounts of sweet fruit unless counting carbs.
Is a blender better than a food processor for keto?
They’re complementary. Blenders make smooth liquids and purees (sauces, smoothies); food processors excel at chopping, shredding, and chunky tasks.
How do I avoid plastic taste from the blender?
Use glass/Tritan jars, wash new plastic parts thoroughly before first use, avoid heating plastic in microwaves, and avoid storing acidic foods in plastic for long periods.
Can I crush ice in a keto blender?
Most high-power blenders can crush ice, but use ice sparingly in fat-heavy drinks to avoid diluting texture and to protect blades. Check manufacturer guidance for ice crush recommendations.
The Bottom Line — How to Choose the Best Blenders for Keto Smoothies for Your Kitchen
If you want the absolute smoothest keto smoothies, reliable nut butter results, and the ability to create silky vegetable sauces, aim for a high-power blender (≈1,000W+) with a durable blade, tamper compatibility, and a supportive warranty. Vitamix and Blendtec remain top choices for heavy-duty use; however, modern Ninja models and some value blenders now deliver impressive performance for less money.
Match the model to your workflows: personal blender for single shakes, full-size high-power blender for batch cooking, and mid-range models if you want a mix of both performance and value. Use the recipe and maintenance tips above to prolong your machine’s life and get better results every time.
We may earn a commission when you buy using our links


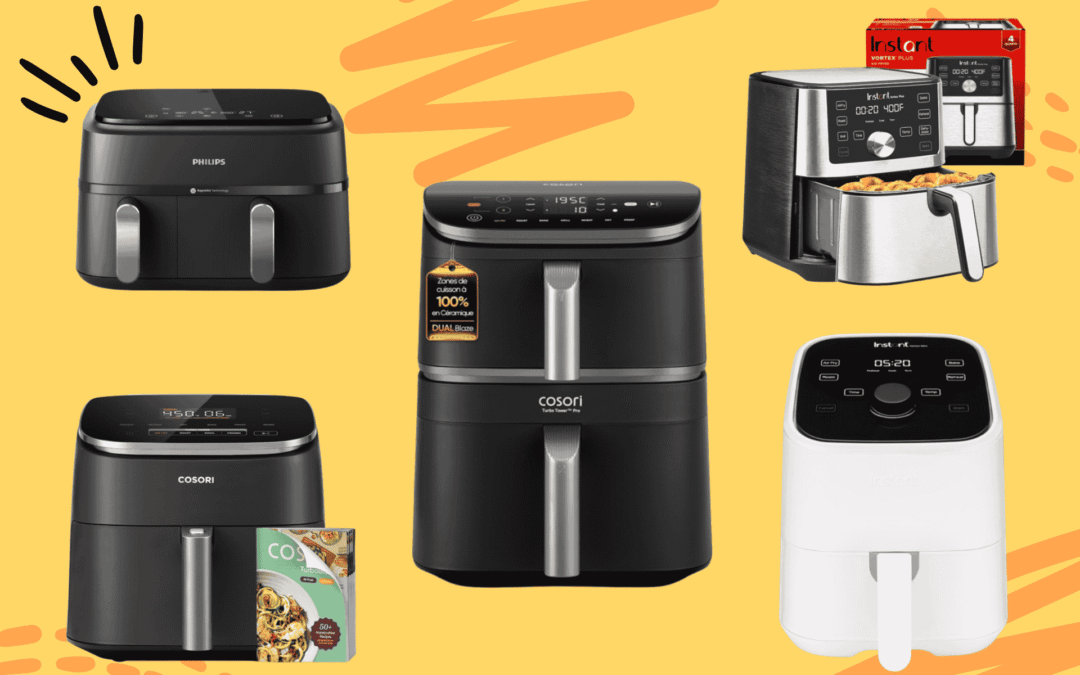
0 Comments